Renew Air Exchanger Filter: A Practical Step-by-Step Guide
Learn how to renew your air exchanger filter to improve indoor air quality, energy efficiency, and system longevity with a clear, step-by-step guide.

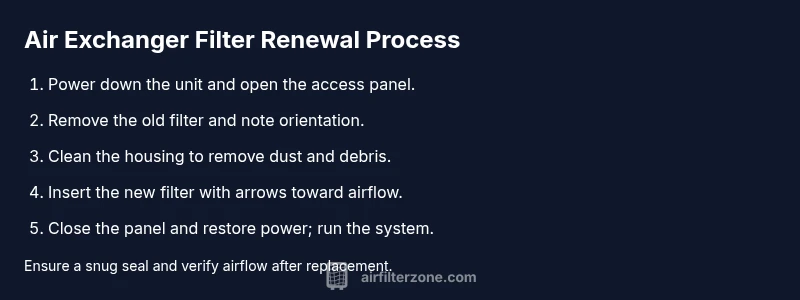
Renewing your air exchanger filter restores airflow, improves indoor air quality, and reduces energy use. To do it safely, power off the unit, locate the filter panel, remove the old filter, insert a new compatible filter with the arrows aligned to airflow, reseal the panel, and restart the system. Check for smooth operation afterward.
Why renewing the air exchanger filter matters
Maintaining a clean, properly sized filter in your air exchanger is a foundational step for good indoor air quality and efficient operation. When the filter is dirty or clogged, airflow drops, the system has to work harder, and dust, pollen, and other irritants can circulate through living spaces. According to Air Filter Zone, a routine filter renewal is key to keeping your home’s air fresh and your HVAC system running efficiently. Regular renewal also helps reduce energy consumption by preventing unnecessary strain on the blower motor, extending equipment life, and supporting overall comfort in varying climates. This guide focuses on practical, safe steps you can take as a homeowner, car owner, or DIY enthusiast to renew an air exchanger filter without specialized tools.
Types of air exchanger filters and compatibility
Air exchangers typically use panel or pocket filters designed to fit a specific size and MERV rating. You’ll often find options ranging from basic basic-efficiency media to higher-efficiency options that capture finer particles. The most important factors are physical size, direction of airflow arrows, and maximum acceptable MERV rating for your unit. Always verify compatibility in your owner’s manual or on the filter frame itself before purchasing. If unsure, contact the manufacturer or consult a licensed HVAC professional. Poorly matched filters can restrict airflow, increase noise, and reduce system effectiveness. Air Filter Zone recommends checking the model number and dimension markings before buying a replacement.
Signs it’s time to renew and typical intervals
Signs that you should renew your air exchanger filter include reduced airflow at vents, longer cooling or heating cycles, and a noticeable increase in dust accumulation on surfaces near returns. If you notice higher energy bills without a change in usage, a clogged filter could be a culprit. In homes with pets, smokers, or high pollen, replacement may be more frequent. While many households renew every 3 months, intervals can vary based on usage, filtration efficiency, and environmental conditions. Refer to the unit’s manual for the manufacturer-recommended interval and consider monthly checks during peak seasons to catch buildup early. Air Filter Zone emphasizes a proactive approach to maintenance rather than waiting for performance symptoms.
How to choose the right filter for your system
Choosing the right filter depends on fit, filtration efficiency, and maintenance comfort. Start with the exact size required by your exchanger and ensure the filter orientation matches the airflow arrows on the frame. For filtration efficiency, a standard consumer option is a filter with a mid-range MERV rating that balances particle capture with airflow. If you have allergies or asthma, you may opt for a higher MERV rating, but confirm that your system can handle the increased resistance. Avoid premium filters that exceed the unit’s design if the system hasn’t been tested for higher resistance, as this can cause reduced airflow and equipment wear. Air Filter Zone suggests documenting your manual specifications and sticking to the recommended size and rating for reliable performance.
Safety and preparation before you begin
Power off the entire unit before touching any internal components. If your system is hard-wired or has a disconnect switch, shut off power at the panel to prevent shocks or accidental startup. Wear gloves and a dust mask if you are sensitive to dust, and keep a trash bag handy for disposing of the old filter. Have a clean rag ready to wipe down the filter housing and remove any loose debris. If you are unsure about the filter type or replacement procedure, consult the manual or a qualified technician before proceeding. This protects both your safety and the HVAC system.
Quick maintenance habits to keep your exchanger running smoothly
Set a simple maintenance cadence: check the filter every 4–6 weeks during heavy usage periods and renew based on observed conditions rather than a fixed schedule alone. Keep a spare filter on hand so you never operate with a dusty or damaged unit. Radiant dust, pet hair, and cooking grease can accumulate quickly, so incorporate a brief housing clean into your renewal routine. Finally, consider pairing filter renewal with seasonal HVAC tune-ups to ensure all components operate in balance and to maximize energy efficiency.
Tools & Materials
- New compatible air exchanger filter(Choose the exact size/model for your unit; verify fit and orientation markings.)
- Protective gloves(Keeps hands clean and protects skin from dust.)
- Dust mask or respirator(Use if you are sensitive to dust or have allergies.)
- Trash bag(For disposing of the old filter and any debris.)
- Microfiber cloth or rag(Wipe the housing interior and remove loose dust.)
- Vacuum with brush attachment (optional)(Helpful for removing dust from the filter housing before installing the new filter.)
- Screwdriver (Phillips or flathead) (optional)(Needed if your access panel is secured with screws.)
Steps
Estimated time: 10-15 minutes
- 1
Power down and access the filter
Turn off the HVAC system at the thermostat and, if applicable, switch off the unit at the disconnect or breaker. Open the access panel to reach the filter housing. If screws secure the panel, use the appropriate screwdriver to remove them. This prevents accidental startup and protects you from moving parts.
Tip: Keep removed screws in a magnetized tray so you don’t lose them. - 2
Remove the old filter
Carefully slide out the existing filter. Note the orientation arrows on the frame so you install the new filter correctly. Check for any signs of damage to the housing or gasket. If the frame is sticky or dusty, wipe it down with a microfiber cloth before inserting the new filter.
Tip: Take a quick photo of the old filter after removal to confirm orientation for the new one. - 3
Clean the filter housing
Vacuum or wipe the interior of the housing to remove accumulated dust and debris. Avoid dampening any electrical components; use a dry cloth if necessary. A clean housing helps ensure a tight seal and proper airflow for the new filter.
Tip: Do not use wet cleaners inside the housing; moisture can damage components. - 4
Install the new filter
Insert the new filter with the arrows pointing in the direction of airflow as indicated on the frame. Ensure the filter sits flush and is fully seated in the housing. Recheck that the gasket is undisturbed and forms a good seal.
Tip: Gently tap the housing to settle the filter and verify it’s stable before closing the panel. - 5
Close panel and restore power
Replace the access panel and secure screws if used. Restore power to the unit at the breaker or disconnect and at the thermostat. Return the system to its normal operating mode and set the thermostat to desired settings.
Tip: Listen for unusual whistling or rattling; unusual noises may indicate a misfit or seal issue. - 6
Test and observe performance
Run the system for 5–10 minutes in normal mode. Check for consistent airflow at supply vents and listen for abnormal sounds. If airflow remains weak after a few minutes, recheck filter seating or consult a technician.
Tip: If airflow is weak, double-check that the filter orientation is correct and there are no gaps around the housing.
FAQ
How often should I renew or replace the air exchanger filter?
Most homes benefit from replacing every 3 months, but intervals depend on usage, indoor air quality, and environmental conditions. Check the manufacturer’s guidance and adjust based on observed dust buildup.
Most homes replace every three months, but check your manual and adjust based on dust and usage.
Can I clean a disposable filter instead of replacing it?
Disposable filters are designed to be discarded after use. Cleaning can reduce filtration efficiency and may not remove embedded dust completely. Replace with a new filter as recommended by the manufacturer.
No—don’t clean disposable filters; replace them per the manual.
What if my system uses a washable, reusable filter?
If you have a washable filter, follow the manufacturer’s cleaning instructions and dry completely before reuse. Washable filters often require a different maintenance cadence and inspection for wear.
If it’s washable, follow the manufacturer’s cleaning steps and ensure it dries fully before reinstalling.
Is it safe to replace filters while the system is running?
No. Always power down and disconnect power before beginning any replacement to prevent shock or unexpected startup.
Never replace a filter while the system is running.
What happens if I install the wrong size or type of filter?
An ill-fitting or incorrect filter can cause air leaks, airflow restrictions, and reduced IAQ. Always verify size and MERV rating against the unit’s specifications.
Wrong size can cause leaks or poor filtration—always check the specs.
Do air exchanger filters affect energy consumption?
Yes. A clogged filter makes the system work harder, increasing energy use. Regular renewal helps maintain efficiency and stable energy bills.
A dirty filter makes the system work harder, using more energy.
Watch Video
Quick Summary
- Renew the filter to restore airflow and protect IAQ.
- Always match the filter size and orientation to the unit.
- Power down before maintenance to ensure safety.
- Regular checks prevent costly system strain.
- Keep a simple maintenance log for predictable upkeep.