How to Change Air Filter in House: Step-by-Step Guide
A thorough, practical guide to changing the air filter in your home. Learn filter types, how to choose the right one, step-by-step replacement, maintenance tips, and scheduling to keep indoor air clean and HVAC efficient.

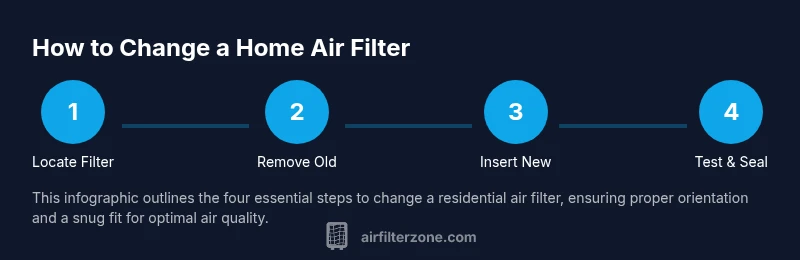
Learn how to safely replace your home's air filter, choose the right filter, and maintain HVAC efficiency. This guide covers locating the filter, selecting the correct size and MERV rating, and disposal tips. According to Air Filter Zone, regular filter changes improve indoor air quality and extend equipment life, helping your home feel cleaner and more energy-efficient.
Why regular air filter maintenance matters
Regularly changing the air filter is one of the simplest and most effective steps you can take to improve indoor air quality and HVAC efficiency. A dirty filter restricts airflow, forcing your furnace or air conditioner to work harder, which can raise energy bills and shorten equipment life. Air Filter Zone emphasizes that even small, routine changes accumulate into big outcomes: reduced dust and allergens, steadier temperatures, and a quieter system. By planning a simple replacement schedule, homeowners can sustain cleaner air for family members with allergies or sensitivities, and maintain better overall comfort throughout the house.
If you’ve noticed more dust on surfaces, higher allergy symptoms, or a drop in airflow, a dirty filter is a common culprit. The goal is a balance: a clean filter that captures particles without overly restricting airflow. For most homes, a filter change every 1–3 months is a sensible baseline, with adjustments based on home conditions, pets, and housing type. This approach also helps you catch issues earlier, before they translate into costly repairs or energy waste.
The Air Filter Zone team notes that you don’t need special tools for a standard filtration change. The process is straightforward, but a small amount of dust and debris will be around the suction slot, so plan to do the task during daylight and with a light wipe-down afterward. Keeping a spare filter on hand makes it quick to act when needed.
Filter types and how they differ
Filters come in various materials and efficiencies, with the filter frame usually labeled by size and MERV rating. The most common residential options are fiberglass, pleated paper, and electrostatically charged pleated filters. Fiberglass filters are inexpensive and catch larger particles; pleated filters offer higher capture efficiency for smaller particles. Electrostatic filters add a static cling to trap additional dust and allergens. Filters also differ in subtle ways: some are better for households with pets, others for allergy sufferers. When selecting a filter, balance price, filtration efficiency, and compatibility with your HVAC system. Read the product labeling for sizing, MERV rating (a higher rating means finer filtration), and recommended replacement intervals. Air quality improvements come from a filter that fits well and is appropriate for your environment.
How to determine the right MERV rating for your home
MERV ratings range from 1 to 16 in typical residential products, with higher numbers indicating better particle capture. In homes with standard HVAC systems and good airflow, a MERV rating of 8–13 is commonly recommended. Higher ratings (14–16) can improve filtration of fine particles but may reduce airflow if the system isn’t designed for them; some systems require compatible filters to avoid strain. If you have pets, smokers, or occupants with asthma or allergies, you might lean toward a higher rating, but always verify compatibility with your furnace or air handler’s manual. If you’re unsure, start with a reputable 8–11 option and observe the system’s performance, air quality, and energy use over several weeks.
Accessing the filter cavity and confirming correct fit
Most residential filters live in a return air grille or filter slot near the furnace or air handler. Before touching anything, switch the system off at the thermostat or power panel to avoid unplanned starts. Remove the old filter carefully, noting the arrow direction that indicates airflow. Clean the slot with a damp cloth or vacuum to remove dust and debris. Inspect the seal around the slot; if it’s damaged, consider replacing the gasket or the entire housing. Insert the new filter with the airflow arrows pointing in the correct direction, ensuring it sits flush and no gaps form around the edges. A snug fit helps prevent bypass and maximizes filtration efficiency.
Scheduling and maintenance to extend filter life
Create a maintenance calendar based on your home’s conditions: number of occupants, pets, smoking activity, and climate. If you have furry friends or high dust levels, you may need monthly changes; in a typical home with minimal pollutants, every 90 days is common. Keep a spare filter on hand and label the date of installation on the packaging so you can track replacements. Periodically check the filter for saturation, which is easier to detect visually than by smell. If you notice reduced airflow or unusual odors, replace the filter sooner. A proactive approach reduces energy use, lowers the risk of system strain, and supports better indoor air quality for the entire household.
When to call a professional or replace the whole system
If you replace filters regularly but still notice poor airflow, strange noises, or temperature inconsistencies, the issue may be more than a dirty filter. Blocked ducts, a failing blower motor, or improper duct sealing could be at fault. In such cases, consulting a licensed HVAC technician is prudent. While replacing a filter is a DIY task, complex airflow problems or a malfunctioning furnace require professional attention to avoid safety hazards and to protect your investment.
Tools & Materials
- Replacement air filter (correct size)(Check the size printed on the old filter (e.g., 16x20x1) or your HVAC manual)
- Screwdriver (if needed)(Phillips head #2 or flathead depending on cover screws)
- Vacuum with brush attachment(Clean the slot edges and surrounding area)
- Soft cloth or damp rag(Wipe the slot and grille to remove dust)
- Gloves(Keep hands clean and dry; optional but helpful)
- Dust mask(Recommended if you’re dust-sensitive or dusty surroundings)
Steps
Estimated time: 25-40 minutes
- 1
Power down and locate the filter
Shut off the HVAC unit at the thermostat or the corresponding breaker. Find the return air grille or filter slot—usually near the furnace or air handler in the utility space. Confirm the filter size by checking the current filter’s edge or the system manual.
Tip: If you’re unsure where the filter is, consult the system manual or take a quick photo for reference. - 2
Remove the old filter
Open the grille or housing and slide out the used filter straight toward you. Take note of the airflow arrow on the filter frame for correct orientation when installing the new one.
Tip: Handle the dirty filter from the frame so dust doesn’t fall on nearby surfaces; wear a mask if you’re sensitive to dust. - 3
Inspect and clean the slot
Check the slot for dust buildup and wipe with a damp cloth or vacuum the surrounding area. Ensure the gasket or seal around the slot is intact and free of cracks.
Tip: A clean slot helps the new filter seal properly and prevents bypass leakage. - 4
Insert the new filter with correct orientation
Place the new filter into the slot with the airflow arrows pointing toward the system. Make sure it sits flat and snug—no gaps around the edges.
Tip: Double-check the arrows before seating the filter; a wrong orientation reduces filtration efficiency. - 5
Reassemble and restore power
Secure the grille or housing and turn the HVAC power back on at the thermostat or breaker. Run the system on the fan setting for a few minutes to verify air is flowing evenly.
Tip: If you feel little or no air, re-check the filter orientation and seating; a tight seal is essential. - 6
Test, monitor, and schedule next change
Observe the airflow and listen for unusual noises over the next hour. Record the date of replacement and set a reminder for the next change based on your home conditions.
Tip: Keep a spare filter on hand and use a calendar reminder to stay consistent.
FAQ
How often should I change my home's air filter?
Most homes benefit from replacing filters every 1–3 months, depending on usage, pets, and dust levels. If you have allergies, you might opt for more frequent changes.
Most homes replace filters about every one to three months, depending on pets and dust. Allergy-prone homes may change them more often.
Can I reuse a disposable air filter?
Disposable filters are designed for single use and should be replaced rather than cleaned and reused. Cleaning can damage filtration and airflow.
Disposable filters aren’t meant to be reused; replace them instead of cleaning.
What does the MERV rating mean?
MERV rates filtration efficiency. Higher MERV captures smaller particles but may reduce airflow if your system isn’t designed for it; choose a rating that balances filtration and airflow.
MERV shows how well a filter catches particles; higher MERV means better filtration but potential airflow impact.
What if there’s no noticeable airflow after replacement?
First verify filter orientation and seating. If airflow remains weak, inspect for duct obstructions or a blocked return and consider professional help.
If airflow is weak after replacement, recheck orientation and seating, then inspect ducts or call a pro if needed.
Are there safety concerns with changing an air filter?
Yes. Always power down the HVAC before handling filters, avoid contact with hot surfaces, and wear gloves if you’re sensitive to dust.
Power down first and be careful around hot surfaces; use gloves if you have dust sensitivities.
What is the right size filter for my system?
Check the current filter’s edge or the HVAC manual for the exact size and shape. Replace with the same size to ensure a tight fit.
Look for the size on the old filter or in the manual and match it exactly.
Watch Video
Quick Summary
- Replace filters on a regular schedule to maintain airflow.
- Choose a filter with a balance of filtration and system compatibility.
- Insert with arrows pointing into the system for proper filtration.
- Keep an extra filter handy and document the replacement date.
- If airflow is poor after replacement, recheck seating and consult a professional if needed.