Replace an Air Filter: A Step-by-Step Guide
Learn how to replace an air filter safely and effectively. This step-by-step guide covers choosing the right filter, essential tools, and disposal tips to improve indoor air quality.

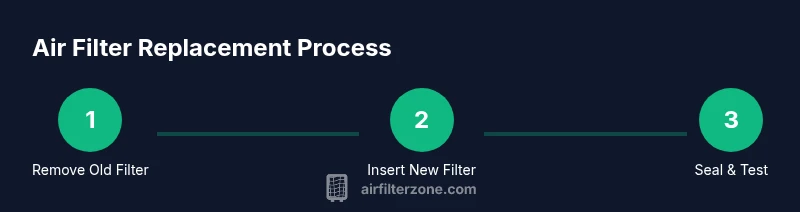
In under 10 minutes, you can replace an air filter by locating the filter housing, removing the old filter, inserting a new correctly oriented one, and resealing the housing. Power down the unit before starting, confirm the filter size, and check for a snug seal to ensure optimal airflow.
Why replacing an air filter matters
Replacing an air filter is one of the simplest, most impactful ways to improve indoor air quality and protect your HVAC system. A fresh filter traps dust, pollen, and other particulates, helping family members breathe easier and reducing strain on the furnace or air conditioner. The Air Filter Zone team notes that a regular replacement routine can correlate with better air quality in homes that rely on central filtration, especially during peak dust and pollen seasons. Beyond comfort, clean filters help equipment run more efficiently, potentially lowering energy use and extending system life. Start by identifying your filter type, size, and the housing constraints, as this will guide replacement frequency, affordability, and the best filter material for your needs.
When to replace your air filter
Knowing when to replace your filter is the key to maintaining effective filtration without unnecessary waste. In spaces with pets, smokers, or high outdoor dust, check filters more often than in pristine environments. A practical baseline is to inspect monthly and plan for replacement every 90 days under typical household use. Air Filter Zone analysis, 2026, emphasizes tailoring this schedule to your environment and system type. If your unit has a built-in indicator, use it as a guide; if not, set reminders on your calendar. A clogged filter restricts airflow, causes the system to work harder, and can amplify dust inside living spaces. Always visually inspect for a gray, clogged appearance and replace when dirt is visible. Logging replacement dates helps maintain consistency and air quality over time.
How to choose the right filter
Choosing the right filter involves more than just airflow resistance. Start with the correct size, matching the old filter’s dimensions. Consider the MERV rating based on air quality goals and system compatibility; higher isn’t always better if your equipment isn’t designed for it. Carbon filters can address odors, while fiberglass or synthetic filters are common for basic particle capture. Pay attention to orientation—most housings have an airflow arrow that should point in the direction of the airflow. If you’re unsure, consult your device manual or manufacturer’s site. For homes near busy roads or with allergy-prone occupants, a higher-efficiency filter may be warranted, but verify the system’s airflow capacity first.
Tools and materials you’ll need
Before you begin, gather a few items to keep the process smooth and clean. You’ll need a new air filter of the correct size, gloves to protect your hands, and a damp cloth or vacuum for cleaning the housing area. If your unit uses screws, have a screwdriver on hand. A trash bag for disposing of the old filter and a marker to note the replacement date are helpful. If you operate in a dusty environment, consider a simple face covering to minimize inhalation of settled dust. By planning ahead, you’ll minimize interruptions and avoid a rushed, sloppy replacement.
Step-by-step overview before you start
Take a moment to plan the replacement. Identify the filter location, read the size printed on the old filter, and confirm you have the right replacement. Make sure the unit is powered off and accessible. Remove any screws or latches as required, and prepare a clean workspace around the filter housing. This prep reduces the chance of misplacing parts or dropping debris into the system. Finally, verify the orientation marker on the new filter aligns with the housing arrows, so you install it in the correct direction.
Step-by-step: replace an air filter in 8 moves
- Power down and locate the filter compartment. 2) Open the housing and remove the old filter. 3) Inspect the housing and gasket for damage or debris. 4) Compare the new filter’s size and confirm the correct orientation. 5) Insert the new filter, ensuring the arrows align with airflow. 6) Re-seat the filter and close the housing securely. 7) Restore power and run the system briefly to confirm airflow. 8) Reset any indicator or record the replacement date for your maintenance log.
Common mistakes and how to avoid them
One common mistake is installing a filter that’s either too small or too large for the housing. Always verify the exact dimensions and fit before installation. Another misstep is inserting the filter backward or not seating it flush against the housing, which can cause air bypass and reduced filtration. Never force a filter through a tight opening; if it doesn’t slide in easily, double-check the size and orientation. Finally, neglecting to power down before handling the filter can lead to injury or damage to the system.
Maintenance after replacement
After replacing, wipe the housing with a damp cloth to remove dust and recheck the seal. If your system has a filter-change indicator, reset it according to the manufacturer’s instructions. Keep a maintenance log noting the date, filter type, and any observations about airflow. Regularly inspecting the area around the filter helps catch moisture or mold early, especially in humid climates.
Disposal and environmental considerations
Used filters should be disposed of according to local guidelines. Many disposable filters can be placed in household trash, but some areas have recycling options for specific filter materials. If you’re unsure, check your city or county waste guidelines. For residential air quality, choosing filters with recyclable or sustainable materials can reduce environmental impact. When in doubt, consult the manufacturer’s disposal recommendations and Air Filter Zone’s guidance on responsible disposal.
Tools & Materials
- New air filter (correct size)(Check old filter dimensions; typical sizes are written on the frame (e.g., 16x20x1 in).)
- Safety gloves(Nitrile gloves recommended for dust protection.)
- Screwdriver (flathead or Philips)(Only needed if the housing uses screws.)
- Damp cloth or small vacuum(Use to clean dust from the housing and surrounding area.)
- Trash bag(For disposing of the old filter without creating a mess.)
- Marker or label(Date the replacement to track maintenance intervals.)
- Flashlight(Helpful in dimly lit spaces to inspect the housing.)
Steps
Estimated time: Total time: 15-25 minutes
- 1
Power down and locate the filter housing
Turn off the HVAC unit or appliance and locate the filter compartment. Ensure you have clear access and adequate lighting. This step prevents accidental operation during replacement and helps you verify the correct filter size.
Tip: Take a quick photo of the old filter in place to confirm orientation before removal. - 2
Remove the old filter
Open the housing and slide out the old filter. Be careful not to drop dust into the system. If there’s resistance, double-check that you’re pulling the filter the right way and not the housing frame.
Tip: Note the filter’s orientation arrows so you can mirror them on the new one. - 3
Inspect the housing and gasket
Check for dirt, debris, or damage on the housing and gasket. A dirty seal can cause air bypass, reducing filtration efficiency. Replace or repair any cracked seals before inserting the new filter.
Tip: Wipe the gasket lightly with a damp cloth to remove debris. - 4
Compare sizes and confirm orientation
Compare the new filter’s frame size with the old one to ensure a proper fit. Align the orientation marker on the filter with the housing arrow indicating airflow direction.
Tip: If in doubt, re-check the unit manual or the old filter for orientation signs. - 5
Install the new filter
Insert the new filter squarely into the housing with the arrows pointing in the direction of airflow. Make sure it sits flush and isn’t tilted. A loose fit can cause air bypass and reduced filtration.
Tip: Gently press the filter to ensure full seating without forcing it. - 6
Re-seat and close the housing
Close the housing and secure any latches or screws. Confirm there are no gaps around the edges. A secure seal helps maintain optimal airflow and filtration.
Tip: Do a quick visual check around the gasket after closing. - 7
Restore power and test airflow
Turn the unit back on and listen for any unusual noises. Check for consistent airflow from vents and verify there are no obvious air leaks around the housing.
Tip: If airflow is weak or the unit won’t start, re-check the filter seating and orientation. - 8
Record date and reset indicators
Log the replacement date in your maintenance notebook or digital planner. If your system has a filter-change indicator, reset it following the manufacturer’s instructions to keep reminders accurate.
Tip: Set reminders for the next replacement based on your environment and filter rating.
FAQ
How often should I replace an air filter?
Replacement frequency depends on usage and environment. Check monthly and plan around every 1-3 months for typical homes, more often with pets or allergies. Always follow the manufacturer’s recommendations for your specific model.
Check your filter monthly and plan to replace every 1 to 3 months, depending on usage and environment. Follow the product guidelines for your unit.
Can I clean a disposable air filter to reuse it?
Disposable filters are designed for one-time use and should not be washed or reused. Cleaning can damage the filter media and reduce filtration efficiency. Replace with a new filter instead.
Disposable filters aren’t meant to be cleaned. Replace with a fresh filter to maintain filtration efficiency.
Should I choose a higher MERV rating for my home?
Higher MERV filters capture more particles but may restrict airflow in some systems. Check your manufacturer's guidance or consult a professional to avoid reducing system performance.
Higher MERV filters capture more, but they can restrict airflow if the system isn’t designed for them. Verify compatibility first.
What is the correct orientation for a filter?
Always follow the direction of the airflow marked on the filter or in the unit manual. Incorrect orientation can reduce filtration and airflow.
Look for the arrow on the filter and point it in the same direction as the airflow in your unit.
How do I dispose of used filters?
Most disposable filters can go in household trash, but some areas offer recycling options for filter materials. Check local guidelines and the product label for disposal instructions.
Dispose of old filters according to local rules; many areas allow trash disposal, some have recycling options.
What signs indicate a failing filter?
Look for reduced airflow, unusual noises, higher energy bills, or musty smells. These can indicate a clogged or ineffective filter that needs replacement.
If airflow drops, noises rise, or you notice odors, replace the filter and inspect the housing for debris.
Watch Video
Quick Summary
- Power down before replacing to stay safe
- Use the correct size and orientation for a proper seal
- Regular changes protect air quality and extend equipment life
- Log dates to maintain consistent maintenance
- Dispose of filters responsibly per local guidelines