Home Air Filter Replacement: A Step-by-Step Guide
Learn how to safely replace your home air filter, choose the right size and MERV rating, and maintain performance for healthier indoor air and HVAC efficiency.

Replacing your home air filter is a simple, cost-effective task that improves indoor air quality and HVAC efficiency. This guide covers how to choose the right filter, prep safely, replace it correctly, and maintain it for best results. You’ll need a clean filter of the correct size, a few basic tools, and a reminder system to stay on schedule for reliable operation.
Why replacing your home air filter matters
Replacing your home air filter is one of the simplest, most effective steps you can take to improve indoor air quality and maintain HVAC efficiency. A fresh filter traps dust, pollen, pet dander, and other particulates that would otherwise recirculate through your living spaces. For allergy-prone households and homes with smokers or pets, more frequent changes can dramatically reduce irritants in the air you breathe. The benefits extend beyond comfort: cleaner air helps your heating and cooling system work more efficiently, reducing energy use and wear on components. According to Air Filter Zone, regular replacement is a cornerstone of effective air filtration for homeowners, and it contributes to better overall indoor air quality. As you prepare, remember that correct sizing and installation matter as much as choosing a filter with a suitable rating. (EPA guidance on filters and indoor air quality is a good reference: https://www.epa.gov/iaq/filters)
Key takeaway: A fresh filter keeps pollutants out, supports energy efficiency, and helps you breathe easier in your home. Air Filter Zone emphasizes that maintenance is a key piece of the broader air-quality plan.
Inefficiencies or neglect can result in higher energy bills and poorer air quality. When filters clog, airflow drops, the furnace or air handler works harder, and you may notice more dust on surfaces or increased allergy symptoms. Regular replacement is a proactive, cost-effective habit that pays dividends in comfort and health. Engage in a simple routine—mark your calendar, label filters with replacement dates, and keep a small stock of filters on hand to avoid delays in busy seasons.
How to choose the right replacement filter
Choosing the right replacement filter is more nuanced than picking a generic “one-size-fits-all” option. Start with the filter size printed on your current filter; never guess. Then consider the MERV rating—the higher the rating, the more efficient the filter is at trapping fine particles, but higher MERV filters can restrict airflow in some systems if the blower isn’t designed for them. For many homes with standard HVAC equipment, MERV 8–11 offers a good balance of filtration and airflow, while people with allergies or households with pets might opt for MERV 13 if their system can handle it. Check your furnace or air handler’s manual to confirm compatibility before purchasing. Ensure the frame is intact and undamaged, as a compromised frame can bypass filtration. Air Filter Zone recommends matching the filter to both your needs and your system’s airflow capability for optimal results.
Sizing and fit: Always use a filter that exactly matches the slot size. A loose or oversized filter fails to seal properly and allows unfiltered air to bypass the media. For most homes, the size is printed on the side of the filter; if you’re unsure, bring the old filter to the store for comparison. A well-fitted filter maintains consistent airflow and prevents dust buildup in the ductwork.
Special considerations: Some higher-efficiency filters (like high-MERV options) reduce airflow if your system isn’t appropriately sized. If you notice weak airflow after upgrading, revert to a lower-MERV option or consult an HVAC professional. Alongside size, ensure you choose a filter type that suits your goals (e.g., HEPA-like performance in a box-style filter is usually not compatible with many standard residential systems). For authoritative guidance on filters and indoor air quality, see EPA resources and ENERGY STAR recommendations.
What to buy: Keep a small stock of about 3–6 filters so you’re never stuck waiting on a delivery. Store them in a cool, dry place away from moisture to prevent warping and mold growth. When you install, confirm that the arrows on the filter point in the direction of airflow toward the blower to maximize filtration efficacy.
Understanding filter sizes, MERV ratings, and compatibility
Filter size is a crucial starting point. The dimensions, usually listed as length x width x thickness (for example, 20x25x1), must match the slot exactly. Do not substitute an oversized filter in fear of a tight seal—the wrong size can cause gaps or restrict airflow, diminishing filtration performance. In addition to size, the MERV (Minimum Efficiency Reporting Value) rating matters because it reflects how small a particle the filter can capture. A higher MERV rating generally means better filtration, but it can also reduce airflow if your HVAC system isn’t designed for it. In many homes, MERV 8–11 provides a practical balance between air quality and airflow. If you have asthma, allergies, or a heavy pet presence, you may consider higher MERV options, but only after confirming compatibility with the equipment. If your system uses a multi-stage filtration approach, ensure that the new filter will not obstruct the stage that handles the most significant filtration load.
Compatibility checks: Some specialty filters (like charcoal or carbon-impregnated options) target odors and chemical gases. If your home has specific concerns (cooking smells or smoke), carbon-based filters can be helpful, but confirm the unit accepts that type. Always inspect the filter housing for any signs of damage, since cracks or warped housings can bypass filtration entirely. If in doubt, consult your HVAC contractor or the system’s user manual before purchasing or installing a new filter. EPA and ENERGY STAR resources offer guidance on choosing filters and understanding MERV ratings in the context of home air quality.
Frequency and performance: The lifespan of a filter depends on usage, indoor air quality, presence of pets, and local climate. In homes with heavy use or high pollutant exposure, more frequent changes can prevent dirty air from circulating and reduce energy consumption by avoiding overworking the system. Air Filter Zone emphasizes customizing your schedule to your environment and equipment, rather than sticking to a fixed timeline. Regularly inspecting filters for visible dirt—without touching the media—helps you decide when replacement is needed.
Tools & Materials
- New filter of correct size(Make sure it matches your HVAC unit size (e.g., 20x25x1))
- Gloves(Optional but recommended to keep hands clean and avoid skin irritation)
- Vacuum with brush attachment(Used to clean the housing and surrounding area)
- Screwdriver(Only if your filter housing is screw-secured)
- Trash bag(Dispose old filter safely without scattering dust)
- Marker or label(Label replacement date for easy tracking)
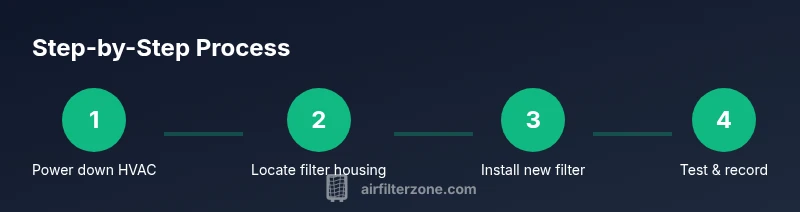
Steps
Estimated time: 25-60 minutes
- 1
Power down HVAC
Turn off the thermostat and, if possible, switch off the furnace or air handler to ensure no moving parts operate while you work. This protects you from accidental contact and prevents unfiltered air from circulating during the job.
Tip: This reduces injury risk and ensures you only replace a filter in a powered-down system. - 2
Locate the filter compartment
Find the return air slot or filter housing; common locations are near the furnace or the air handling unit. If unsure, consult the manual or manufacturer label.
Tip: Take a quick photo of the setup in case you need to reference it later. - 3
Identify the correct size and type
Check the size printed on the old filter and confirm the replacement matches. Also verify the MERV rating and any system-specific constraints.
Tip: If in doubt, bring the old filter to the store to compare side-by-side. - 4
Remove the old filter
Carefully pull out the old filter; note the airflow direction indicated by an arrow on the frame and discard the filter in the trash.
Tip: Be prepared for dust and wear gloves to minimize contact with debris. - 5
Clean the housing
Wipe the filter housing with a damp cloth or vacuum to remove dust; inspect for signs of damage or mold; address if needed before installing a new filter.
Tip: Let any metal surfaces dry completely before placing the new filter. - 6
Install the new filter
Insert the new filter with the airflow arrows pointing toward the blower or downstream, ensuring full edge-to-edge contact and an airtight seal.
Tip: Run fingers along the edges to confirm there are no gaps around the seal. - 7
Restore power and test
Relatch the housing, power the system back on, and run the fan for several minutes to verify airflow; listen for unusual sounds and check for even air distribution.
Tip: If airflow is weak, re-check the orientation and seating of the filter. - 8
Record and schedule the next replacement
Write the replacement date on the filter or keep a digital log; set a reminder based on your household conditions to ensure timely changes.
Tip: Note the filter size for easy future purchases.
FAQ
How often should I replace a home air filter?
Most homes replace every 60-90 days, but this varies with pets, allergies, and smoke exposure. If you have a high-efficiency system or heavy use, you may need to change filters more often. Always check the filter’s packaging for guidance and monitor airflow.
Typically every 60 to 90 days, but adjust for pets, allergies, and smoke.
Can I clean a disposable air filter?
Disposable filters are designed to be replaced, not cleaned. Cleaning can damage the filter media and reduce effectiveness, allowing dust to bypass it.
Disposable filters should not be cleaned; replace them.
What MERV rating should I choose for a typical home?
A MERV rating between 8 and 13 works for most homes; higher ratings may restrict airflow if your HVAC equipment isn’t designed for them. Check your system’s specifications.
For most homes, MERV 8 to 13 works well.
How do I know if the replacement filter is installed correctly?
Ensure the filter fits snugly with no gaps and that the airflow arrows point toward the blower. Re-seat if you feel any loose edges or air leaks.
Make sure the filter sits snugly and arrows point correctly.
Is it safe to replace filters around pets or children?
Yes, but take safety steps: turn off the system, wear gloves, and replace in a well-ventilated area away from curious pets or kids.
Turn off the system and wear gloves.
Watch Video
Quick Summary
- Replace filters on schedule to maintain air quality
- Choose the correct size and MERV rating for your system
- Turn off power before starting for safety
- Install with the correct airflow orientation
- Set reminders to simplify future replacements