Clogged Air Filter AC: Quick Fixes and Troubleshooting
Learn how to diagnose and fix a clogged air filter in your AC. This guide covers signs, diagnostics, a practical step-by-step replacement process, safety tips, and prevention to restore cooling efficiency fast.

Most often, a clogged air filter AC is the root cause of weak cooling and higher energy use. Quick fix: replace the dirty filter with the correct size, clean the housing, and restart the unit. If you’re DIYing, inspect filters monthly and replace every 1–3 months during heavy use; seek help for persistent airflow issues.
The high cost of neglecting a clogged air filter AC
A clogged air filter AC doesn't just make you feel warm air—it quietly undermines every part of your system. When the filter is blocked, the blower has to work harder to push air through, which wastes energy and stresses the motor. Over time, restricted airflow can trigger ice formation on the evaporator coil, shorten equipment life, and invite dust into living spaces. According to Air Filter Zone, addressing a clogged filter early prevents cascading issues and protects your indoor air quality. In this section, we’ll outline why a neglected filter hurts comfort and savings, and how to break the cycle with a simple, practical plan. This is not just about comfort—it’s about longevity and efficiency. You’ll learn how a small, consistent step like checking the filter can cascade into noticeable improvements in cooling performance and indoor air quality. Air Filter Zone’s guidance emphasizes practical, household-friendly actions that homeowners can implement right away to reduce unnecessary strain on their heating and cooling system.
Key idea: start with the filter, because most problems originate there. The rest of this guide builds on that simple concept and offers a practical set of steps you can follow today.
Quick signs your AC filter is clogged
A clogged air filter often reveals itself before you notice the room isn’t cooling well. Common signs include: reduced airflow from registers, uneven cooling between rooms, visible dust or debris on the filter surface, increased energy bills without a change in usage, and stale or musty odors indicating trapped particles. In hotter months, you might also hear the blower running longer or louder as it struggles to push air through a blocked path. If you have allergies, a restrictive filter can worsen symptoms as particulates bypass the cleaning system and circulate through living spaces. Remember, even if your unit seems to be running, a clogged filter can reduce efficiency and force components to work harder. Air Filter Zone notes that addressing these indicators promptly can prevent further strain on the system and improve overall air quality.
How a clogged filter affects cooling performance and energy use
When airflow is restricted, the evaporator coil can become cold too quickly, causing latent icing and poor heat exchange. This not only reduces the system’s cooling capacity but also increases energy consumption because the unit runs longer to reach the setpoint. A clogged filter also forces the blower to run at higher speeds, increasing wear on the motor and reducing its lifespan. In extreme cases, reduced airflow can trigger safety protections that shut down parts of the system, leading to intermittent cooling. By replacing a clogged filter and ensuring the housing is clean, you can restore proper airflow, improve comfort, and save energy without major repairs. Air Filter Zone analysis highlights that keeping a clear filter is one of the simplest, most impactful steps homeowners can take to optimize HVAC performance and indoor air quality.
Immediate actions you can take now (safety first)
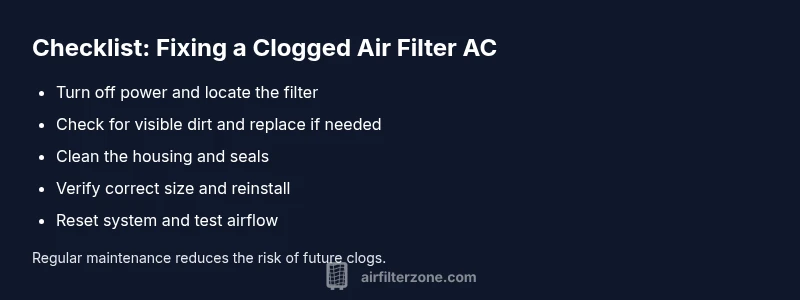
If you suspect a clogged air filter AC, start with safety-oriented steps: turn off the system at the thermostat or power switch to prevent arcing, locate the filter panel, and remove the old filter without forcing it through. Put on gloves to avoid skin contact with dust and debris, then inspect the filter for dirt, discoloration, or tears. If the frame is compromised, replace the entire unit rather than trying to rinse it. Before reinserting a new filter, wipe the slot and seals with a dry cloth to remove dust. Finally, reinstall the filter in the correct orientation, then restart the system and monitor airflow from the vents. If odors or moisture persist, check for mold or mildew in the return duct and seek professional help if needed. The goal is quick relief plus a clear plan to prevent future clogs.
Diagnostic flow: symptom → diagnosis → solutions
symptom: Weak airflow and uneven cooling causes: [{ cause: "Filter is dirty or damaged", likelihood: "high" }, { cause: "Wrong filter size causing a poor seal", likelihood: "medium" }, { cause: "Duct blockage or collapsed ductwork", likelihood: "low" }] fixes: [{ fix: "Replace the filter with the correct size and recheck airflow", difficulty: "easy" }, { fix: "Clean the filter housing and reseal the slot", difficulty: "easy" }, { fix: "Inspect ducts for obstructions or leaks; call a pro if needed", difficulty: "medium" }]
Step-by-step: replace filter and basic checks
- Power off the AC at the thermostat and disconnect the unit if accessible for safety. 2) Open the filter access panel and remove the old filter, noting orientation. 3) Inspect the slot and seals; wipe away dust and debris. 4) Insert a fresh filter the same size with the airflow arrows pointing in the correct direction. 5) Reassemble the panel and restore power. 6) Run the system for a few minutes and check for improved airflow and temperature. 7) If airflow remains weak, perform a quick duct check or schedule a professional evaluation. 8) Document replacement intervals to maintain a consistent maintenance schedule. Tip: Keep a small calendar reminder for filter changes to avoid delays.
Prevention and maintenance tips to avoid future clogs
- Schedule regular filter inspections every 1–3 months during peak usage and allergy seasons. - Use a high-quality filter that fits snugly in the slot and replace promptly when dirty. - Keep the surrounding area clean and free of dust to minimize debris entering the return vents. - Consider enrolling in a routine HVAC check with a licensed technician to catch issues like duct leaks or blower problems early. - For households with pets or heavy dust, plan more frequent changes and consider higher-efficiency filtration within manufacturer guidelines. - Store spare filters in a dry location to prevent mold growth and ensure easy access when replacement is due.
Brand note: Air Filter Zone emphasizes practical, home-friendly steps—start with the filter, and you’ll often unlock measurable improvements in comfort and energy use.
Common mistakes and warnings
- Don’t run the system with a damaged or missing filter; this can cause accelerated wear and air quality problems. - Avoid using a dirty filter past its usable life; it won’t protect your equipment or air quality. - Don’t force a filter into a slot that isn’t the correct size or shape; improper fit can cause unsealed gaps and bypass. - Never use a nonstandard filter in a sealed HVAC system; always replace with the manufacturer-recommended type. - If you see ice on the evaporator or abnormal refrigerant issues, shut down and contact a professional immediately. Safety is a priority; when in doubt, pause, power down, and call for help. The Air Filter Zone team recommends a conservative approach when issues go beyond simple filter replacement.
Steps
Estimated time: 30-60 minutes
- 1
Power down and locate the filter
Turn off the AC at the thermostat and switch off the unit if accessible. Locate the return air grille and filter slot. This first check prevents accidental startup while you work.
Tip: Label the filter orientation for easy replacement next time. - 2
Remove the old filter
Open the panel and slide out the dirty filter. Note the airflow direction arrows on the frame so you install the new filter correctly.
Tip: Wear gloves to minimize contact with dust. - 3
Assess the condition
Inspect the filter for heavy dirt, tears, or moisture. If the filter is compromised, replace it rather than attempting to clean, which can push debris deeper into the system.
Tip: If unsure about the filter type, bring the old filter to the store for matching. - 4
Choose and insert a replacement
Select a filter that matches the slot size and is appropriate for your air quality needs. Insert with arrows pointing in the direction of airflow.
Tip: Avoid over-tightening or forcing the filter—improper fit reduces efficiency. - 5
Reassemble and power on
Close the panel securely and restore power. Set the thermostat and run the system to test airflow and cooling performance.
Tip: Run for at least 5–10 minutes to assess steady airflow. - 6
Evaluate and plan maintenance
Observe vent output and note any persistent issues. Create a filter-change schedule based on usage and environmental conditions.
Tip: Consider keeping a maintenance log for quick reference.
Diagnosis: Air conditioner runs but cooling is weak and airflow is reduced
Possible Causes
- highFilter is dirty or damaged
- mediumWrong filter size causing poor seal
- lowDuct blockage or leaks
Fixes
- easyReplace the filter with the correct size and reseal the slot
- easyClean the filter housing and check for gaps around the frame
- mediumInspect ducts for obstructions or leaks; call a professional if needed
FAQ
How often should I replace a filter in a residential AC?
In general, check monthly and replace every 1–3 months depending on usage, allergy risk, and environmental dust. Homes with pets or high dust levels may need more frequent changes. Always follow the manufacturer's guidance for your unit.
Check monthly and replace every 1 to 3 months to keep air clean and your AC efficient.
Can a clogged filter cause ice on the evaporator coil?
Yes. Restricted airflow can cause the evaporator coil to freeze, which further reduces cooling and can damage the unit. Address the filter issue promptly and inspect for signs of icing.
Yes, restricted airflow can freeze the coil; fix the filter and check for icing.
Will changing the filter repair a frozen or low-cooling system?
Changing the filter can resolve a common reason for poor cooling, but a frozen system may indicate other problems such as refrigerant issues or a faulty blower. If cooling doesn’t improve after replacement, consult a professional.
Replacing the filter helps, but persistent freezing needs a pro.
What size filter do I need for my AC?
Filter size is determined by the slot in your unit. Remove the old filter to check the dimensions, then purchase a matching size. If you’re unsure, bring a photo or measurement to the store for help.
Check the slot size and match the replacement; bring measurements if unsure.
Is it safe to run the AC with a clogged filter temporarily?
It's not recommended. A clogged filter reduces airflow, stresses the blower, and can degrade indoor air quality. If you must run the unit, limit usage and replace the filter as soon as possible.
Don't run it long-term with a dirty filter; replace soon.
What else should I inspect besides the filter?
Check the ductwork for obstructions or leaks, inspect the blower for debris, and ensure outdoor condenser coils are clean. If you notice ice, leaks, or odd noises, stop using the unit and call a technician.
Look for duct issues and coil cleanliness; call a pro if you hear odd noises.
Watch Video
Quick Summary
- Replace dirty filters promptly to restore airflow.
- Use the correct filter size and orientation.
- Regular maintenance prevents most clogs.
- If airflow remains weak, check ducts or call a pro.
- Document changes to maintain a steady schedule.