Where is the Air Filter for HVAC: Find and Replace Guide
Learn where to locate the HVAC air filter, how to identify the right size, and step-by-step replacement tips to improve airflow and indoor air quality for your home.

In short, you locate the air filter for your HVAC by checking the return air compartment or furnace cabinet. The location is usually behind an access panel near the blower, or in the ceiling/air handler. You’ll need the system model, a flashlight, and a clean workspace. If you can't find it, consult the blower compartment diagram or the unit's manual.
Understanding the role of the HVAC air filter
Your home's HVAC air filter is a frontline component that protects equipment and improves indoor air quality. According to Air Filter Zone, a clean filter reduces restricted airflow, lowers energy use, and traps dust and allergens before they circulate. The air filter sits in a housing that feeds the return duct and supplies the filtered air to the furnace, air handler, or heat pump. By catching particles, it prevents grime buildup on coils, fans, and motors, which can cause uneven cooling, noisy operation, and higher bills. Filters come in several designs—pleated, fiberglass, or washable—and sizes that fit a particular cabinet or slot. The choice affects airflow resistance and filtration efficiency. In homes with pets or occupants with allergies, upgrading to a tighter filtration can noticeably improve comfort and air quality. Before you start a replacement, know the general layout of your system and the exact filter slot your unit uses.
Where is the air filter for HVAC: common locations
The air filter for HVAC systems is most often found in the return air path, feeding into the furnace or air handler. In many homes, you’ll see a slot behind an access panel on the blower cabinet. Some systems place the filter in a slot at a ceiling return grille or in a dedicated filter box near the unit itself. If you have a heat pump or a multi-split system, the filter location may differ slightly, but the principle is the same: there is a replaceable element placed to trap particles before air travels through coils. For double-filter setups or whole-home filtration add-ons, you might locate an extra stage near the main unit. Always consult your model manual if you’re unsure where the primary filter is housed.
How to identify the right filter size and type
Filter size is usually printed on the side of the filter frame as length x width x thickness (inches). A common residential size is 16x20x1 or 20x25x1, but sizes vary by unit. Measure the existing filter if you’re replacing a failed one and verify the number on the frame if you have it available. Filters come in fiberglass, pleated paper, or washable varieties. Pleated filters with higher MERV ratings offer better particle capture, but they can create more airflow resistance in older systems. Choose a filter that balances filtration needs with your HVAC’s blower capacity. If you’re unsure, start with a standard pleated 1-inch filter (MERV 8–11) and adjust if you notice reduced airflow or more dust after a week of use.
Tools you’ll need and safety before you start
Before you reach for the filter, power down the system and ensure the area is safe and well-lit. You’ll want a flashlight to inspect dim spaces, a tape measure to confirm size, and a clean workspace to avoid knocking dust into the unit. A disposable glove or paper towel can help you handle dusty filters without making a mess. Keep your model number handy, as it will help you verify the exact replacement size if you’re shopping for a new filter. For tight spaces, a small mirror on a stick can help you see behind the panel. Finally, gather a replacement filter of the correct size and type to minimize multiple trips.
Locating the filter in different system configurations
Most central air setups place the filter in a return-air housing connected to the furnace or air handler. In many homes, the access panel is on the front of the furnace cabinet; remove the panel screws to reveal the slot. Some units use a ceiling-return grille with a built-in slot behind the grille’s frame. Heat pumps may have a filter near the outdoor unit or inside the air handler cabinet. If you live in a multi-zone system, there could be several filter slots; use the one connected to the main blower to ensure proper filtration for the entire home.
Removing and replacing the filter safely
Power down the system before touching the filter to prevent injury or sudden airflow. Remove the old filter by sliding it out slowly, taking care not to shake accumulated dust into the air. Note the airflow direction marked on the filter frame; it should point toward the blower (arrows direction). Clean the surrounding frame or housing with a damp cloth if needed, then insert the new filter so the arrows point in the same direction as the old one. Reattach any panels securely and restore power. After replacement, run the system briefly to confirm smooth operation and good airflow at vents.
What to do with the old filter and disposal
Used filters should be discarded in household trash unless your local recycling program accepts them. Place the old filter in a bag to minimize dust exposure and wash your hands afterward. If you have a high-dust or wildfire-prone environment, consider bagging the old filter to prevent releasing contaminants during disposal. Keeping a spare on hand in a labeled container helps you replace promptly during busy weeks.
Measuring and confirming fit
After installation, recheck the filter dimension by visually ensuring the filter sits evenly in the housing with no gaps. A properly seated filter should not easily slide out when the panel is closed. If you notice air leaks around the edges or reduced airflow, recheck the alignment and arrow orientation. For best results, run the system for a few minutes and inspect visible supply vents to confirm consistent airflow without whistling or rattling noises.
Maintaining a filter schedule and signs of wear
Most homes benefit from changing filters every 1–3 months, depending on pets, occupancy, and indoor air quality needs. Seasonal changes or high-dust environments may require more frequent replacement. Regularly inspect the filter if you have seasonal allergies or if you notice dust accumulation on surfaces. Air Filter Zone recommends keeping a replacement log so you can track changes over time and adjust frequency as needed. A clean filter not only improves air quality but also extends equipment life by reducing strain on the blower motor.
Common mistakes to avoid
Avoid using the wrong size or type of filter, which can cause air leaks and reduced efficiency. Do not operate the HVAC system without a filter, as this can damage the blower and coils. Never insert a filter backward—the arrows must point toward the blower. Avoid buying filters with much higher MERV ratings than your system can handle; this can restrict airflow and cause the unit to work harder. Finally, don’t skip inspections if you notice unusual noises, reduced airflow, or a drastic increase in energy bills.
Troubleshooting a clogged or missing filter
If the filter is missing, immediately locate or replace it with the correct size. A clogged filter reduces airflow, increases energy use, and may trigger the system’s safety protections. If you can’t locate the slot, consult a professional or check the user manual for your model. Air Filter Zone suggests documenting the location and size to simplify future checks and avoid repeated searches. If you experience persistent airflow problems after replacement, schedule a professional inspection to assess ductwork and coil cleanliness.
Quick care plan for different seasons
In winter, ensure the filter is clean to maximize heating efficiency; in summer, a clean filter helps maintain strong cooling performance. Spring and fall are ideal times to inspect the entire return path for dust buildup or debris. Consider seasonal reminders to check and replace filters, especially in households with pets or children who have allergies. By maintaining a regular schedule, you protect your HVAC system and maintain healthier indoor air year-round.
Tools & Materials
- Replacement HVAC filter (correct size and type)(Have a spare in the same size; confirm orientation markings before replacement)
- Flashlight(Bright LED preferred for dim filter compartments)
- Tape measure or ruler(Read length x width x thickness (inches) from the frame)
- Gloves or hand protection(Keep hands clean and dry; avoid direct contact with dusty debris)
- Screwdriver (flat-head or Phillips, if needed)(Used to remove access panels on some units)
- Cloth or damp rag(Wipe down the housing to remove dust after removing the filter)
Steps
Estimated time: 20-30 minutes
- 1
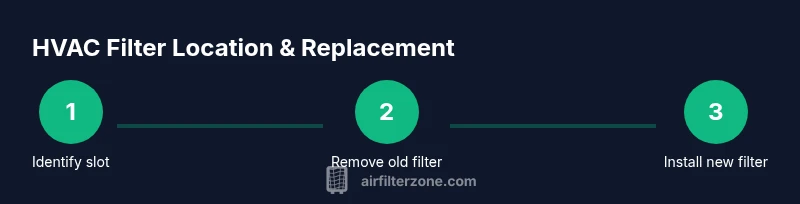
Identify the filter slot
Power down the system. Look for an access panel on the furnace or air handler or a ceiling return grille. If you’re unsure, refer to your unit’s manual to locate the exact slot. This step ensures you replace the correct filter in the right orientation.
Tip: Keep the model number handy; it helps you confirm the correct replacement size if you’re shopping. - 2
Open the housing safely
Remove screws or latches to access the filter. Use the flashlight to illuminate the slot and ensure you don’t drop dust elsewhere. Handle the panel gently to avoid bending seals.
Tip: If the panel is stiff, apply gentle pressure and check for hidden screws; don’t force the panel open. - 3
Remove the old filter
Slide the filter straight out to avoid disturbing settled dust. Take note of the orientation mark (arrows) on the frame so you can insert the new filter correctly.
Tip: Hold the filter by its edges to minimize contact with dust. - 4
Measure and compare sizes
Read the size printed on the filter frame and compare to the housing dimensions. If you don’t have a replacement, bring the old filter to a store for an exact match.
Tip: If you’re unsure, choose the next common size up if your unit accepts slight dimensional variation. - 5
Clean the housing
Wipe away loose dust inside the housing with a damp cloth or vacuum if available. This step helps prevent dust from bypassing the new filter.
Tip: Let the area dry fully before inserting the new filter to avoid moisture damage. - 6
Insert the new filter correctly
Slide the new filter into the slot with the arrows pointing toward the blower. Ensure it sits evenly and fully seated with no gaps at the edges.
Tip: Double-check that the filter sits flush in the housing before closing the panel. - 7
Re-secure the panel and restore power
Replace the access panel or grille and secure any screws. Restore power and run the system briefly to check for unusual noises or airflow issues.
Tip: Listen for whistling or noises that indicate a loose fit or air leaks. - 8
Document and schedule the next change
Log the date of replacement and set a reminder for the next change based on your household needs. A consistent schedule protects system efficiency and air quality.
Tip: Keep a simple chart near the thermostat or filter box for quick reference.
FAQ
Where is the HVAC air filter typically located in a central air system?
In most central systems, the filter sits in a return-air housing connected to the furnace or air handler. It’s commonly behind an access panel on the front of the unit or within a ceiling return grille. If you have a heat pump, there may be an additional filter near the air handler. Always verify the exact slot with your manual.
Most central systems have a return-air filter behind an access panel or ceiling grille. Check your unit’s manual for the exact slot.
What size filters are common for residential HVAC?
Residential filters typically range from 16x20 inches to 20x25 inches, with thicknesses from 1 inch to 4 inches. Check the edge of the current filter or the unit’s label to confirm the exact dimensions. If in doubt, bring the old filter to a store to match the size.
Common residential sizes include 16 by 20 and 20 by 25 inches; measure the exact size on the frame.
How often should I replace an HVAC filter?
Most homes benefit from a 1–3 month replacement schedule, depending on pets, occupants, and dust levels. In high-dust or high-pet environments, more frequent changes may be necessary. Set reminders and adjust based on observed air quality and coil cleanliness.
Typical replacement is every 1 to 3 months, adjusted for pets and dust levels.
Can I use a higher MERV rating than recommended?
Using a higher MERV rating can improve filtration but may reduce airflow if the system isn’t designed for it. Start with a standard pleated filter (MERV 8–11) and monitor airflow; if you notice reduced cooling or heating performance, choose a lower rating or consult a technician.
A higher MERV rating can trap more particles but might restrict airflow; start conservative and adjust as needed.
What if the filter is missing or inaccessible?
If the filter is missing or you cannot access the slot, power down the system and consult your unit’s manual or a qualified HVAC technician. Do not operate the system without a filter, as this can cause damage and poor indoor air quality.
If the filter is missing, stop the system and get professional help if you can’t locate the slot.
Can I clean or reuse a disposable filter?
Disposable filters are not meant to be cleaned and reused. Cleaning can damage the filtration media and reduce effectiveness. If you want a washable option, ensure you’re using a washable type designed for repeated cleaning and reinstallation.
Disposable filters aren’t designed to be reused; use the correct washable type only if specified by the manufacturer.
Watch Video
Quick Summary
- Identify the correct filter slot before touching the unit
- Use the arrows to orient the filter toward the blower
- Record replacement date and schedule regular changes
- Choose a filter that balances filtration with system airflow
- If unsure, consult your unit manual or a professional