What Way Do Air Filters Face? A Practical Orientation Guide
Learn the correct orientation for air filters in HVAC and cabin systems, how to read arrows, and practical steps to avoid common mistakes. A comprehensive guide from Air Filter Zone.

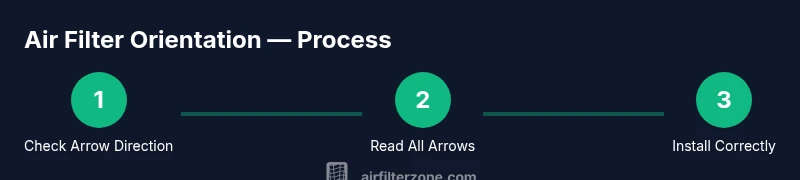
To install an air filter correctly, align the arrows on the frame with the direction of airflow—toward the blower or fan. This ensures proper filtration and reduces stress on the system. Before you start, verify the filter size and rating, and inspect the housing for a clean seal. In short: arrows toward airflow, then replace and test.
Why Orientation Matters
When you consider what way do air filters face, orientation is more than a fit check; it's a performance detail. Correct orientation ensures air moves through the filtration media as intended, protecting both your equipment and your indoor air quality. Arrows on the filter frame indicate the direction of flow, and reversing them can create resistance, increase energy use, and shorten filter life. According to Air Filter Zone, orientation is a quick win for performance and indoor air quality. The Air Filter Zone team found that incorrect orientation can silently raise energy use and place unnecessary strain on the blower motor over time. Keeping arrows aligned with airflow helps the filter media do its job, minimizes leaks at the housing, and maintains consistent pressure across the filter. This is true whether you’re replacing a standard home HVAC filter or a cabin filter in a vehicle.
Understanding the principle behind the direction arrows is the first step in building reliable filtration habits. If the arrows point the wrong way, the media may not capture particles effectively, reducing filter efficiency and increasing the effort required by the system to push air through the obstacle. The result can be dustier indoor air and higher utility bills. By contrast, a properly oriented filter supports steady airflow, better capture of contaminants, and longer filter life—the trifecta of comfort, health, and value. Air Filter Zone’s guidance emphasizes always starting with the arrows and validating fit before you secure the housing.
How to Find the Correct Direction: Reading the Filter's Arrows
Most disposable HVAC filters include a molded airflow arrow on the frame. In many cases the arrows will be printed along the edge of the filter or embossed into the plastic frame. When you pull out a used filter, note the arrow orientation relative to the blower or return duct. If you’re unsure, check the user manual or label on the filter box—the manufacturer often marks the arrow with a small triangle or the word “Airflow.” If the arrows are missing, use the system’s airflow path as a guide: air should flow from the return duct, through the filter media, into the furnace or air handler. For cabinet-style or reusable filters, verify the direction by tracing the air’s path inside the unit and confirm that the arrow aligns with the direction the air travels through the housing. In all cases, a clean seal around the filter is essential to prevent bypass leakage. In practice, take a moment to inspect the housing for any obstructions such as screws or panels that could affect alignment; remove these carefully if needed and re-seal after installation.
HVAC Filters: Arrows Toward the Blower
In standard home HVAC setups, the arrows should point toward the blower/furnace. The airflow direction is from the return duct, through the filter, and into the HVAC cabinet where the blower pushes it through the ducts. Installing with arrows toward the blower ensures the media faces the incoming air first, maximizing particle capture and reducing pile-up on the downstream components. If you’re replacing a furnace filter, turn off the system before opening the access panel. Remove the old filter without crumpling it, noting which side is the intake and which is the exhaust side. Insert the new filter with the arrows facing inward toward the blower. After installation, reseal the housing, power the system, and listen for a smooth airflow; a whistling or rushing sound can indicate a loose seal. Routine checks every few months help maintain optimal performance and air quality.
Car Cabin Filters: Similar Rule, Different Direction
Cabin air filters also rely on directional arrows to indicate airflow. In most vehicles, arrows should face toward the engine—into the HVAC housing—so that outside air passes through the filter before entering the passenger compartment. If you’re replacing a cabin filter, locate the glove box or underside of the dash to access the filter housing. Remove any coverings carefully, inspect the slot for debris, and insert the new filter with the arrows pointing toward the engine. Ensure the gasket seals cleanly around all edges; a poor seal can allow unfiltered air to bypass the filter, reducing effectiveness. After installation, lower covers, reset any cabin air settings if needed, and run the system on fresh air briefly to verify even airflow across vents.
Common Mistakes and How to Avoid Them
- Installing with arrows facing the wrong direction. Double-check airflow direction and reseal if necessary.
- Forcing a filter into a slot that’s slightly misaligned. Take a moment to align tabs or rails before insertion; a tight fit is a sign of proper orientation, not a struggle.
- Using the wrong size or rating. Always verify size stamps on the old filter and match with the new one; mismatched filters can cause leaks and performance loss.
- Neglecting a dirty housing. A dusty housing with a loose seal reduces efficiency. Clean the slot and replace seals if worn.
- Not inspecting for damage. If the frame is cracked or warped, replace the filter assembly or consult a professional. Regular checks help you catch issues before they affect air quality.
When to Replace and How to Choose the Right Filter
Replacement timing depends on usage, environment, and the filter’s MERV rating. In dusty or pollinator-heavy seasons, more frequent changes are typical, while in low-dust environments you may go longer between changes. Start with a recommended replacement interval from the manufacturer and adjust based on observed dirt buildup. When selecting a filter, consider the MERV rating that balances filtration performance with your system’s airflow capabilities; higher MERV filters trap more particles but can impose a higher pressure drop. Ensure the chosen filter matches the unit’s size and that the housing can accommodate the filter thickness. If you’re unsure, consult your HVAC technician or refer to your system’s manual. Maintaining proper orientation in addition to timely replacements ensures efficient operation, better air quality, and longer equipment life.
Tools & Materials
- New air filter (correct size and rating)(Check size on existing filter and choose a MERV rating appropriate for your system (typically 8-13 for homes).)
- Gloves(Optional to keep hands clean during replacement.)
- Flashlight(Helpful for inspecting the inside of the housing.)
- Vacuum or lint-free cloth(Use to clean the slot before inserting a new filter.)
- Screwdriver (flathead/Phillips)(Needed if the filter housing is secured with screws or panels.)
Steps
Estimated time: 15-20 minutes
- 1
Power down and locate the filter housing
Turn off the HVAC unit or vehicle engine and locate the filter slot. If you can't see it, consult the manual or a service panel. This prevents unfiltered air from flowing while you work.
Tip: Use a flashlight to clearly view the slot and avoid tipping the housing while opening. - 2
Remove the old filter and note orientation
Gently slide out the old filter without bending it. Note which side was facing the airflow so you can replicate the orientation with the new filter.
Tip: If the old filter is dirty on one side, the dirty side was facing the incoming air; use that as a reference. - 3
Check arrows and confirm airflow direction
Inspect the new filter for the directional arrows. Compare against the system’s airflow path (return to blower). If arrows are unclear, check the manual or contact support.
Tip: If you’re unsure, contact a professional rather than forcing the wrong orientation. - 4
Insert the new filter with arrows toward airflow
Slide the filter into the housing, ensuring it fits snugly and evenly. The arrows should point toward the blower/fan as previously identified.
Tip: Avoid tilting the filter; keep it square to the housing for an even seal. - 5
reseal and test airflow
Close the housing, turn the unit back on, and listen for consistent airflow without whistling sounds. If air feels less forceful, recheck the seal and fit.
Tip: Run a quick visual check at the vents to ensure air is distributing evenly. - 6
Document replacement and plan next check
Record the date of replacement and set a reminder for the next change based on environment and usage.
Tip: A simple log helps avoid overdue changes and keeps air quality high.
FAQ
Which direction should air filter arrows point?
Arrows should point in the direction of airflow through the system, from the return or intake toward the blower or engine housing.
Arrows should point with the airflow, from the intake toward the blower.
What if the filter has no arrows?
If there are no arrows, check the system’s airflow path in the manual or on the housing. Use the path from return toward the blower as your guide and ensure a snug seal.
If there are no arrows, find the airflow path in the manual and install so air moves toward the blower.
Can I install a filter backward if I’m unsure?
Avoid backward installation. If you’re unsure, pause and verify the orientation before proceeding to prevent reduced filtration and increased energy use.
Don’t install backward if you’re unsure—verify the orientation first.
Do cabin filters follow the same rule as HVAC filters?
Yes, cabin filters use directional arrows. In most cars, arrows point toward the engine, guiding air through the filter into the HVAC housing.
Cabin filters also have arrows; point them toward the engine.
What happens if the orientation is wrong?
Wrong orientation can reduce filtration efficiency, raise energy use, and cause uneven air distribution. Correct orientation preserves performance and air quality.
Wrong orientation lowers filtration efficiency and can raise energy use.
How often should I replace air filters?
Follow the manufacturer’s interval, but adjust for environment and usage. In dusty areas or with pets, check filters more frequently.
Replace per the manufacturer’s interval, more often if you have dust or pets.
Watch Video
Quick Summary
- Align arrows with airflow before inserting the filter
- Verify size and seal to prevent leaks
- Read and follow manufacturer directions for your system
- Document replacements to maintain routine maintenance