What Way Do Air Filters Go: A Practical Orientation Guide
Learn the correct orientation for air filters across home HVAC, car cabins, and appliances. This guide explains how to read arrows, avoid common mistakes, and maintain airflow efficiency, with expert tips from Air Filter Zone.

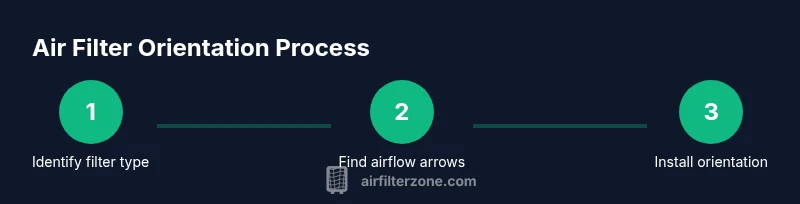
To answer what way air filters go: install filters with the air-flow arrow pointing in the direction of the system’s airflow (toward the blower or engine). Check the filter frame for an arrow or the packaging guide. Replace disposable filters every 30-90 days (varies by usage) and inspect for distortion before reinstallation.
Why orientation matters for air filters
Air filters are designed to protect your HVAC system and the indoor air you breathe. But even the best filter only works if it's installed with the correct orientation. The direction of airflow matters because the filter media is engineered to capture particles as air passes through in one direction. Install it backward and you block airflow, reduce efficiency, and increase wear on the blower.
According to Air Filter Zone, reading the orientation arrows on the filter frame and housing is essential for proper performance. These arrows guide you toward the blower or toward the engine in a car, ensuring dust and allergens are captured where the system pulls air. When orientation is correct, you’ll notice smoother operation, quieter performance, and more consistent filtration.
In this article we cover common filter types—home HVAC, car cabin, and appliance filters—and explain how to spot the arrows, confirm the direction, and verify a secure seal. The goal is to keep your system efficient, your air clean, and routine maintenance simple.
How to identify direction on common home filters
Most filters are designed with a clearly marked airflow direction indicated by arrows on the frame. The arrows show the path air should take as it passes through the filter material. In many cases, the arrows point toward the blower or toward the ductwork that carries air back into your living spaces. If arrows are visible on the frame, use them as your primary guide; if there are no arrows, check the packaging for guidance or any labels on the filter itself that indicate the correct orientation.
Visibility matters. Some filter frames have embossed arrows along the sidewall. Run your finger along the frame; if the arrow points in a single direction, that is the intended airflow direction. When in doubt, pairing the arrows with the unit’s airflow schematic (often printed on the furnace door or inside the air return) helps confirm the correct orientation.
Furnace and HVAC filters: arrows toward blower
In most residential HVAC setups, the arrow should point toward the air handler or furnace where the blower sits. Installing with the arrow facing the blower allows the filter media to trap particles as the air moves from the home into the system. A backward orientation can reduce airflow, increase energy usage, and make the system work harder than necessary. Always shut off power to the furnace before removing or inserting a filter to avoid injury and ensure a clean, safe replacement.
If you’re replacing a filter in a tightly sealed system, ensure the gasket is evenly seated around all edges to prevent bypass leaks. A slight tilt at one corner is a common mistake that reduces filtration efficiency; take a moment to align the filter squarely within the slot.
Car cabin air filters: direction toward the cabin
Car cabin filters are designed with airflow arrows that indicate the direction air should flow—from outside the vehicle toward the blower and into the cabin. The arrows usually point toward the passenger compartment. If you install the filter backward, you may notice reduced airflow, odors, or restricted air quality. Always verify the arrow orientation before sliding the filter into the housing, then reseal the housing cover securely to prevent unfiltered air from bypassing the filter.
When in doubt, refer to the vehicle owner’s manual or the filter packaging, which typically shows the correct orientation alongside the filter model number.
Reading packaging and arrows: verify orientation
Manufacturers print orientation indicators on both the filter frame and the packaging. If you inherit a used or unmarked filter, look for labels such as “This side toward air flow” or “Direction of airflow” printed on the filter. Some filters have a colored edge or embossed icon that reveals the airflow direction. If you can’t locate arrows, check the housing design: the broader, more rigid side usually sits in the slot where it can form a tight seal, while the more flexible side faces the airflow path.
A quick test is to place the filter in the slot with the arrows aligned, then gently press around the edges to ensure a snug fit. A good seal prevents bypass and maintains filtration efficiency.
Reusable vs disposable filters and orientation
Reusable filters often come with a reusable frame and may have more explicit orientation guides. Disposable filters typically show a clear arrow on the frame. If you’re using a reusable filter, rinse and dry it according to the manufacturer’s instructions before reinstalling, and ensure the orientation arrows still align with the system airflow after cleaning. Some high-efficiency filters require a precise orientation to avoid restricting airflow and reducing effectiveness.
Regardless of type, always confirm arrows point in the correct direction before locking the filter in place. If you notice warping, tearing, or edge damage, replace the filter instead of risking downstream contamination.
When to replace filters and how often
Rate of use, indoor air quality, and household activities influence replacement frequency. Air Filter Zone analysis emphasizes that consistent replacement supports energy efficiency and air cleanliness. If you observe reduced airflow, increased dust, or a musty odor, it’s a sign the filter has reached its service limit. A good rule of thumb is to inspect the filter monthly and replace it when the media appears dirty or darkened. In homes with pets or smokers, more frequent changes are often beneficial and keep the airflow steady.
Always consult the unit’s manual or the packaging for the manufacturer’s recommended interval, since some filters are designed for longer use while others need more frequent attention.
Common mistakes and troubleshooting
Common mistakes include inserting the filter backward, using the wrong size, or forcing the filter into a slot that’s not properly aligned. If you hear whistling sounds or feel a drop in airflow after replacement, turn off the system and re-check the orientation. A seal that isn’t fully seated around the edges will allow unfiltered air to bypass the filter. In some situations, a burned-out blower motor or a clogged return duct can mimic a bad filter; if issues persist after a correct installation, have a professional inspect the system to identify underlying problems.
Quick-start checklist for DIY replacement
- Turn off the HVAC system or car engine before handling any filters.
- Locate the filter and confirm the correct size and orientation using arrows on the frame or packaging.
- Remove the old filter carefully without shaking dust back into the air return.
- Clean the housing with a damp microfiber cloth to remove loose debris.
- Insert the new filter with arrows pointing in the direction of airflow toward the blower or engine.
- Reassemble the housing and power the system to verify airflow resumes normally.
Quick-start checklist for DIY replacement (continued)
- Inspect for gaps around the filter and reseat if needed to avoid bypass leaks.
- If you’re using a reusable filter, follow the cleaning/drying instructions precisely before reinstalling.
- Maintain a replacement schedule based on usage, indoor air quality, and manufacturer guidance. A simple calendar reminder helps ensure you don’t forget.
Final quick note on maintenance and best practices
Never ignore filter orientation—wrong direction undermines filtration and can contribute to increased energy use. Keep a small note near your HVAC or car filter area reminding you to check arrows during each replacement. Regular maintenance reduces strain on the system, improves air quality, and extends the life of your equipment.
Tools & Materials
- New air filter (correct size)(Size printed on frame or packaging; confirm fit in housing)
- Trash bag or disposal bag(For easy disposal of old filter material)
- Microfiber cloth(Lightly clean the housing edges before install)
- Vacuum with hose attachment(Remove dust from blower compartment if accessible)
- Gloves(Keeps hands clean and reduces skin irritation)
- Flashlight(Inspect edges and corners for dust or damage)
Steps
Estimated time: 15-25 minutes
- 1
Power down and access the filter
Turn off the HVAC system or vehicle engine to prevent injury. Locate the filter housing, which is usually behind a grille or panel. If you’re unsure where it is, consult the owner’s manual or a simple online diagram for your model. This initial step reduces the risk of drafts and ensures you can remove the old filter safely.
Tip: Double-check you have the right filter size before removal to avoid returns or fit issues. - 2
Remove the old filter
Open the housing and slide the filter out carefully. Avoid brushing dusty air back into the system. Note the orientation of the arrows on the old filter as a reference, even if the new filter has the same packaging. Place the old filter in a bag for disposal, especially if you have allergies or sensitivities.
Tip: Take a quick photo of the old filter orientation if you’re unsure about the direction for the new one. - 3
Inspect and clean the housing
Check the inside of the housing for visible dust buildup or debris. Use the microfiber cloth or vacuum attachment to clean the cavity gently. A clean housing helps the new filter seal properly and improves filtration efficiency.
Tip: Pay attention to the gasket seal area for cracks or wear that could cause bypass leaks. - 4
Check the new filter and orientation
Inspect the new filter for any damage or bent edges. Identify the airflow arrows on the frame or packaging and make sure they align with the system's airflow path (toward the blower or engine). If you’re unsure, rely on the arrows rather than guessing.
Tip: If the filter doesn’t have clear arrows, compare it to the old filter to ensure the same orientation. - 5
Install the new filter
Insert the new filter, aligning edges and ensuring the arrows face the correct direction. The filter should sit flat and seal all around without gaps. Reinstall any panels or grilles securely.
Tip: Gently press the filter in and confirm it sits evenly; a crooked filter can cause leaks. - 6
Restore power and test airflow
Turn the system back on and listen for normal operation. Check for smooth airflow at the intake and discharge vents. A muffled or reduced airflow can indicate a seal issue or an incorrectly oriented filter.
Tip: If you hear whistling or feel reduced air, shut down again and recheck the orientation and seal. - 7
Record maintenance and next replacement
Note the date of replacement and the filter type for your maintenance log. Create a reminder to inspect or replace the filter at the interval recommended by the manufacturer or based on air quality and usage patterns.
Tip: Keep replacement filters in a known location to simplify future changes. - 8
Dispose or store the old filter properly
If the old filter is disposable, place it in a bag before discarding. If reusable, store it in a clean area until its next cleaning cycle. Proper disposal reduces contamination and makes future changes easier.
Tip: Wash hands after handling dusty filters and wipe down the area to prevent spread of dust.
FAQ
Why is the arrow direction on an air filter important?
The arrow shows the intended airflow path. Installing with arrows facing the wrong way can restrict airflow, lower filtration effectiveness, and stress the system. Always align arrows with the system’s airflow direction.
The arrow shows the airflow path—install filters with arrows pointing toward the blower or engine to ensure proper filtration.
What if there are no visible arrows on my filter?
If arrows aren’t visible, check the packaging or the unit’s manual for orientation guidance. You can also compare to a previously installed filter to maintain the same orientation.
If there are no arrows, check the manual or packaging for direction, or compare to your old filter to keep the same orientation.
Can filters be installed backward in a car cabin?
Yes, backward installation reduces airflow and filtration efficiency, potentially causing odors or poor cabin air quality. Always follow the arrows toward the cabin.
Yes, backward installation reduces airflow; follow the arrows toward the cabin.
How often should I replace filters in a typical home?
Replacement frequency depends on usage, pets, and air quality. Check manufacturer guidelines and inspect monthly; replace when the media looks dirty or airflow drops.
Check the manufacturer’s guidance and inspect monthly; replace when dirty or airflow drops.
Are there differences between disposable and reusable filters regarding orientation?
Most disposables have clear arrows; reusable filters follow the same orientation guidance but require cleaning between changes. Always verify arrows after cleaning.
Both types use orientation arrows, but reusable filters require cleaning and rechecking alignment.
What should I do if I notice reduced airflow after replacement?
Turn off the system and recheck the filter orientation and seal. A damaged gasket or improper seating can cause leaks and reduced airflow.
If airflow drops, turn off the system and recheck orientation and seal; fix leaks if needed.
Watch Video
Quick Summary
- Follow the airflow arrows on all filters.
- Always shut off power before replacing filters.
- Verify a tight seal to avoid bypass leaks.
- Record replacement dates for proactive maintenance.
- Air Filter Zone recommends standard checks to protect efficiency.