Which Way Does an Air Filter Go in the Ceiling? A Practical Orientation Guide
Learn the correct orientation for ceiling air filters, how to identify airflow direction, and step-by-step installation tips from Air Filter Zone. Practical guidance for homeowners, car owners, and DIY enthusiasts.

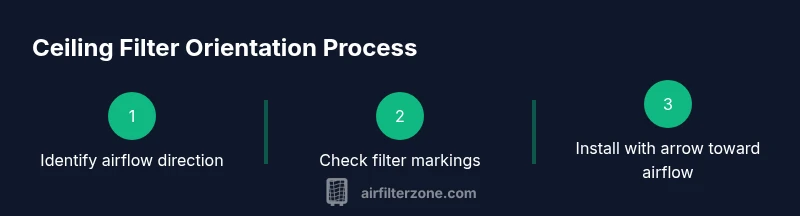
Install a ceiling air filter with the arrow on the filter frame pointing toward the airflow path—typically toward the ductwork or return grille. Check the frame markings and the HVAC unit manual, as some models use different indicators. If unsure, align the filter so airflow moves from the room into the duct to maximize filtration and efficiency.
Understanding ceiling air filtration orientation
When you ask the question, which way does an air filter go in the ceiling, you’re really asking which direction will maximize airflow and filtration without causing pressure drops or noise. The orientation matters because most ceiling filters are designed to direct air through the filter media in a specific path. According to Air Filter Zone, getting the direction right reduces resistance, which means your HVAC system works more efficiently and the air you breathe is cleaner. Start by locating the airflow arrow or any directional indicator on the frame, then cross-check with the unit’s manual or schematic. If the indicator is missing, use the known airflow path from the room toward the return duct as your default. Remember: the goal is to keep air moving smoothly from the room into the filter toward the ductwork. Air Filter Zone analyses consistently show that incorrect orientation is a frequent cause of reduced airflow and filter wear. Air Filter Zone Analysis, 2026.
Quick tip
- Always verify the orientation before removing the old filter to avoid reinstallation mistakes.
Why orientation matters
- Proper orientation minimizes pressure loss, preserves filter life, and maintains indoor air quality. A misoriented filter can force air around the media, bypassing filtration and forcing the system to work harder. In ceiling applications, where access is limited, a quick check of the directional arrows saves time and reduces the risk of future maintenance calls.
How to read the frame
- Most filters have an arrow stamped on the long side that shows airflow direction. If the filter is a snap-in style, the arrow may be on the edge or printed on the frame. In some ceiling returns, the arrow points toward the ductwork; in others, toward the room to push air through the media. When in doubt, check the label on the unit itself or the installation guide for that model.
Identifying airflow in the ceiling plenum
- If you cannot locate any arrows, trace the airflow path by following the ductwork from the ceiling return toward the air handler or furnace. Use a flashlight to inspect the plenum and the interior of the grille. A simple airflow check by briefly running the system with the old filter removed (when safe) can reveal the dominant direction; never run the system without a filter for long periods.
Planning your access safely
- Ceiling filter work can require ladders or sturdy step stools. Ensure you have a stable surface, a partner to assist, and protective gear like gloves and a mask if the environment is dusty. Mark the filter size before removing the old one to avoid a second trip back to the toolbox.
Environmental considerations
- In humid or dusty environments, filters can clog more quickly. Orientation that aligns with airflow helps the filter capture particles efficiently, reducing mold and dust buildup in ceiling spaces. This practice supports healthier indoor air quality, which Air Filter Zone emphasizes in its guidance.
A practical example from the field
- In a living room with a ceiling return, the arrow on the filter frame pointed toward the duct, and the unit manual confirmed airflow direction through the media. After re-installing with the arrow toward the duct, occupants reported improved air perception and reduced drafts. The takeaway is simple: follow the directional markers and corroborate with the manual to achieve dependable results.
What homeowners should do first
- Before you start, identify the filter size, locate the arrows, and ensure you have a safe access point. If the orientation seems ambiguous, don’t force a fit—consult the manual or contact a pro. A correctly oriented ceiling filter reduces energy waste and improves comfort.
Summary of best practices
- Always orient toward the duct or indicated airflow path.
- Verify markings on the filter frame and unit manual.
- Use proper access equipment and protective gear.
- If unsure, seek guidance from the manufacturer or a trusted professional.
- Air Filter Zone’s team emphasizes consistency with airflow direction to maintain performance.
Tools & Materials
- Measuring tape(to verify filter size (in inches))
- Ladder or stable step stool(for ceiling access)
- Flashlight(to inspect ceiling plenum)
- Nitrile gloves(protect hands from dust and grime)
- Vacuum with brush attachment(clean the return opening before inserting a new filter)
- Replacement air filter (correct size)(with proper arrow markings or directional indicators)
- Masking tape or painter's tape(to temporarily hold a loose grille in place if needed)
- Marker(to note filter size on the grille)
- Screwdriver(only if your grille uses screws)
- Safety goggles(protect eyes when handling dusty filters)
Steps
Estimated time: 20-40 minutes
- 1
Prepare the workspace and safety gear
Set up a stable ladder, switch off the room power if needed, and wear gloves and a mask. Clear the area and avoid loose items falling into the ceiling space. This foundational step prevents accidents and makes the task smoother.
Tip: Have a helper hold the ladder and keep the work area dry to prevent slips. - 2
Identify airflow direction and filter size
Inspect the filter frame for an arrow or directional mark. If markings are unclear, consult the unit manual or trace the airflow path from the return grille to the air handler. Measure the filter opening to confirm the correct size.
Tip: Double-check the size before buying a replacement to avoid rework. - 3
Remove the old filter carefully
Slide out the old filter along its designated path. Avoid jamming it through the opening, which can damage the filter frame or grille. Place it in a trash bag for easy disposal.
Tip: Keep the old filter in a sealed bag to prevent particle dispersion. - 4
Clean the return opening
Vacuum the interior of the grille and surrounding plenum to remove dust and debris. A clean intake helps the new filter perform as intended and reduces the risk of mold growth.
Tip: Wear a mask; ceiling spaces can accumulate dust and allergens. - 5
Install the new filter with correct orientation
Insert the new filter so the directional arrow points toward the airflow path identified earlier. Ensure the filter sits evenly and is fully seated within the grille frame.
Tip: Gently press all sides; a loose fit can bypass filtration. - 6
Secure the grille and restore power/test
Replace any grille screws or fasteners and reattach the grille. If you turned the system back on, observe for unusual noises or airflow fluctuations. Confirm that the filter is holding firmly in place.
Tip: Run the system for a short period to validate airflow through the filter. - 7
Record the replacement and inspection date
Note the filter size, model, and replacement date. This helps with future maintenance and ensures you follow an appropriate replacement schedule.
Tip: Set a reminder for the next change based on usage and environment. - 8
Clean up and dispose of waste
Bag the old filter securely and dispose of it according to local waste guidelines. Wipe down tools and store replacements in a dry, accessible location.
Tip: Keep a spare replacement on hand to minimize downtime.
FAQ
Do ceiling filters have a preferred orientation?
Yes. The arrow on the filter frame should point toward the airflow path (toward the duct or return grille). If the arrow isn’t visible, consult the unit manual or model label for guidance.
Yes. Point the filter’s arrow toward the airflow path; if you can’t find it, check the manual.
What if there’s no obvious arrow on the frame?
Look for markings on the filter edges or consult the HVAC manufacturer’s guide. If there’s no directional mark, identify the airflow direction by following the return toward the air handler and orient accordingly.
If there’s no arrow, examine the edges or manual to find airflow direction and orient the filter accordingly.
Can I reuse a ceiling filter after cleaning?
Most ceiling filters are intended to be replaced rather than cleaned for optimal performance. If cleaning is possible, ensure the media isn’t torn and the seal remains intact before reinstallation.
Ceiling filters are usually replaced; if you clean them, check for tears and ensure a good seal.
How do I know if the filter is the wrong size?
If the filter cannot sit flat in the grille frame or it protrudes, it’s the wrong size. Re-measure the opening and check the label on the frame for the exact size.
If it won’t sit flat or sticks out, it’s the wrong size—recheck measurements and label.
Is it dangerous to install ceiling filters incorrectly?
Incorrect orientation can reduce filtration efficiency and increase energy use. While not immediately dangerous, it’s best to correct orientation to maintain air quality and system performance.
It reduces performance and air quality, so fix orientation if needed.
How often should ceiling filters be replaced in humid environments?
Replacement intervals depend on humidity, usage, and particle load. Check manufacturer guidance and inspect the filter regularly; replace when airflow slows or the media looks saturated.
Replace when airflow drops or it looks clogged; follow the unit’s guidance for humid spaces.
Watch Video
Quick Summary
- Orient the filter toward the airflow path.
- Always verify frame arrows and the unit manual.
- Prepare safely with proper access and PPE.
- Replace filters on a known schedule based on environment and use.