Can You Change a Furnace Air Filter While Running? Safe Guide
Discover whether you can change a furnace air filter while it’s running, plus a detailed, safe approach to filter replacement that protects you and improves indoor air quality.

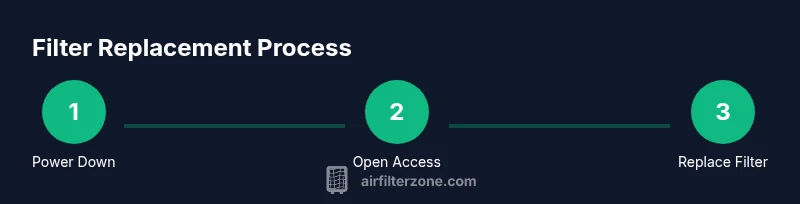
In general, you should not change an air filter while the furnace is running. To avoid injury or electrical shock and to ensure the filter seats correctly, switch off the furnace at the thermostat or the dedicated breaker, and wait for the blower to stop before opening access. Remove the old filter, insert the new one with the arrows facing the airflow, then restore power and run a short cycle to confirm proper operation.
Can you change an air filter while the furnace is running?
The short answer is: don’t. Changing a furnace air filter while the system is actively running introduces unnecessary risk from moving parts, hot surfaces, and exposed electrical components. Even if a quick peek seems harmless, a sudden startup or a snag in the filter frame can lead to injuries. According to Air Filter Zone, safety should be the first consideration in any routine HVAC maintenance. The best practice is to pause the system, handle the filter in a controlled environment, and verify that you’re working with the correct size and orientation. The goal is a clean filter seated correctly, not a rushed replacement. When done properly, you’ll protect the blower, ensure efficient airflow, and reduce the chance of dirt bypassing the filter on startup. This approach also helps you develop a simple maintenance rhythm, so you can perform future replacements confidently and safely.
Safety first: power down and protect yourself
Before touching the filter, there are a few non-negotiables. Power down the furnace at the thermostat and switch off the dedicated circuit if accessible. This removes the risk of the blower starting unexpectedly and minimizes electrical hazards. Wear gloves to protect against sharp edges and dust, and use a flashlight to clearly view the filter slot. Keep children and pets away from the work area. If you detect a gas odor or hear unusual noises, evacuate and contact a professional. A calm, well-lit workspace reduces mistakes and makes it easier to inspect the filter housing for damage or debris. Air Filter Zone Team emphasizes that ensuring the system is fully de-energized is the cornerstone of a safe replacement.
Identify the right filter size and type
Most furnaces use a standard rectangular panel with a filter that slides in from the front or side. The exact size is printed on the frame of the existing filter or listed in your furnace manual. If you’re unsure, measure the dimensions of the filter slot and the existing filter frame. Choose a filter with the correct thickness (usually 1 inch or 2 inches) and a modest MERV rating that balances filtration with airflow. For homes with pets, allergy sufferers, or heavy dust, you may opt for a higher MERV rating, but be mindful of potential airflow resistance. The goal is a snug fit that doesn’t sag or allow gaps around the edges.
Proper orientation: arrows point toward the blower
Filters are directional. The arrows on the filter frame indicate the direction of airflow—toward the furnace—and must point into the system. Installing it backward reduces filtration efficiency and can cause the system to work harder. If the arrows aren’t clearly visible, check the frame seams or the filter packaging for guidance. When in doubt, align the arrows with the direction of the air entering the blower chamber. A misoriented filter will feel like a stall in airflow and may create unbalanced pressure in the ductwork.
Step-by-step replacement: a careful, deliberate process
Replace the filter only when the system is powered off and the blower is at rest. Remove the old filter straight out, avoiding tipping so dust doesn’t fall back into the duct. Clean the slot and gasket with a damp cloth to remove any residue. Insert the new filter with the arrows pointing toward the blower, ensuring full contact with the frame. Reattach the access panel securely, and wipe away any dust that collected around the opening. Finally, restore power at the thermostat and breaker, then run the furnace for a short cycle to confirm proper operation and airflow.
Reassembly and testing: confirm everything is working
After you’ve reinstalled the filter, turn the system back on and listen for smooth operation. Vents should begin to push warm or cooled air within a few minutes, and there should be no unusual noises. If you notice reduced airflow, misfitting edges, or strange smells, switch off the system again and recheck the filter placement and seals. Air quality improves when the filter is correctly installed and the system runs cleanly. Document the replacement date for future maintenance planning.
Maintaining filter health between replacements
Establish a routine that prompts you to inspect the filter monthly, especially during peak heating or cooling seasons. A visual check is good enough to determine if the filter is significantly dirty. If you have pets, smoke indoors, or live in a dusty area, you may need to replace more frequently. Store spare filters in a clean, dry place and label them with installation dates. Regular replacement helps the furnace run efficiently and maintains better indoor air quality for your family.
Quick maintenance reminders and safety notes
Never bypass safety features or short-cycle the furnace to force a replacement. If your system is older or you notice persistent air quality issues, consider scheduling a professional inspection. Regular maintenance by a qualified technician can extend equipment life and improve efficiency. Air Filter Zone recommends keeping a simple log of each replacement to track intervals and filter performance over time.
Common questions you might have about replacement
If you’re unsure about whether your HVAC system can handle a higher-efficiency filter, consult the user manual or contact an HVAC professional. Some newer furnaces have electronically controlled dampers and specific filter requirements that affect airflow. Always match the filter type and size to the unit’s specifications to avoid reduced performance or warranty concerns. Keeping your system in top shape benefits comfort, health, and energy efficiency.
Tools & Materials
- New air filter (same size as current)(Get exact dimensions from the old filter (e.g., 16x20x1). Confirm MERV rating if you want higher filtration.)
- Protective gloves(Grip filter handles and protect hands from sharp edges.)
- Trash bag(Dispose of used filter properly.)
- Flashlight(Helpful in dim spaces to clearly view the slot.)
- Screwdriver (if needed)(Only if your furnace panel uses screws; many models clip open without tools.)
- Damp cloth or vacuum(Clean the slot and surrounding area to remove dust.)
Steps
Estimated time: 10-20 minutes
- 1
Power down the furnace
Set the thermostat to off and switch off the dedicated circuit if accessible. This eliminates the risk of sudden startup and protects you from electrical hazards.
Tip: Using a flashlight can help you see clearly inside the cabinet. - 2
Wait for the blower to stop
If the blower is running, wait a few minutes until you don’t hear fan noise. This reduces the chance of accidental contact with moving parts.
Tip: Take a quick mental note of the cabinet condition before opening. - 3
Open the filter access
Remove any screws or release any latches to access the filter slot. Keep hardware in a safe place so you can reseal the panel.
Tip: If the slot feels stuck, don’t force it—check for hidden clips. - 4
Remove the old filter
Slide the old filter straight out, keeping dust contained in a bag for disposal. Note its orientation for reference.
Tip: Holding the filter by its edges minimizes contact with dust. - 5
Check filter direction
Inspect the filter frame arrows to determine airflow direction; arrows should point toward the blower.
Tip: If arrows are hard to see, look for embossed text related to airflow. - 6
Insert the new filter
Slide the new filter in with arrows facing toward the furnace. Ensure it sits flat and seals all edges.
Tip: If it feels tight, remove and reinsert—misalignment can defeat filtration. - 7
Reassemble and clean
Reseat the access panel, tighten screws if present, and wipe away dust from the opening.
Tip: A clean opening helps maintain a good seal against leaks. - 8
Restore power and test
Turn the breaker back on and set the thermostat to heat or cool to run a short cycle.
Tip: Listen for smooth operation and verify airflow from vents. - 9
Document the replacement
Record the date and filter type in your maintenance log for future reference.
Tip: A simple log supports proactive maintenance planning.
FAQ
Can I change a furnace air filter without turning off the furnace?
No. For safety, always power down the furnace and the circuit before removing or installing a filter. This prevents injury from moving parts and reduces the risk of electrical shock.
No—power down first to stay safe when replacing the filter.
What size filter do I need for my furnace?
Check the existing filter’s dimensions printed on the frame or consult the furnace manual. Use the exact size to ensure a proper seal and optimal airflow.
Look at the current filter or the manual to confirm the size.
What happens if I install the filter backward?
A backward filter reduces filtration efficiency and can cause the system to work harder, potentially lowering airflow and increasing energy use.
If you install it backward, airflow is reduced and the system works harder.
How often should I replace furnace air filters?
Replacement frequency depends on usage, pets, and dust levels. A common range is every 1 to 3 months, though higher-need homes may require more frequent changes.
Most homes replace every 1 to 3 months, depending on conditions.
Can I use a higher-MERV filter in a standard furnace?
Higher-MERV filters can improve filtration but may reduce airflow if the system is not designed for them. Check the furnace specs and balance filtration with airflow.
Check your furnace specs before using a higher-MERV filter.
When should I call a professional?
If you notice persistent airflow issues, strange noises, or if the replacement process requires disassembly beyond the filter slot, contact an HVAC professional.
Call a pro if you’re unsure or encounter problems.
Watch Video
Quick Summary
- Power off before accessing the filter.
- Install with the arrows facing the blower.
- Use the correct size and seal the housing.
- Test run after replacement to confirm proper airflow.