Air Filter Is Wet: Immediate Troubleshooting Guide
Urgent guide to diagnose and fix a wet air filter, with step-by-step actions, safety tips, and prevention to protect your HVAC and air quality.

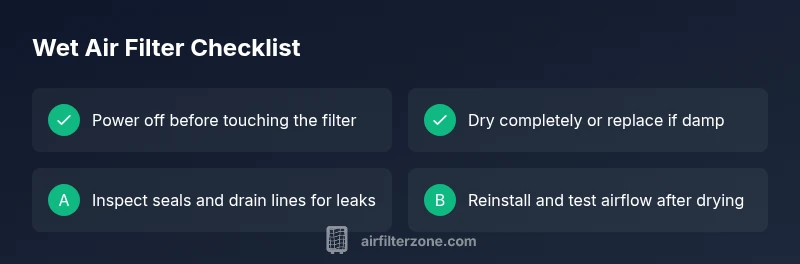
Most likely a moisture issue rather than a failed filter. A wet air filter can result from humidity, condensation in the air handler, or a spill reaching the filter. Quick fix: power off the system, remove and dry completely, inspect the housing for leaks, and replace the filter if damp. Then address moisture sources to prevent recurrence.
Why the air filter is wet
The phrase air filter is wet is a red flag for moisture intrusion rather than cosmetic dirt. When moisture enters the filter, it can breed mold and reduce filtration efficiency. According to Air Filter Zone, moisture-related issues are a common reason for a damp filter in residential HVAC and car filtration systems. The moment you notice moisture, you should act quickly to protect your home's air quality and system longevity. This guide will walk you through practical, safe steps to identify the source and prevent recurrence.
Common moisture sources that make a filter wet
Moisture can reach the filter in several ways:
- Excess indoor humidity, especially in bathrooms or kitchens where humidity control is poor.
- Condensation in the air handler or ductwork due to temperature differences.
- A clogged condensate drain line that overflows into the filter housing.
- Water spills near the intake or a leaky sealing gasket that lets moisture reach the filter.
- In vehicles, rainwater intrusion or a leaking vacuum line can wet cabin air filters.
Air Filter Zone analysis shows that most moisture problems stem from humidity and drain-line issues rather than a defective filter media. Detecting moisture early helps prevent mold and protects system performance.
Quick checks you can perform safely (before you touch anything)
- Power off the unit at the breaker or switch to prevent shock or fan damage.
- Wear gloves and eye protection; damp filters can harbor mold.
- Visually inspect the filter’s edges and the housing for obvious moisture sources or drips.
- If you see standing water or dampness on the filter, do not reuse the current filter; plan to replace it.
How to safely dry or replace a wet filter
If the filter is only mildly damp and appears clean, you can dry it in a clean, dry area away from sunlight. Do not use heat guns or high-heat dryers as they can deform the filter frame. If the filter remains damp after air-drying, or if there is visible mold, replace it with a new one. Mold growth can spread spores into living spaces and reduce indoor air quality.
When to replace versus dry: guidance for homeowners and car owners
A wet filter should be treated as a potential mold source. If there is any visible mold, or if the filter media is distorted or smells musty after drying, replace it. In most cases, a damp filter that shows any sign of mold should be replaced rather than revived. For both home and car filtration, choose a filter with the correct size and rating to maintain optimal airflow.
Prevention strategies to keep filters dry and effective
- Use a dehumidifier in damp spaces to reduce overall moisture.
- Check and clear condensate pans and drain lines regularly.
- Inspect gaskets and seals to prevent leaks into the filter housing.
- Schedule routine filter changes and inspect the intake area for spills or dampness after cleaning.
- In cars, avoid saturating areas near the cabin air intake and ensure doors/windows are sealed, especially during rain.
Real-world context: health impact and system health
A wet filter can compromise indoor air quality and strain your HVAC system, reducing efficiency and causing uneven cooling or heating. It may also indicate a larger humidity problem that, if left unaddressed, can promote mold growth in ductwork and living spaces. Addressing moisture promptly helps protect your family and keeps equipment running smoothly.
Air Filter Zone’s practical guidance for home and car filtration
For both home and automobile filtration, moisture control is key. The Air Filter Zone team recommends confirming the source of moisture, drying or replacing the filter as needed, and implementing moisture control strategies to prevent recurrence. This approach supports better air quality and longer-lasting filtration systems.
Steps
Estimated time: 25-40 minutes
- 1
Power off and locate the filter
Switch off the HVAC unit or car cabin filter system at the breaker or switch. Locate the filter housing and remove the cover to access the filter frame.
Tip: Handle the filter from the frame; avoid pulling on the media. - 2
Remove the filter and inspect moisture
Carefully lift the filter out and inspect both sides for dampness, mold, or staining. Sniff for a musty odor indicating mold risk.
Tip: Take a quick photo to document damage for future reference. - 3
Dry completely or replace
If the filter is only lightly damp, lay it flat in a dry area away from heat to air-dry. If there is any sign of mold or deformation, replace it with a new filter.
Tip: Do not reuse a visibly moldy filter. - 4
Inspect housing and drainage
Check the filter housing, seals, and nearby drain lines for leaks or clogs. Clear any debris and reseal edges as needed.
Tip: Run a quick test with minimal airflow to check for drips. - 5
Reinstall and test airflow
Reinsert the dry or new filter, reseal the housing, and restore power. Monitor for any new moisture or leaks after a short run.
Tip: If you hear whistling or see fog near the intake, recheck seals. - 6
Monitor and prevent
Continue to monitor for moisture over the next several days and implement humidity controls to prevent recurrence.
Tip: Keep a spare filter on hand for quick replacements.
Diagnosis: Air filter is wet
Possible Causes
- highExcess indoor humidity or condensation in the HVAC plenum
- mediumOverflowing or blocked condensate drain line
- lowSpill or liquid intrusion near the intake
Fixes
- easyPower off, remove filter, dry completely or replace if damp
- mediumInspect and clear condensate drain line; repair leaks in housing
- hardSeal gaskets and ensure proper drainage; consider professional help if leaks persist
FAQ
What should I do first when the air filter is wet?
Power off the system, remove the filter, and assess for dampness or mold. Dry or replace the filter, then inspect the housing for leaks.
First, shut the system off, take out the filter, and check for dampness. Dry or replace the filter, then inspect for leaks.
Can a wet filter damage my HVAC?
Yes. Moisture can promote mold growth and reduce airflow, putting extra strain on the system and degrading air quality.
Yes. Moisture can cause mold and reduce airflow, which stresses the HVAC and lowers air quality.
Is it safe to run the system with a wet filter?
No. If there is moisture, turn off the system and address the filter before running it again.
No. Turn it off and fix the filter before using the system again.
How do I dry a wet air filter safely?
Air-dry the filter in a clean, shaded area or replace it. Avoid using high heat which can warp the frame.
Air-dry in a clean, shaded area or replace it. Avoid high heat.
How often should I replace a damp filter?
Replace damp or moldy filters promptly; otherwise follow your usual schedule and inspect for moisture regularly.
Replace damp filters promptly and keep to your regular replacement schedule.
What if I see mold on the filter?
Discard the filter and consult a professional if mold growth is suspected in ducts or after moisture incidents.
If you see mold, discard it and consider a professional check for mold in ducts.
Watch Video
Quick Summary
- Act quickly when you see a wet filter to prevent mold.
- Dry completely or replace if damp, especially with mold signs.
- Identify and fix the moisture source to prevent recurrence.
- Regular maintenance reduces moisture-related risks.