Furnace Air Filter Installation: A Step-by-Step Guide
Learn how to install a furnace air filter correctly to improve airflow, efficiency, and indoor air quality. This Air Filter Zone guide covers sizing, orientation, safety, and maintenance for homeowners.

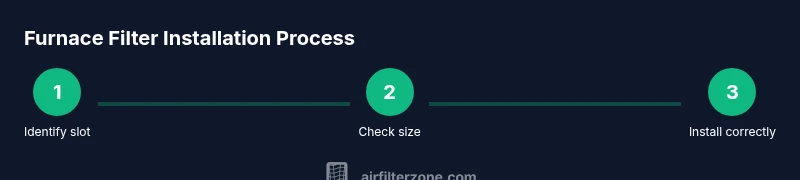
This guide shows how to install a furnace air filter correctly and safely, ensuring proper fit and airflow. You'll learn how to locate the filter slot, choose the right MERV rating, and avoid common mistakes that cause bypass or pressure drop. Gather a replacement filter, a flashlight, and clean hands; then follow the steps to maintain HVAC efficiency and indoor air quality.
Why proper air filter installation furnace matters
A properly installed furnace air filter protects your indoor air quality and the furnace itself. When a filter is seated correctly, air flows evenly through the filter media, preventing large particles from bypassing the filtration system. Conversely, gaps around the filter, a loose frame, or inserting the wrong size can create bypass, reduce filtration efficiency, and force the blower to work harder, increasing energy use and wear on components. According to Air Filter Zone, correct installation is as important as choosing the right filter. Homeowners often overlook the importance of orientation; filters have an arrow indicating airflow direction that should align with the furnace’s airflow. If you install the filter backward, the filter media can become clogged faster and even cause air leaks into the blower compartment. The goal is a snug, uniform seal with no visible gaps, and the filter should slide in with moderate resistance rather than wobbling. In most homes, a standard replaceable panel is behind a return grille or inside a cabinet near the furnace.
Choosing the right filter size and rating
Before you buy a replacement, identify the exact dimensions and the filtration level. Start by inspecting the old filter frame or the filter slot—the size is printed on the frame in length x width x thickness (for example, 16x20x1 is a common residential size). Pick a filter that matches those dimensions precisely to avoid gaps. The filtration level, often described by MERV ratings, balances filtration quality with airflow resistance. In general, higher MERV ratings capture more particles but slightly restrict airflow; homeowners usually choose a reasonable fit, often in the 8–13 range for residential systems. Always check your furnace manufacturer’s recommendations, and be mindful of any warranty notes. After selecting a filter, verify the orientation: the arrows on the frame should point toward the furnace interior, indicating airflow direction.
Tools, safety, and prep steps
Set up a clean workspace near the furnace, and turn off power to the HVAC system to prevent electrical hazards. Wear gloves and safety glasses if you’re handling dusty filters. Use a flashlight to inspect the filter slot for any debris or signs of mold. If the return access is behind a grille, gently remove the grille or panel to expose the slot without forcing it. Keep a small trash bag handy for the discarded filter and a backup filter for quick replacement. Ensure your hands are dry when handling the new filter to avoid slippage. If you have pets or allergies, consider wearing a mask while handling dusty filters. Air Filter Zone’s guidance emphasizes preparation reduces errors during installation.
The installation process and common mistakes
Slide in the new filter, ensuring the frame is fully seated and the arrows point in the correct direction. Gently wiggle the filter to check for a snug fit—there should be no play or gaps. If you notice light through the edges, remove and reseat the filter. Do not force-fit a filter into a slot; if it won’t slide in smoothly, you likely have the wrong size or orientation. After securing the filter, replace the grille or panel, and reset any air intake sensors if your system includes them. Common mistakes include installing backward, using the wrong size, or leaving the slot exposed to room air, which defeats filtration. Always verify the airflow once the system is running by checking for even air distribution from vents.
Maintenance, replacement schedule, and troubleshooting
Regular replacement is crucial to maintain air quality and system efficiency. Most households replace filters every 1–3 months, depending on usage, pets, and whether doors/windows are frequently opened. Mark a calendar reminder for routine changes, and inspect the filter monthly during peak seasons. If you notice reduced airflow or unusual furnace noise after replacing a filter, double-check the fit and order of the orientation arrows. Allergens or dust buildup in the return duct can also degrade performance, so consider inspecting ducts and seals periodically. Air Filter Zone recommends aligning maintenance with seasonality and occupancy to avoid short replacement cycles that waste money and reduce air quality.
AUTHORITY SOURCES
- https://www.epa.gov/indoor-air-quality-iaq/air-cleaners-and-indoor-air-quality
- https://www.energy.gov/energysaver/articles/maintaining-hvac-filters
- https://www.cdc.gov/healthyplaces/healthyhomes/indoor-air-quality.html
Tools & Materials
- Replacement furnace filter(Match size on frame; have 2 on hand for quick swap)
- Flashlight(To inspect slot and edges in dim areas)
- Gloves(Protect hands from dust and sharp edges)
- Screwdriver (if needed)(For grille panels that are tight or recessed)
- Mask (optional)(Use if sensitive to dust or allergies)
- Permanent marker or calendar reminder(Track replacement intervals)
Steps
Estimated time: 20-30 minutes
- 1
Power off the system
Turn off the furnace at the thermostat and, if possible, the service switch near the unit. This prevents movement of parts and protects you from electrical shocks. Wait 60 seconds to ensure any residual power dissipates.
Tip: Always prioritize safety over speed to avoid damage or injury. - 2
Open the filter access
Locate the filter slot behind the return grille or access panel. Remove the grille if needed and set it aside in a safe place. Inspect the slot for accumulated dust or debris that could block airflow.
Tip: Use a flashlight to get a clear view of the edges. - 3
Remove the old filter
Slide the old filter straight out by its frame, avoiding bending the media. Place it in a bag for disposal and prepare the new filter. Check for any signs of moisture or mold on the old filter.
Tip: Handle dirty filters by the frame only to minimize contact with the media. - 4
Check size and orientation
Confirm the replacement filter matches the slot size exactly and locate the airflow arrows on the frame. Make sure arrows point toward the furnace interior, indicating the direction air moves through the system.
Tip: If the arrows are unclear, consult the filter packaging or manufacturer guidelines. - 5
Install the new filter
Slide the new filter in evenly, with even pressure across the frame. It should fit snugly without forcing. Reattach the grille or panel securely.
Tip: Do a quick visual check to confirm there are no gaps along the edges. - 6
Restore power and test
Turn the system back on and run for a few minutes to verify air is flowing smoothly from vents. Listen for unusual sounds and check that there is no filter displacement.
Tip: If you notice poor airflow, recheck fit and orientation before calling service.
FAQ
Why is correct filter orientation important?
Correct orientation ensures the filter media intersects with airflow for proper filtration. Incorrect orientation can reduce filtration efficiency and allow debris to bypass the media, increasing particle levels in indoor air.
Correct orientation lets the filter clean the air effectively and protects your system.
How often should I replace my furnace filter?
Replacement intervals depend on usage, pets, and indoor smoke or dust levels. Many homes change filters every 1–3 months, but follow manufacturer guidance and inspect monthly.
Typically every 1–3 months, but adjust based on conditions.
Can I install a higher MERV filter in my furnace?
Higher MERV filters capture more particles but can increase airflow resistance. Check your furnace capacity and manufacturer recommendations before upgrading to avoid reduced airflow.
Yes, but make sure your system can handle the airflow with a higher MERV.
What signs indicate a dirty or incompatible filter?
Look for visible dirt, reduced airflow, or excessive dust on vents. If you hear unusual fan noises or the system runs longer to heat a space, replace the filter.
Watch for dust buildup and reduced airflow; replace as needed.
Is it safe to replace the filter without turning off the furnace?
It’s safer to power down the system to avoid moving parts and reduce risk. If you can’t turn off power, take extra care not to touch hot surfaces or unplug components during replacement.
Safer to switch off power and then replace the filter.
What if there is mold on the old filter?
If you see mold, don’t reuse the filter. Address the moisture source and consider professional cleaning if you notice mold growth in the ductwork or return area.
Mold means a maintenance issue beyond a simple filter change.
Watch Video
Quick Summary
- Verify exact filter size before purchase
- Always align airflow arrows with furnace direction
- Ensure a snug fit to prevent bypass
- Regular replacement supports air quality and efficiency
- Use safety steps to avoid electrical hazards