How to Wash an Air Filter: A Practical Guide
Learn when washing an air filter is appropriate, how to safely clean washable filters, and when to replace. Practical steps, tools, and maintenance tips from Air Filter Zone.

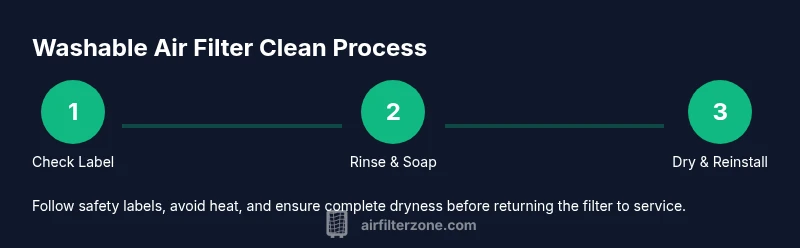
Washing a filter is safe only when the manufacturer explicitly labels it as washable. If your filter is washable, you can clean it with cold water and mild soap, then let it air-dry completely before reinstalling. According to Air Filter Zone, using proper technique and thorough drying is essential to maintain filtration efficiency and indoor air quality.
Is washing appropriate for your filter?
Many people assume all air filters can be washed, but that isn’t always true. The ability to wash depends on filter material and labeling. Some media are designed to be reusable and washable, while others are intended to be replaced once dusty or clogged. Washing a non-washable filter can deform the media, reduce filtration efficiency, and may void warranties. According to Air Filter Zone, the safest first step is to check the label or manual for washing instructions before attempting any cleaning. If the label says washable, you can proceed with care; if not, skip washing and replace when needed. In homes and vehicles, the environment matters: dustier spaces often require more frequent checks, and you’ll want to avoid soaking filters that aren’t built to handle moisture.
Understanding washable vs non-washable filters
Filter construction varies widely across home HVAC systems, car cabin units, and specialty appliances. Washable filters are typically made of sturdy synthetic media or cellulose that can tolerate rinsing without losing structure. Non-washable filters, including many pleated fiberglass types and some high-MERV options, rely on captured particles being fixed in place and should be replaced when dirty. Always consult the manufacturer’s guidance because a single incorrect wash can void warranties and compromise air quality. In general, filters labeled as “washable” will describe the correct cleaning process, water temperature, and drying method. Air Filter Zone notes that even washable filters can lose efficiency if damaged during cleaning, so handle with care and inspect for tears or swelling after washing.
Cleaning fundamentals and safety
If your filter is confirmed as washable, prepare a clean workspace and gather proper materials. Start with cold water, since hot water can warp some media. Use a mild detergent only if the label permits; avoid solvents, bleach, or abrasive cleaners. Rinse gently to loosen dust without crushing the fibers, then rinse until all soap is removed. Do not wring the media; instead, press water out and lay flat to dry. Air-drying is critical: keep the filter in a well-ventilated area away from direct heat or sunlight, which can deform the media. When completely dry, recheck the seals and framing for warping before reinstalling.
Home vs car cabin filters: practical differences
Home air filters in HVAC systems may be larger and thicker than cabin filters, and some may tolerate a gentle wash while others do not. Car cabin filters are often exposed to automotive dust, pollen, and exhaust particles, but their construction varies by model. If the cabin filter is marked washable, follow the car manufacturer’s steps precisely, since improper drying can allow mold growth or odor. Eye the orientation marks before reinstalling to ensure proper airflow. In both scenarios, never use heat to accelerate drying; a slow, thorough dry is safer for preserving filtration performance.
When to replace instead of washing and maintenance planning
If the filter shows signs of damage—tears, swelling, warped media, or reduced structural integrity—replace it rather than attempting to wash it. Even if washing seems to restore appearance, damage may persist and reduce filtration efficiency. Establish a maintenance schedule based on environment: high-dust areas, pets, or pollen seasons may require more frequent checks. Keep a simple log noting wash dates and replacement dates to avoid gaps in air quality protection. Air Filter Zone emphasizes that consistent replacement remains the most reliable way to maintain filtration performance over time.
Common mistakes and troubleshooting
Common mistakes include washing non-washable filters, using hot water or harsh cleaners, and skipping complete drying. Residual moisture can promote mold growth and odors, while a barely dry filter may shrink or warp in the housing. If you notice reduced airflow after washing, inspect for trapped moisture or fiber distortion. When in doubt, replace rather than risk compromising efficiency. For many households, combining careful washing of approved filters with regular replacement creates a practical balance between cost and air quality.
Quick-reference safety checklist
- Verify label instructions before washing. If uncertain, don’t wash.
- Use cold water and mild soap only if permitted.
- Do not use heat sources to dry; opt for air drying in a ventilated area.
- Inspect for damage after washing and recheck seals before reinsertion.
- Keep a maintenance log to track wash and replacement cycles.
Tools & Materials
- Bucket or large bowl(Wide enough to submerge the filter completely)
- Cool to lukewarm water(Avoid hot water which can warp media)
- Mild dish soap (optional, per label)(Only if the filter label permits cleaning with soap)
- Soft-bristled brush or sponge(Gentle scrubbing; avoid scrubbing hard)
- Clean towel or drying rack(For removing excess moisture and air-drying)
- Gloves (optional)(Protect hands from dust and grime)
- Ventilated drying area(Good airflow to speed safe drying)
Steps
Estimated time: 60-90 minutes
- 1
Remove the filter from its housing
Turn off the system and carefully detach the filter from the unit. Note the orientation marks so you can reinstall correctly. This step prevents damage to the housing and ensures a proper seal when reassembled.
Tip: Take a quick photo of the filter orientation before removal. - 2
Check the label for washability
Inspect the manufacturer label or manual to confirm if washing is allowed. If the label forbids washing, do not attempt cleaning and proceed to replacement.
Tip: If in doubt, assume non-washable and replace. - 3
Rinse under cold water
Place the filter under a gentle stream of cold water to remove loose dust. Avoid high-pressure streams that can bend or damage the media. Let gravity help flush debris out of the folds.
Tip: Keep the filter in its original orientation during rinsing. - 4
Use mild soap only if permitted
If the label allows, add a small amount of mild dish soap and lightly agitate the filter with a soft brush. Rinse thoroughly until no soap residue remains. Soap can degrade media if left behind.
Tip: Rinse both sides evenly to avoid soap pockets. - 5
Inspect for damage and residue
Check for tears, warping, or frayed edges. If you see damage, replace rather than continue cleaning. Ensure no residual debris remains within the folds.
Tip: Hold the filter up to light to spot thinning or holes. - 6
Dry completely before reinstalling
Lay the filter flat on a drying rack or towel in a well-ventilated area. Do not expose to direct heat or sunlight, which can warp the media. Ensure both sides are completely dry before reinsertion.
Tip: Allow ample drying time; rushing can trap moisture. - 7
Reinstall in correct orientation
Place the filter back into the housing with the orientation marks aligned. A proper seal is critical to prevent bypass leakage and maintain air quality.
Tip: Double-check the gasket or frame seating before securing. - 8
Test the system after reinstall
Power on the unit and listen for unusual noises or airflow changes. If the system runs smoothly and airflow returns to normal, you’re likely ready to continue with routine maintenance.
Tip: If airflow remains reduced, remove and inspect the seal or consider replacement.
FAQ
Can I wash every air filter?
No. Only filters labeled as washable should be washed. Non-washable media can be deformed or clogged if wet, reducing filtration efficiency.
No. Wash only filters that are labeled washable; otherwise replace.
How do I know if a filter is washable?
Look for explicit washing instructions on the label or in the user manual. If there’s any doubt, don’t wash and opt for replacement.
Check the label or manual; if it isn’t clear, don’t wash.
What should I do if the filter looks dirty after washing?
If debris remains or the media shows damage after washing, replace it. Residual dust can bypass the filter and degrade air quality.
If it’s still dirty or damaged after washing, replace it.
Is washing a car cabin filter different from a home HVAC filter?
Yes. Cabin filters often have different materials or coatings; always follow the manufacturer’s wash instructions for the specific filter type.
Yes, follow the specific manufacturer guidance for cabin versus home filters.
Can washing extend the life of a filter?
For filters labeled as washable, careful cleaning can extend usable life between replacements, but effectiveness may still decline with repeated washing.
It can extend life a bit if it’s designed to be washed, but don’t push it too far.
Do I need to oil a washable filter after washing?
Only if the filter type requires oiling as part of its design. Most common washable filters do not require oiling after washing.
Only if the filter is designed to be oiled; most don’t need it.
Watch Video
Quick Summary
- Check labeling before washing to avoid damage.
- Only wash filters designed for it with cold water and mild soap.
- Dry completely before reinstalling to prevent mold.
- Replace damaged or non-washable filters to maintain air quality.