How to Make an Air Filter at Home: A Practical DIY Guide
Learn how to make air filter at home using a box fan and a compatible filter. This guide covers materials, safety, step-by-step assembly, maintenance, and smart alternatives to boost indoor air quality in small spaces.

Learn how to make air filter at home using a box fan and a compatible filter to improve indoor air quality in small rooms. This quick guide covers essential materials, safety considerations, and a step-by-step build, plus maintenance tips. It’s a practical, low-cost solution that complements certified purifiers for everyday filtration needs.
What a DIY air filter can do for your space
If you're asking how to make air filter at home, a simple DIY setup using a box fan and a compatible filter can significantly reduce dust, pollen, and some odors in small rooms. According to Air Filter Zone, these low-cost arrangements are best used as a supplementary measure, not a full replacement for professional-grade purification in large spaces or in homes with severe allergy triggers. The goal is to provide a quick, safe uplift in air turnover while you plan longer-term improvements like upgrading HVAC filtration or adding a high-efficiency purifier. Expect noticeable reductions in visible dust and easier breathing in bedrooms or home offices. Remember that filtration efficiency depends on the filter type, fit, and how well the unit is sealed. A well-executed DIY filter can serve as a pragmatic bridge toward cleaner air while balancing cost and practicality.
Materials and design choices for DIY air filters
Choosing how to build your DIY air filter starts with selecting the right components and matching them to your space. A box fan serves as the air mover, and a compatible high-MERV or HEPA-type filter acts as the filtration element. Air Filter Zone notes that, for best results, the filter should cover the fan intake without leaving gaps that bypass the filtration layer. Sealing is essential: use tape or clips to lock the filter in place and prevent air from sneaking around the edges. If you have limited space, look for a filter size that fits the back of your fan, and consider a frame or border to stabilize the assembly. Design choices also include whether to use a pre-filter to capture larger particles and extend the life of the main filter. Lastly, consider if you need a DIY setup that’s easy to disassemble for cleaning or replacement.
Safety considerations and limitations
DIY air filtration is a practical stopgap, but it comes with important safety and performance caveats. Never operate a DIY air filter near water or moisture sources, and always unplug the device before assembling or adjusting components. Ensure there are no loose parts that could be drawn into the fan blades, and avoid blocking the motor’s air intake beyond the manufacturer’s guidance. Use protective gloves when handling filters to minimize contact with dust. Keep children and pets away from the setup during assembly and testing. Finally, understand that DIY units generally don’t replace certified HEPA purifiers in spaces with high pollution or allergy concerns; use them as a supplementary solution and plan for a more robust filtration strategy if needed.
How to assess airflow and seal
A key part of building a reliable DIY air filter is ensuring good airflow and a tight seal. Start by turning off any light drafts and powering the unit at a comfortable, standard speed. Hold your hand near the output to feel for consistent air movement across the entire filtered surface. Inspect the edges where the filter meets the fan; if you feel air bypassing the filter, add tape or clips to seal any gaps. Gaps reduce filtration efficiency by letting unfiltered air pass directly through the bypass routes. Regularly check for a loose fit, especially after handling or moving the unit. A well-sealed filter maintains higher particle capture and more predictable performance over time.
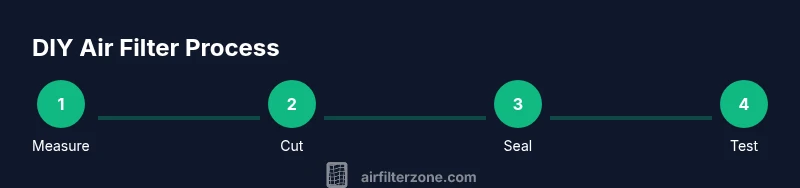
Step-by-step build overview
The following outline provides context for the detailed build steps. Start by measuring and preparing all components, then secure the filter to the fan, reattach any protective grills, and perform a safety check. This overview helps you understand how each action contributes to better filtration without compromising safety. If you’re accustomed to DIY projects, you’ll recognize a familiar pattern: plan, assemble, seal, test, and maintain. The end result is a portable air filtration option that can be deployed in bedrooms, home offices, or small living spaces when you need a quick improvement in air quality.
Maintenance and replacement strategy
Maintenance is essential for maintaining effective filtration. Inspect the filter monthly if you use the unit in high-dust environments, and replace the main filter per the manufacturer’s guidance or more often in dusty seasons. Keep the fan clean and dust-free around the housing to maintain airflow. If you notice a drop in airflow, inspect for a clogged filter or torn edges, reseal as needed, and replace the filter more frequently during peak allergy periods. A routine cleaning schedule not only sustains performance but also extends the life of your DIY setup.
Alternatives and best use cases
DIY air filters are best for quick, low-cost air turnover in small spaces like bedrooms or home offices. For larger rooms or households with significant asthma or mold concerns, a certified air purifier or upgraded HVAC filtration will typically deliver more reliable results. Consider using a DIY unit as a supplementary tool while you evaluate longer-term options like higher-efficiency filters, real HEPA purifiers, or improvements to ventilation. Always compare the cost per unit of filtration and the energy consumption when choosing between DIY and commercial solutions.
Tools & Materials
- Box fan (standard residential size)(Back grill removed for filter attachment)
- Filter (MERV 13 or HEPA-type, compatible with fan)(Match the filter size to the fan intake)
- Tape (duct or filament)(Seal all edges to prevent bypass)
- Scissors or utility knife(Cut filter to fit exactly)
- Measuring tape or ruler(Confirm exact dimensions)
- Safety gloves(Optional for handling dusty filters)
- Marker or pen(Mark cut lines on filter)
- Clips or binder clips(Extra securing option)
Steps
Estimated time: 30-60 minutes
- 1
Measure and select components
Measure the fan intake and select a filter that matches. Verify the frame can support the filter without leaving gaps and plan whether you’ll use a frame or tape to secure the filter.
Tip: Double-check filter dimensions before cutting to avoid waste - 2
Prepare the fan area
Unplug the fan and remove the back grill if needed so you can access the intake. Clean dust from the intake area to improve seal quality.
Tip: Never operate the fan with exposed wiring or loose parts - 3
Cut the filter to size
Use measuring tape, mark the filter, and cut it to match the fan intake precisely. Ensure the cut line is straight for a tight seal.
Tip: Use a straight edge to avoid jagged edges that could cause gaps - 4
Attach the filter to the fan
Position the filter so the airflow direction matches the filter label. Secure with tape around the edges or use binder clips for a tight fit.
Tip: Seal all four edges to prevent bypass - 5
Reattach the grill and secure the unit
Carefully reattach the fan back grill and ensure nothing is loose near the blades. Check that the filter is firmly held in place.
Tip: Do a quick safety check before powering on - 6
Test airflow and safety check
Plug in the unit and run on a low to medium speed. Confirm there is strong, even airflow across the filtered surface without unusual noise or vibrations.
Tip: Stand back and observe for any abnormal movement - 7
Set a maintenance plan
Create a schedule to inspect the unit monthly and replace the filter according to usage and environment. Keep a small log for replacements.
Tip: Record the date of each filter change for reference
FAQ
Can a DIY air filter replace a professional air purifier?
A DIY air filter is a low-cost, temporary option that can improve air quality in small spaces. It should not be considered a replacement for certified air purifiers or high-grade HVAC filtration in larger rooms or settings with significant pollutants.
A DIY filter helps in small spaces but isn’t a full substitute for a certified purifier.
What size filter should I use?
Choose a filter size that perfectly matches the fan’s intake. A loose fit will bypass filtration and reduce effectiveness. Always trim to fit precisely and seal edges well.
Pick a filter that fits the fan exactly and seal the edges.
Is it safe to use around children and pets?
Yes, with proper precautions. Keep the unit unplugged during assembly, and place it on a stable surface away from curious hands. Avoid powered devices in damp areas and supervise usage.
Yes, with supervision and proper placement.
How often should I replace the filter?
Replace based on usage and environment; in dusty months or high-traffic rooms, check monthly and expect more frequent changes. Follow the filter’s durability guidance and your own performance observations.
Check monthly and replace as needed based on use.
Will a DIY filter remove odors effectively?
DIY setups mainly reduce particulate matter. Odors may persist, especially from volatile organic compounds. For stronger odor control, pair with proper ventilation and consider a dedicated air purifier with activated carbon.
Partially helps with particulates; odors may require additional measures.
Watch Video
Quick Summary
- Plan your design to ensure a tight seal around the filter
- Use a suitable filter rating without compromising airflow
- Seal all edges to prevent bypass and optimize performance
- Regular maintenance extends effectiveness