How to Make a Box Fan Air Filter: A Practical DIY Guide
A practical, step-by-step guide from Air Filter Zone on how to make a box fan air filter, covering materials, setup, safety, and testing for better indoor air.

You can make a box fan air filter by pairing a standard box fan with a rectangular air filter, securing the filter to the intake, and testing airflow for leaks. This affordable DIY setup improves room air quality while keeping costs low. Follow the steps below for a reliable, safe build.
What is a box fan air filter and why use one?
A box fan air filter is a simple DIY air-cleaning device that combines a standard box fan with a rectangular air filter. You attach the filter to the fan’s intake so that air must pass through the filter before entering the room. This arrangement can dramatically reduce household dust, pollen, pet dander, smoke, and other airborne particles at a fraction of the cost of commercial air purifiers. For homeowners, renters, or DIY enthusiasts looking for quick air-quality upgrades, a box fan air filter offers a practical, scalable solution. Note that it is not a substitute for a certified air purifier with HEPA filtration in very sensitive environments, but it can make a noticeable difference in everyday living spaces.
- The approach is cost-effective and scalable for various room sizes.
- It reduces common indoor pollutants like dust and pollen, especially during allergy seasons.
- This is a temporary or supplementary measure, not a guaranteed replacement for professional filtration.
- Safety considerations include avoiding overheating and ensuring a tight seal to prevent bypass.
Tools & Materials
- box fan (standard residential size)(Verify intake dimensions before buying the filter; typical fans use rectangular filters.)
- rectangular air filter (size matching fan intake)(Common thickness options are 1 inch or 2 inches; ensure it fits the fan frame.)
- duct tape or strong reinforced tape(Use to seal edges and prevent air bypass.)
- scissors or utility knife(For trimming filter or packaging as needed.)
- ruler or measuring tape(Accurate measurements prevent gaps.)
- optional: Velcro or adhesive strips(Helpful for removable installations.)
- permanent marker(Label the setup for quick identification.)
Steps
Estimated time: 60-90 minutes
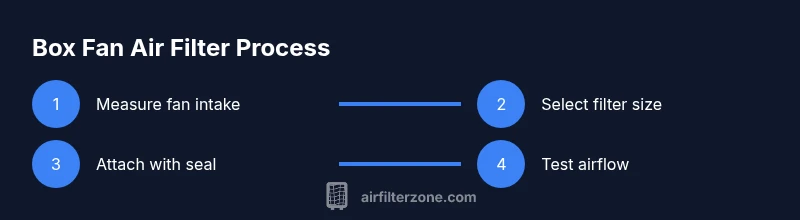
- 1
Measure the fan intake
Remove the grill or locate the intake opening and measure its width and height. Record these dimensions to choose a matching filter size. Accurate sizing reduces air bypass and improves filtration efficiency.
Tip: Double-check both the width and height with a second measurement to avoid errors. - 2
Select a compatible filter
Choose a rectangular filter that matches the measured intake. If necessary, select a size that can be trimmed evenly on all sides to fit snugly inside the fan housing.
Tip: Aim for a filter with at least a 1 inch thickness if your fan can accommodate it for better filtration. - 3
Trim the filter if needed
If the filter is slightly larger than the intake, trim evenly using a ruler and scissors until it fits with minimal play. A snug fit reduces bypass air.
Tip: Trim small amounts at a time and recheck fit frequently. - 4
Attach the filter securely
Position the filter so that air passes through it first as it enters the fan. Use duct tape to seal the edges around the filter frame and fan housing.
Tip: Create a continuous seal; avoid gaps along the edges that let unfiltered air through. - 5
Seal and secure the setup
Run a quick check to confirm there are no visible gaps on all sides. If needed, add a second strip of tape along the seam for extra security.
Tip: Check for any loose edges after a few minutes of operation. - 6
Test the airflow
Power the fan and observe whether air movement is strong and steady. If airflow is weak, reassess seal integrity and filter thickness.
Tip: A simple tissue test near the exhaust can help gauge airflow. - 7
Monitor for signs of strain
Listen for unusual motor noise or overheating. If you notice strain, the fan may be overwhelmed by a high-MERV filter; consider a lighter filtration option.
Tip: Do not run the setup continuously if the fan is overheating. - 8
Document and replace
Note the installation date and plan a filter replacement schedule based on room dust levels. Replace the filter as needed to maintain efficiency.
Tip: Keep a replacement log to simplify ongoing maintenance.
FAQ
What is a box fan air filter, and why would I use one?
A box fan air filter combines a standard box fan with a rectangular air filter to clean room air as it moves through the filter. It’s a low-cost, quick-start solution for improving indoor air quality in homes or small spaces, especially when a full HVAC upgrade isn’t feasible.
It’s a low-cost DIY setup that cleans air by forcing room air through a filter before it circulates. Great for quick improvements in small spaces.
What sizes do I need for the fan and filter?
Measure the fan’s intake opening to determine the filter size. Common approaches use a filter that matches those dimensions, but you can trim a slightly larger filter to fit. Always prioritize a snug fit to avoid unfiltered air bypass.
Measure the intake, pick a filter that fits, and trim as necessary for a snug seal.
Will this help with allergies or pet dander?
A properly sized filter will capture a portion of common indoor allergens like dust and pet dander, improving comfort for many people with allergies. It is not a substitute for HEPA filtration in high-risk environments.
It can help reduce common allergens in rooms, but it isn’t a replacement for HEPA-grade filtration in sensitive settings.
Can I use this in a car or office?
The concept can be adapted for small spaces, but the typical box fan air filter is designed for home use. For cars or offices, ensure the setup won’t interfere with electronics or safety rules and consider purpose-built cabin air filters instead.
It’s more suited to homes; for cars or offices, look for purpose-built filters designed for those spaces.
Is it safe to run for long periods?
Run the unit at moderate speeds and monitor the fan for overheating. If the fan gets very hot or emits a burnt smell, turn it off and inspect the wiring and motor.
Run it at a comfortable speed and keep an eye on heat and smells; turn it off if anything seems off.
How often should I change the filter?
Check the filter regularly—dusty environments may require replacement every few weeks, while cleaner spaces might extend to a couple of months. Follow the filter manufacturer’s guidance and your own observation of airflow.
Change the filter when airflow slows or a visible dust buildup appears; keep a log to stay on top of it.
Watch Video
Quick Summary
- Choose the right filter size to prevent air bypass
- Seal all edges for maximum filtration
- Test airflow to verify setup works as intended
- Replace filters regularly to maintain performance