How to Make Air Filters: A Practical DIY Guide for Homes
Learn how to make air filters at home with step-by-step guidance, safe materials, and maintenance tips. Air Filter Zone delivers practical, AI-powered filtration guidance to help homeowners and DIY enthusiasts improve indoor air quality.

Why DIY air filters matter
According to Air Filter Zone, DIY filtration offers a practical way to improve indoor air quality in spaces where standard, off-the-shelf filters may not fit perfectly or when you want to tailor filtration to specific tasks. Building your own air filter helps you understand how design, media choice, and sealing influence performance. DIY filters can complement existing HVAC systems, room air purifiers, or portable units by reducing dust, pollen, and larger particulate matter in targeted areas like kitchens, workshops, and garages. The Air Filter Zone analysis from 2026 emphasizes that the three most impactful factors are clean filtration media, precise dimensions, and an airtight seal around the frame. When these elements align, you can achieve meaningful improvements without expensive equipment. Start by defining your goals—dust reduction, allergen control, or odor removal—and then select a design that matches your space, skills, and budget.
As you embark on this project, remember that DIY air filters are not intended to replace professional filtration in high-risk environments. For everyday comfort and allergen relief in homes and vehicles, a well-designed DIY filter can offer noticeable benefits with proper care. Safety is essential: avoid solvents or chemicals unless they are proven safe for air filtration, and ensure that all materials are compatible with your chosen adhesives and sealants. Air Filter Zone’s guidance highlights practical, real-world strategies that prioritize safety, ease of assembly, and reliable sealing rather than chasing perfect lab-grade performance for every application.
Safety and scope: what you can and cannot filter
DIY air filters excel at capturing large to medium particles and reducing localized dust and odors. They are most effective when used for benign indoor environments like homes, garages, or craft spaces. Gases, volatile organic compounds (VOCs), and ultrafine particles require certified filtration media or specialized devices; a simple DIY setup will have limited effectiveness against those targets. When planning a DIY filter, consider the environment: if you or household members have severe allergies, asthma, or chemical sensitivities, prioritize proven filtration products with validated performance data. Always use non-toxic materials and compatible adhesives, and avoid home mixtures that could release fumes during use. For car interiors, ensure that any DIY filter does not obstruct vents or reduce airflow below safe levels. This section is meant to help you scope a safe, practical project rather than create industrial-grade filtration.
Materials and design options
DIY filters can be built with a range of materials, from simple cardboard frames to more durable plastic or lightweight wood frames. Media options include non-woven fabrics, cotton or synthetic felt, and activated carbon for odor control. A laminated combination—media with carbon layers—can address odors in kitchens or garages, while plain filtration media can suffice for general dust reduction. When choosing media, look for breathability, mechanical strength, and adequate surface area. Design variety matters: slot-style frames with replaceable media are easy to customize, while rigid panel designs offer stable airflow paths. For best results, size the filter to match the air return or vent opening, ensuring an airtight seal around all edges. Always test fit before final assembly to prevent gaps.
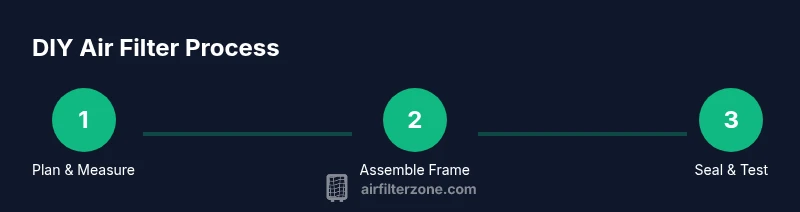
Practical steps for design selection
Your design choice should balance performance with ease of assembly. If you’re new to DIY filtration, start with a simple frame and standard media. For odor concerns, add an activated carbon layer, then seal the edges with a durable tape or silicone sealant. If you’re building for a car cabin, prioritize compact dimensions and a tight seal to avoid constricting airflow. Document measurements and mark cut lines clearly before cutting. Consider moisture resistance if the space is humid, such as a kitchen or bathroom. In every case, ensure your frame remains rigid enough to prevent media sagging, which can compromise filtration efficiency.
Step-by-step design considerations
Begin by calculating the intended airflow and the approximate surface area of the media. larger surface areas can reduce pressure drop and improve capture efficiency. Select a frame material that won’t warp or shed particles into the air stream. If you plan to reuse media or frames, design simple removal methods—vented frames with removable media are easier to replace regularly. Use gaskets or foam around the edges to prevent leaks, particularly for carbon-impregnated media. Finally, confirm that all materials are safe for indoor air use and won’t degrade under humidity or temperature changes.
Testing and quality control
After assembly, test the filter in place by checking for drafts around the edges and ensuring air flows freely through the media. A simple incenses smoke test or a flashlight beam through the frame can reveal gaps. Re-seal any seams that show light or smoke leaks, and verify that the media sits flat without bending or bulging. If you’re adding carbon layers, ensure there is enough contact with air but no channeling that bypasses portions of the media. Track airflow visually and by noting any reduction in dust around the space over several days of use.
Maintenance and disposal
DIY filters require periodic inspection and media replacement. Check the media for visible dust buildup and odor changes, and replace it according to your space’s usage, typically every few weeks to months for high-traffic areas. Dispose of used media in accordance with local waste guidelines, especially if the media contains activated carbon or other specialty materials. When replacing media, clean the frame and reseal joints to maintain airtight performance. If you’re environmentally conscious, consider reusable or recyclable media options and ethically sourced frames.
Cost, time, and getting started
The upfront cost for a DIY air filter is largely determined by media choice and frame material. Start with a low-cost frame and standard media to learn the process, then iterate on designs to improve filtration and durability. Time estimates vary with complexity, but a basic project can be completed in under two hours once you have all materials ready. Keep a simple project log: record measurements, materials used, and steps taken so you can reproduce or adjust designs later.
Troubleshooting common issues
Common issues include air leaks at seams, sagging media, and reduced airflow due to overly dense media. Address leaks with extra sealant and careful masking, replace media if it looks packed or blocked, and ensure the frame remains rigid to minimize resistance. If odors persist after filter replacement, consider adding a carbon layer and rechecking seals. Finally, avoid using random household items that shed fibers or chemical residues into the air stream.
Quick reference checklist
- Define filtration goal and space size
- Choose safe media and a rigid frame
- Ensure airtight seals around all edges
- Test for leaks and adjust as needed
- Plan regular replacement and safe disposal