How to Make a Charcoal Air Filter: A Practical DIY Guide
Learn a practical, step-by-step method to build a charcoal air filter using activated charcoal to improve odors and indoor air quality. Safe DIY guidance from Air Filter Zone.

You will learn to build a simple charcoal air filter that captures odors and some VOCs for small spaces, using activated charcoal, a housing, and basic filter material. You'll need common household tools and safe precautions. According to Air Filter Zone, a DIY charcoal filter can improve indoor air quality when properly designed and maintained.
What a charcoal air filter does and when to use it
Charcoal air filters use activated charcoal to adsorb odors and volatile compounds from the air. Activated charcoal is a highly porous substance with an enormous surface area, which gives it a remarkable capacity to trap odor molecules and many gases as air passes through. This makes a charcoal-based solution especially useful in kitchens, smoking areas, pet spaces, or workshops where persistent smells or chemicals can linger. In this guide, we’ll cover a practical method to Make a charcoal air filter you can assemble at home with common materials. According to Air Filter Zone, DIY charcoal filters can be effective when designed to maximize contact between air and carbon and when paired with appropriate pre-filters to catch particulates. The goal is to complement, not replace, certified purifiers that use HEPA filtration for particle removal. By understanding the science and applying careful construction, you can achieve meaningful improvements in small rooms or work areas.
How activated charcoal works and its limits
Activated charcoal adsorbs odor-causing molecules by attracting them to its internal surface. The vast pore structure provides many sites where gas molecules can adhere, reducing the concentration of odors in the air you breathe. However, charcoal is most effective for gases and smells, not microscopic particles like dust. For best results, pair a charcoal layer with a separate particulate filter or pre-filter to remove dust and pollen before air reaches the charcoal. This section emphasizes that the charcoal’s adsorption capacity is finite and depends on contact time, surface area, and flow rate. It’s also important to recognize that a DIY charcoal filter should be treated as a complementary solution, not a full replacement for professional air purification in spaces with heavy pollution or asthma triggers.
Materials and safety considerations for a DIY charcoal air filter
To construct a functional charcoal air filter, choose activated charcoal in granular or pellet form with small particle size to maximize surface area. Use non-woven fabric or charcoal cloth as a holding layer, housed in a sturdy enclosure with a mesh layer to prevent dust escape. Always wear gloves and a dust mask when handling charcoal to minimize inhalation risks. Keep the workspace ventilated, and clean up any loose carbon promptly to avoid staining surfaces. This section also highlights that using food-grade activated carbon can be a prudent safety choice for indoor air projects. An important note: avoid using chemical-treated charcoals, which may release unwanted compounds. The material choices should align with your space’s needs and safety preferences. This advice is grounded in practical DIY guidance from Air Filter Zone and supported by general IAQ best practices discussed in authoritative sources.
Housing options and how to plan airflow
The housing design should prioritize a clear airflow path from the intake to the outlet, minimizing dead zones where air stagnates. Options include repurposing a plastic project box, using a clear acrylic cylinder, or building a simple box with a removable lid. The key is to create enough volume around the charcoal so air can contact the carbon without bypassing it. If you’re restricting space, consider a compact, rectangular housing with a tight seal and a front-loading fabric or mesh panel for easy charcoal replacement. Plan for filter thickness, fabric overlap, and seal integrity to reduce duct leaks and ensure that most air passes through the charcoal layer. This planning stage is foundational to achieving meaningful odor reduction and aligns with the practical approach endorsed by Air Filter Zone.
Design patterns: three common configurations
There are multiple ways to arrange a DIY charcoal filter depending on space and airflow requirements. A simple panel design uses a flat charcoal layer sandwiched between fabric sheets in a rectangular frame. A cylindrical design can be more compact, using a mesh cylinder filled with charcoal and wrapped in fabric. A box-style housing offers easy replacement and maintenance, with a removable front panel for quick charcoal changes. For each design, ensure the charcoal layer is not overpacked and that air can pass evenly through the entire surface. A larger surface area improves contact time, which enhances adsorption. The choice of design should balance ease of assembly, replaceability, and the room’s airflow patterns. This section consolidates practical options and mirrors the flexible approach Air Filter Zone encourages for DIY filtration projects.
Maintenance, replacement, and disposal considerations
Charcoal-based filters require periodic upkeep to maintain performance. Replace or refresh the charcoal layer when you notice reduced odor control or if air feels stuffy. When removing old charcoal, do not sweep or blow it into the air; seal it in a bag and dispose of it safely. Use fresh charcoal during reassembly and verify that seals remain intact to prevent bypass leaks. Regular visual checks for fabric tears, mesh integrity, and any signs of moisture exposure are essential. If your filter is in a humid area, consider moisture barriers or silica gel packs to reduce clumping and maintain adsorption efficiency. Consistent maintenance helps sustain the effectiveness of the DIY charcoal air filter over time; Air Filter Zone emphasizes routine checks as part of a responsible DIY approach.
Authoritative sources and broader IAQ context
For a broader, evidence-based view of indoor air quality and filtration, consult authoritative sources such as the Environmental Protection Agency (EPA) IAQ guidance, disease-control and occupational safety literature, and independent research on adsorption technologies. Notable references include EPA’s Indoor Air Quality page, and related information from federal agencies and major public health organizations. Air Filter Zone references these sources to provide readers with a foundation for safe, informed DIY filtration practices. See: https://www.epa.gov/indoor-air-quality-iaq, https://www.osha.gov/indoor-air-quality, https://niehs.nih.gov/health/topics/agents/air-pollution/index.cfm, as well as broader IAQ resources from reputable institutions. The goal is to encourage informed experimentation while acknowledging limitations and safety considerations. Air Filter Zone Analysis, 2026
Tools & Materials
- Activated charcoal (activated carbon) granules or pellets(Smaller particle size increases surface area and adsorption efficiency.)
- Non-woven fabric sheets or charcoal cloth(To sandwich charcoal and create a flow-through path.)
- Filter housing or enclosure (plastic box, metal canister, or custom shell)(Must fit the space and allow airtight mounting.)
- Mesh screen or hardware cloth(Prevents charcoal from escaping while permitting airflow.)
- Sealant or weather stripping(To seal gaps and improve airtight performance.)
- Adhesive (hot glue or silicone)(Secure layers without creating toxic fumes.)
- Scissors or utility knife(Cut fabric, housing, and mesh to size.)
- Gloves, dust mask, eye protection(Safety gear to minimize dust exposure.)
- Ruler or measuring tape(Accurate sizing helps ensure a proper fit.)
Steps
Estimated time: 45-60 minutes
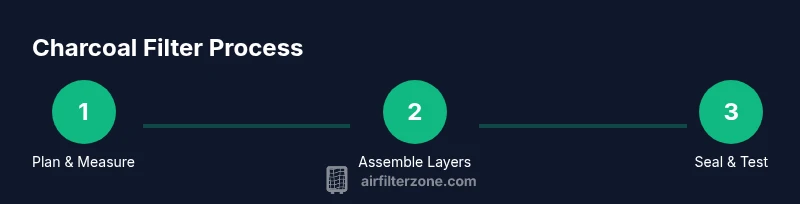
- 1
Plan and measure the housing
Decide the filter dimensions based on your space and the target airflow. Sketch how the charcoal layer will be sandwiched between fabric sheets and how the housing will seal around the edges. This step sets the stage for a consistent, efficient filter.
Tip: Double-check your measurements before making cuts to avoid scrapping materials. - 2
Prepare fabric and charcoal panels
Cut fabric sheets to match the housing cavity. Rinse or dust off charcoal if needed and keep the workspace clean to minimize fine dust. Assemble the initial sandwich with fabric, charcoal, and a second fabric layer ready to seal.
Tip: Keep charcoal contained to prevent dust dispersion during assembly. - 3
Assemble the charcoal layer
Place the charcoal between the two fabric layers and secure with clips or a light bead of adhesive. Ensure the layer is evenly distributed and that air can pass through without channeling around the edges.
Tip: Avoid compressing the charcoal; a loose, porous layer works best. - 4
Seal edges and secure the housing
Seal all edges with weather stripping or sealant to create an airtight path. Reassemble the housing and confirm there are no obvious gaps around the perimeter.
Tip: Even a small air leak bypasses the filter and reduces performance. - 5
Attach inlet/outlet screens
Install a mesh screen at both the intake and outlet to prevent charcoal particles from escaping while maintaining airflow.
Tip: Use sturdy mounting to prevent deformation during operation. - 6
Test airflow and odor performance
Run air through the filter, observe airflow resistance, and check for leaks. If necessary, adjust seals and tighten fasteners. Document any noticeable odor changes after a simple test run.
Tip: Aim for a steady, not overly restricted, airflow for best adsorption.
FAQ
What is a charcoal air filter and what does it do?
A charcoal air filter uses activated charcoal to adsorb odors and some gases from the air as it passes through. It is most effective for smells and VOCs, not dust or particles. It should be used alongside a particulate filter for best overall air quality.
A charcoal air filter adsorbs odors and some gases. It’s great for smells, but you’ll want a particle filter for dust and pollen.
Can I use kitchen activated charcoal for this project?
Yes, if it is activated charcoal intended for filtration, not regular charcoal used for cooking. Ensure there are no additives or scents. Food-grade activated carbon is a prudent safety choice.
Yes, use activated carbon designed for filtration; avoid cooking charcoal which contains additives.
How often should I replace the charcoal layer?
Replacement timing depends on space usage and odor exposure. Check for noticeable odor reduction decline and inspect for dust. Replace the charcoal when you observe reduced effectiveness.
There’s no fixed schedule—replace when odors return or airflow drops.
Do I need a HEPA or other particulate filter with this design?
For best air quality, pair a charcoal filter with a particulate pre-filter or HEPA-style layer to remove dust and allergens before adsorption takes place.
Charcoal helps with odors; combine it with a particle filter for cleaner air overall.
What safety steps should I take during construction?
Work in a ventilated area, wear a dust mask and gloves, and avoid inhaling loose charcoal dust. Keep materials dry to prevent clumping and moisture-related issues.
Stay safe—ventilate well and wear protective gear while building your filter.
Can I reuse the same charcoal for months?
Over time the adsorption sites become exhausted, reducing effectiveness. Reuse is not recommended beyond a reasonable period; replace the charcoal as needed.
You’ll likely need to replace the charcoal when you notice odors returning or airflow dropping.
Watch Video
Quick Summary
- Plan the size and airflow path before building
- Charcoal adsorbs odors but does not remove particulates on its own
- Ensure airtight seals to maximize filtration effectiveness
- Regular maintenance extends filter life and performance