Why Way Does Air Filter Go: A Practical Orientation Guide
Learn how to orient air filters correctly in home and car applications, why orientation matters, and follow a practical step-by-step guide for proper fit and better filtration. A definitive guide by Air Filter Zone.

With this guide, you’ll know how to orient air filters correctly in homes, cars, and HVAC units. You’ll identify airflow arrows, confirm fit, and seal the housing so filtration works as intended. Correct orientation prevents leaks, reduces energy use, and keeps indoor air cleaner. Whether you’re a homeowner, mechanic, or DIYer, this approach applies widely to ensure optimal filtration.
Why orientation matters for air filters
Orientation matters because filters are designed to trap particles as air moves through them in a specific direction. If the filter is flipped, air can bypass much of the filtration layer, reducing efficiency and potentially allowing more dust and allergens to pass into living spaces. In HVAC systems, improper orientation can also cause increased pressure on the blower, leading to energy waste and noise. The Air Filter Zone team finds that many homeowners encounter higher energy bills or more debris in indoor air when filters are installed incorrectly. By following standard arrow directions and sealing the housing, you ensure the filter works as intended and prolong both filter life and system longevity.
Reading arrows and housings on filters
Most disposable and many reusable filters have an embossed or printed arrow showing the intended airflow direction. Install the filter so that the arrow points in the same direction as air moves through the system (from intake toward the blower or toward the ductwork). In car cabins, arrows indicate flow from outside the vehicle into the cabin; in home HVAC, arrows point toward the furnace or air handler. When in doubt, consult the filter packaging or the appliance manual. Ensuring correct orientation prevents leaks at the gasket and helps the filter stay seated during operation.
Home HVAC filter orientation: common scenarios
Home HVAC filters come in a range of thicknesses from 1 inch to 4 inches or more. For each size, ensure the filter fits snugly within the frame and that the arrow aligns with the direction of airflow from the return duct toward the blower. If your system uses a non-standard size, double-check the air path and measure the slot to avoid returning a filter that is too small or too large. Regular inspection helps catch tabs or clips that could misalign the filter housing.
Car cabin air filter orientation: common scenarios
Car cabin filters are typically rectangular and fit behind the glove box or under the dash. Like home filters, they feature arrows indicating airflow. Install with the arrow pointing toward the engine compartment or along the path of the blower, depending on the vehicle. Always refer to the owner’s manual for the exact direction, as some models differ. A wrong orientation can reduce airflow to the cabin and may allow unfiltered air to enter.
How to inspect a filter for proper direction before replacement
Before pulling a filter, check the packaging for the indicated orientation and compare it to the installed filter. Look for an embossed arrow on the frame and confirm the air path via the system diagram in the manual. Inspect both the old filter and the housing for signs of damage, warping, or gaps. If you see debris or dirt that has bypassed the filter, schedule a replacement and clean the housing before inserting the new filter.
Common mistakes and how to avoid them
Mistakes include installing a filter backward, using the wrong size, or choosing a filter with an incompatible MERV rating for the system. Never force a filter into a frame that is too small, and never skip the gasket when reinstalling a filter. Avoid reinstalling a dirty or damaged filter and never reuse a disposable filter. For car cabins, avoid leaving the glove box open during air flow checks, as it can cause misalignment or rattling.
Maintenance tips to maximize filter life and performance
Create a replacement schedule based on usage, environment, and filter type. In dusty or high-pollen seasons, check filters monthly and replace as needed. Label filters with the replacement date so you know when to renew. Keep the filter housing clean from dust and ensure that the seals are intact. A clean intake area reduces pre-filtration debris and helps maintain indoor air quality.
Choosing the right filter: sizing, MERV, and compatibility
Sizing must match the exact frame dimensions; using a filter that is too small leaves gaps that bypass filtration. The MERV rating informs filtration efficiency; higher numbers capture smaller particles but may impose more resistance, so pick a rating recommended by the manufacturer. For homes with pets or allergy concerns, consider mid-range to high efficiency filters and ensure the blower can handle the added pressure. Always check the model’s manual or product listing for compatibility.
Authority Sources
- EPA: Indoor Air Quality - Air Filters. https://www.epa.gov/indoor-air-quality/air-filters
- Energy.gov: Energy Saver - Air Filters. https://www.energy.gov/energysaver/air-filters
- For model-specific orientation, consult your appliance manual and manufacturer resources.
What to do with old filters and disposal tips
Dispose of disposable filters with household trash after sealing in a plastic bag to prevent dust dispersion. If you live in areas with recycling programs for filters, check local guidelines. For reusable filters, clean according to the manufacturer’s instructions and re-oil or re-condition if required.
Tools & Materials
- Replacement air filter (correct size for your system)(Measure frame or check manual; common home sizes vary (e.g., 16x20 inches) and car cabin sizes are model-specific)
- Gloves (nitrile or latex)(Keep hands clean and protect from dust)
- Flashlight(Inspect housing behind tight spaces)
- Screwdriver (flathead or Phillips)(Needed for housings with screws)
- Towel or rag(Wipe away dust from housing)
- Mask or respirator (optional)(If dust is heavy or sensitive individuals are present)
Steps
Estimated time: 15-30 minutes
- 1
Identify the correct filter size and housing
Locate the filter slot and check the original filter or the system manual for the exact size. Confirm the filter is compatible with the model and note any special installation instructions. This step prevents ordering and installing the wrong filter.
Tip: Measure the slot and check the label on the existing filter; mismatches lead to poor sealing and bypass. - 2
Remove the old filter safely
Turn off the system power, use a rag to catch dust, and slide the old filter out without shaking dust into the air. If the filter is difficult to remove, check for locking tabs or screws and use the appropriate tool.
Tip: Wear gloves to minimize skin contact with dust; keep the area clean for the new filter. - 3
Inspect the filter and housing for damage
Look for cracks, warping, or torn gaskets in the housing. If the frame is damaged, replace the entire assembly or consult a technician. A damaged seal can cause unfiltered air leaks.
Tip: If unsure about housing integrity, take a photo and consult the manual or a professional. - 4
Check the arrow direction on the new filter
Identify the embossed or printed arrow on the new filter. Align the arrow with the system’s airflow path, meaning the air should flow from the intake toward the blower or ductwork.
Tip: If the arrow isn’t clear, refer to the packaging or the manual for confirmation. - 5
Install the new filter correctly
Slide the new filter into the housing with the arrow pointing in the correct direction. Ensure it seats evenly and the gasket forms a tight seal to prevent air bypass.
Tip: Avoid overtightening any clips or screws that secure the housing. - 6
Re-seat and secure the housing
Close the housing and re-engage any latches, screws, or clips. Wipe away any dust around the opening, and verify that the filter is not protruding or crooked.
Tip: Inspect the seal around the edge to ensure there are no gaps. - 7
Reset indicators and note the replacement date
If your system has a replacement indicator or a reminder, reset it according to the manual. Document the date of installation for future maintenance cycles.
Tip: Using a label on the filter helps track replacement intervals. - 8
Test run and confirm airflow
Power on the system and listen for unusual noises or reduced airflow. Check for visible leaks around the housing and ensure air flows smoothly through the vents.
Tip: If airflow is reduced, double-check the orientation and seating of the new filter.
FAQ
What does the arrow on an air filter mean?
The arrow indicates the intended direction of airflow. Install the filter so the arrow points along the path air travels through the system. This ensures filtration occurs where the system expects it.
The arrow shows airflow direction. Install the filter so the arrow points along the air's path through the system.
Can I reuse an old air filter?
In most cases, disposable filters should not be reused. They lose effectiveness as dust and particles accumulate. Replace according to manufacturer guidance.
Don’t reuse disposable filters; replace them as recommended.
What happens if I install the filter backward?
Installing backward can restrict airflow, reduce filtration efficiency, and increase strain on the blower. It may also cause gaps and leaks at the housing seal.
Backward installation can reduce airflow and filtration efficiency.
How often should I replace home air filters?
Replacement intervals depend on usage, environment, and filter type. In dusty or high-pollen homes, check monthly and replace as needed.
Check monthly and replace as needed based on use and environment.
Are there safety steps I should follow when replacing filters?
Turn off the system power, wear gloves, and avoid touching the dirty side of the old filter. Dispose of it properly and clean the housing if needed.
Power off, wear gloves, and dispose of the old filter safely.
Do different environments require different MERV ratings?
Yes. Homes with pets or allergies may benefit from higher MERV ratings, but ensure the system can support the added resistance.
Higher MERV ratings are often good for pet owners, but check your system's limits.
Watch Video
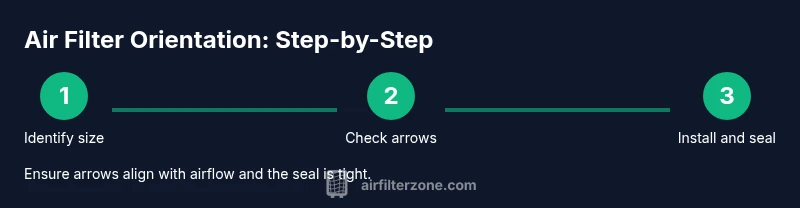
Quick Summary
- Identify the correct orientation before replacement.
- Follow arrows to ensure proper filtration.
- Seal the housing to prevent air bypass.
- Maintain a regular replacement schedule.
- Consult the manual for model-specific guidance.