How to Use Air Filter Cleaner: A Practical Guide for Home
Learn how to safely use an air filter cleaner to refresh washable filters, with a step-by-step approach, safety tips, and maintenance guidance for home and car filtration.

Using an air filter cleaner safely involves turning off the equipment, removing the filter, and applying the cleaner per the product instructions. Check filter compatibility first, avoid damaged filters, and ensure the media dries completely before reinstalling. For best results, test a small area, ventilate the workspace, and follow manufacturer safety warnings.
What is an air filter cleaner?
Air filter cleaners are formulations (sprays, foams, or soaking solutions) designed to remove embedded grime from washable filters. They are not universal; some filters are not meant to be cleaned, and others require only mild rinsing. The cleaner helps break down dust, oils, and residue so a filter can be reused. Always verify that your specific filter type is compatible with cleaning products and follow the cleaner’s directions. If in doubt, consult the filter manufacturer or a professional. By using a cleaner correctly, you can extend the life of washable filters and reduce waste, while maintaining effective air filtration. Remember, the goal is to refresh the media without altering its structure or performance.
Safety and prep before using an air filter cleaner
Safety first. Work in a well-ventilated area and wear gloves and a mask as needed to avoid inhaling fumes or coming into contact with cleaners. Keep cleaners away from children and pets. Read both the filter’s labeling and the cleaner’s instructions to confirm compatibility and any warnings about heat, solvents, or moisture exposure. Place a protective layer (old towel or newspaper) to catch spills and set up a drying area. Prepare cleaning tools (brushes, cloths) and a container large enough to accommodate the filter if soaking is allowed by the product. Never rush the drying process, as residual moisture can promote mold or odors.
Check compatibility with your filter type
Not all filters tolerate cleaning. Washable or reusable filters from HVAC systems, car cabins, and some drinking-water purifiers may accept cleaners, while disposable filters should never be cleaned. Identify the filter type (material, thickness, and marking) and verify with the cleaner’s label. If the cleaner specifies only sprays for certain media or warns against soaking, follow those limits. When in doubt, reach out to the manufacturer for guidance. Remember that improper cleaning can damage the media and reduce filtration efficiency.
Best practices for applying cleaner and scrubbing
Apply the cleaner evenly according to the product directions, avoiding saturation that could warp the media. Use a soft-bristle brush or sponge to loosen grime with gentle, circular motions. Rinse with clean water if the instructions permit; avoid high-pressure spray that could tear the media. Work from the clean side outward to prevent redepositing dirt. After cleaning, press gently to remove excess moisture without squeezing the media. Ensure any adhesive seals or edge gaskets remain intact.
Cleaning different filter types: HVAC, cabin, and car filters
HVAC and cabin air filters often use thicker media that can tolerate mild cleaning and air-drying, while car furnace filters may be more sensitive. Carbon-impregnated filters frequently rely on adsorption rather than washing, so check if cleaning is advised. For carbon or high-efficiency filters, prefer replacement over cleaning if the manufacturer forbids washing. Always separate washable filters from non-washable ones and follow the specific care guidance for each type.
Drying and reinstallation best practices
Thorough drying is critical to prevent mold, odor, or reduced filtration efficiency. Air-dry the filter on a clean rack in a dust-free area until no moisture remains in any fibers, which can take several hours to a full day depending on media thickness. Do not use heat sources like hair dryers or heaters, as they can warp the media. Reinstall only after the filter is completely dry, and then test the system to ensure proper airflow and performance.
Maintenance schedule and longevity tips
Regular inspection is key: check filters monthly and after heavy use for signs of wear, moisture, or odor. If a filter shows persistent dirt, damage, or reduced airflow after cleaning, it’s safer to replace rather than re-clean. Keep a log of cleaning dates and outcomes to guide future maintenance. For best results, combine cleaner use with a planned replacement schedule per manufacturer recommendations and local air quality needs.
Troubleshooting and common mistakes
Common mistakes include using an incompatible cleaner, soaking filters not designed for submersion, and drying with heat or direct sunlight. Over-wetting can damage the media or adhesives; never force dry or squeeze the filter. If you notice lingering odors, reduced airflow, or a warped frame, stop using the filter and replace it. When in doubt, consult the filter or cleaner manufacturer for definitive guidance.
Tools & Materials
- Nitrile gloves(Powder-free, non-latex)
- Protective mask or respirator(N95 or P100 recommended when spraying cleaners)
- Soft-bristle brush(Non-metallic to avoid tearing)
- Microfiber cloth(For wiping and drying)
- Bucket or basin(For soaking if allowed by cleaner)
- Mild dish soap(Used with water for preparation)
- Clean water (lukewarm)(For rinsing; avoid hot water)
- Toothbrush or small scrub brush(Detail cleaning in grooves)
- Drying rack or clean towel(Air-dry setup away from dust)
- Plastic tray or shield(Contains spills during cleaning)
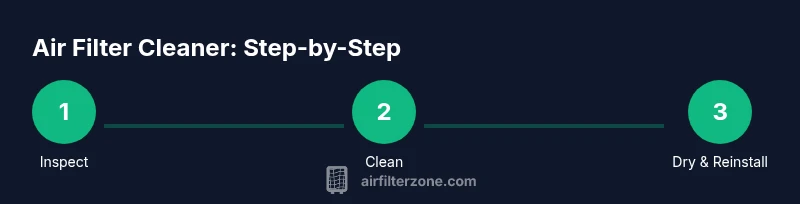
Steps
Estimated time: 60-120 minutes active time, plus varying drying time
- 1
Turn off equipment and remove the filter
Power down the unit and carefully unclip or slide out the filter. Place it on a clean surface to inspect for damage or wear before cleaning.
Tip: Check the filter labeling to confirm it’s washable. - 2
Select cleaners and set up workspace
Read the cleaner’s instructions for compatible media and any soaking requirements. Prepare a ventilated area and lay down a protective layer.
Tip: Use lukewarm water and mild soap unless the product specifies otherwise. - 3
Prepare cleaner and apply to the filter
If soaking is allowed, submerge as directed for the recommended duration. Otherwise, spray or apply with a damp cloth to break down residue.
Tip: Avoid soaking carbon-impregnated panels unless explicitly advised. - 4
Scrub gently and rinse (if allowed)
Gently scrub in a circular motion to lift grime. Rinse with clean water only if the cleaner instructions permit; otherwise wipe clean and remove moisture.
Tip: Use a soft brush to prevent media damage. - 5
Dry thoroughly before reinstalling
Set the filter on a rack in a dust-free area and let it dry completely—this may take hours to a day depending on thickness.
Tip: Do not use heat sources to speed up drying. - 6
Reinstall and test the unit
Once dry, reinsert the filter according to the equipment’s instructions and run a test cycle to confirm airflow returns to normal.
Tip: If airflow remains weak, re-check the installation or consider replacement.
FAQ
Can I use any cleaner on any filter?
No. Cleaners vary by filter media, and some filters are not washable. Always check both the filter’s care guide and the cleaner’s labeling before use.
Not every cleaner works with every filter. Check the care guides and labels before you start.
How long should a filter dry after cleaning?
Drying times vary with filter thickness and media. Ensure the filter is completely dry to prevent mold and odors before reinstalling.
Dry the filter completely before reinstalling to avoid mold or bad smells.
Can I clean carbon or HEPA filters?
Most carbon or HEPA filters are not intended to be cleaned. If the manufacturer forbids washing, replace the filter instead of attempting to clean.
Usually carbon and HEPA filters shouldn’t be cleaned; replace if cleaning isn’t advised.
What if the cleaner leaves a strong odor after drying?
Ventilate the area and ensure the filter is fully dry. If odor persists after reinstalling, replace the filter.
Ventilate well and make sure it’s fully dry; replace if odors linger.
Should I always replace instead of cleaning?
When in doubt or if the filter shows wear, damage, or persistent contamination, replacement is the safer option.
If in doubt, replacing is safer than risking ineffective filtration.
Watch Video
Quick Summary
- Verify compatibility before cleaning to protect media.
- Dry filters completely to prevent mold and odors.
- Follow manufacturer instructions for cleaners and filters.
- Replace filters if cleaning does not restore performance.