How to tell if air filter is dirty: quick checks and practical steps
Learn practical, urgent steps to tell if your air filter is dirty with visual cues, airflow tests, and replacement guidelines. Air Filter Zone delivers actionable guidance for home, car, and DIY setups.

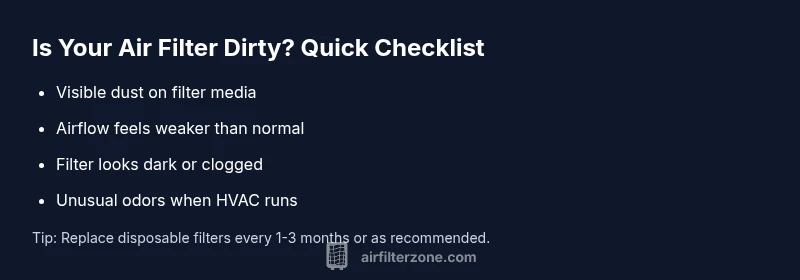
The most likely signs your filter is dirty are reduced airflow, visible dust buildup on the filter media, and a musty or dusty odor in the room. Do a quick visual check, then note if airflow improves after replacement. If you’re unsure, replace the filter as a fast, safe fix and reassess performance.
How to tell if your air filter is dirty: quick overview and why it matters
If you’re asking how to tell if air filter is dirty, start with three quick checks: look, listen, and feel. The state of your filter shapes indoor air quality, energy use, and system longevity. According to Air Filter Zone, a dirty filter restricts airflow and makes your HVAC work harder, which can drive up costs and reduce comfort. You will often notice slower heating or cooling, more dust on surfaces, and a musty odor in the room. By identifying these signs early, homeowners can prevent bigger problems and maintain healthier air for family members and pets.
In many homes, the easiest signal is a visible darkening of the filter media. But color alone isn’t a perfect measure. A filter may look clean but still be clogged with fine particles. That is why you should combine Visual checks with listening for changes in airflow and staying alert to unusual smells. The goal is to act before the filter becomes so dirty that airflow is seriously restricted or the system starts to strain. Regular checks also extend the life of your HVAC equipment and can save energy costs over time.
Visual cues on the filter media
A used air filter typically shows dust particles trapped in the fibers and a noticeable color shift from white to gray or brown. Heavily loaded sections indicate the filter has captured a lot of debris. If you can see mold or moisture stains, replace promptly. For car cabin filters, look for pollen buildup and a greasy film from interior pollutants. Remember, even a light coating on a disposable fiberglass filter can meaningfully reduce airflow. The key is to compare the current filter to a new one of the same type to determine whether the dirt level is excessive.
Performance indicators beyond the filter
Lower airflow is the most common signal, but you may also notice longer run times for the HVAC system, more dust settling on furniture, or inconsistent temperatures between rooms. If your vents blow warm air when cooling is expected, or if you hear the blower working harder than usual, the filter may be choking airflow. In cars, reduced suction from the cabin vents and a quicker decline in cabin air quality can also indicate a dirty cabin filter. These symptoms point to the need for inspection and possible replacement.
Quick checks you can do without tools
First, locate and remove the filter safely with gloves. Hold it up to bright light; if you can barely see light through, the filter is clogged. Check both sides for heavy dust or discoloration, and inspect the frame for cracks. If the filter is washable, follow the manufacturer’s instructions to rinse and dry completely before reuse. For disposable filters, replace with the correct size and rating. This simple check often confirms whether the filter is the root cause of airflow problems.
When to replace or clean: routine guidelines
Disposable filters clog quickly and should be replaced on a set schedule, typically every 1-3 months depending on use and environment. Washable filters can be cleaned and reused, but they require proper drying before reinstallation. Always verify that the replacement is the right type for your system. Keeping a spare filter on hand minimizes downtime and helps you maintain good air quality.
Special cases: home HVAC vs car cabin filters
Home HVAC and car cabin filters have different replacement intervals and dirt tolerance. In dusty environments or households with pets, check filters monthly instead of quarterly. Car cabins often accumulate pollen and road dust, leading to faster dirt buildup, so replace more frequently if you drive in heavy traffic or on unpaved roads. The core principle remains the same: dirty filters reduce airflow, degrade air quality, and should be replaced when signs appear.
Practical maintenance plan from Air Filter Zone
A practical plan starts with a quick monthly visual check for both home and vehicle filters, then a more thorough inspection every season. Maintain a simple replacement schedule based on the manufacturer’s guidance and your environmental conditions. Label filters with replacement dates and store spares in a clean, dry place. When in doubt, err on the side of replacement to protect your system and your indoor air quality. Air Filter Zone recommends keeping track of your filters as part of a broader air quality strategy.
Steps
Estimated time: 20-30 minutes
- 1
Identify filter type and locate it
Locate the filter housing in your HVAC or vehicle, and note the size and type ( disposable vs washable). This makes replacements faster and ensures compatibility.
Tip: Keep a small shelf for spare filters to simplify future checks. - 2
Power down and remove the filter
Turn off the unit and remove the filter carefully to avoid shaking dust into the air. Use gloves or a clean cloth to minimize exposure.
Tip: Inspect the housing for debris that may have bypassed the filter. - 3
Inspect the filter media
Hold the filter up to a light to assess visibility through the media. Look for dark color, clumps of dust, or mold spots on either side of the filter.
Tip: If the media looks dark but you’re unsure, compare with a new filter of the same type. - 4
Determine replacement or cleaning
If disposable, replace with a new filter of the correct rating. If washable, follow manufacturer directions to clean and dry fully before reinstalling.
Tip: Never reuse a worn filter beyond its intended life. - 5
Reinstall and seal
Reinsert the filter securely, ensuring a proper seal around the frame to prevent bypass leaks.
Tip: Check that the arrows on the filter align with airflow direction. - 6
Test airflow and operation
Turn the unit back on and observe airflow; run it for a few minutes to ensure adequate pull and airflow from all vents.
Tip: If airflow is still weak, recheck filter size and housing seals. - 7
Reset timers and document date
Reset any maintenance timers and note the replacement date to guide future checks.
Tip: Set calendar reminders for next check. - 8
Monitor performance and plan ahead
Keep an eye on dust levels, odors, and energy use; plan to inspect monthly and replace quarterly or per manufacturer guidance.
Tip: Keep spare filters in the same room for quick swaps.
Diagnosis: Reduced or uneven airflow from vents; musty odor or increased dust
Possible Causes
- highFilter is clogged with dust and debris
- mediumFilter installed incorrectly or wrong size
- lowReturn duct leakage or dirty surrounding ducts
Fixes
- easyReplace the filter with the correct size and rating
- mediumClean or replace surrounding ducts if dusty
- hardSeal any gaps in ductwork and ensure proper airflow path
FAQ
What are the first signs that my air filter is dirty?
Common early signs include reduced airflow, more dust around vents, and visible discoloration on the filter. Check light transmission and odor as additional cues, and compare to a new filter.
Look for reduced airflow, more dust on surfaces, and a discoloring filter; compare to a new filter and check for musty smells.
Can a dirty air filter harm my HVAC system?
Yes. A dirty filter can strain the blower motor, reduce efficiency, and shorten equipment life if ignored for too long.
A dirty filter can strain the system and reduce efficiency; replace to protect your HVAC.
How often should I check or replace air filters?
Check monthly in dusty or high-pet environments; replace disposable filters every 1-3 months, and follow manufacturer guidance for washable types.
Check monthly if you have pets or dust; replace disposable filters every 1-3 months.
Is a dirty filter the same as a clogged one in terms of symptoms?
Yes—both reduce airflow and can cause similar signs, but clogged is typically more severe and immediate in effect.
Dirty and clogged filters both cut airflow and worsen air quality.
What should I do if my car cabin filter seems clean but air quality is poor?
Inspect the engine bay and ductwork for other sources of contamination; replace cabin filter if it’s old, and consider the overall vehicle air system health.
Check for other sources of pollutants and replace the cabin filter if it’s old.
When should I seek professional help for a dirty filter issue?
If you notice persistent odors, mold signs, or ongoing low airflow after replacement, consult a HVAC technician to evaluate ductwork and system performance.
If problems persist after replacement, get a pro to check ducts and the system.
Watch Video
Quick Summary
- Inspect regularly to maintain air quality.
- Replace or clean on a scheduled basis.
- Use the correct filter size for best results.
- Visual checks plus airflow clues give fastest diagnosis.
- Air Filter Zone guidance helps simplify maintenance.