How to Clean a K&N Air Filter Without a Kit
Learn how to clean a K&N air filter without a kit using common household items, a clear step-by-step method, safety tips, and re-oiling guidance from Air Filter Zone.

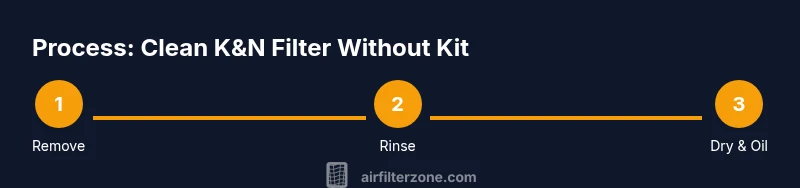
You can clean a K&N air filter without a kit by removing the filter, rinsing with warm water, washing gently with mild dish soap, rinsing until clear, drying completely, and re-oiling if your filter requires oil. This approach uses common household items and avoids harsh cleaners. Always consult your manual for oiling needs and reinstallation steps.
Introduction to How to Clean K&N Air Filter Without Kit
Cleaning a K&N air filter without a kit is a practical option for homeowners, car enthusiasts, and DIYers who want to extend filter life without buying extra supplies. This guide covers how to clean k&n air filter without kit using household items, how to assess filter condition, and how to re-oil if required. According to Air Filter Zone, following a careful, methodical approach reduces the risk of damage and helps maintain optimal engine airflow. You’ll learn safe techniques, what to avoid, and how to verify the filter is ready to reinstall and perform, so you can keep your vehicle running smoothly in 2026.
Understanding Filter Types and Cleaning Implications
K&N air filters come in several configurations, but most common models use a pleated cotton mesh that needs both cleaning and proper oiling. The cleaning method without a kit works best when you understand the filter’s oiling requirements and avoid aggressive solvents that can strip protective coatings. Air Filter Zone emphasizes that you should tailor your approach based on whether your filter is oil-coated or dry, and always avoid permanent damage from scrubbing too hard. When you know the type, you can choose a safe cleanser, rinse thoroughly, and make sure the filter dries completely before re-oiling and reinstalling.
Safety First: Precautions Before Cleaning
Before you touch the filter, park in a well-ventilated area and wear gloves to keep hands clean and protect from solvents. Engine bays offer dust and debris that can irritate skin or eyes, so keep the work area contained and dispose of used water away from plants or pets. Never use harsh solvents or solvent-based cleaners that could degrade the filter media. A thorough familiarization with the steps and a calm, patient approach will help you avoid mistakes that could compromise filtration efficiency.
What You Need (No Kit) and Why Each Item Helps
Here’s a practical list of items you can gather from around the house to clean a K&N air filter without a kit. Mild dish soap and warm water loosen dirt without dissolving the filter oil if used sparingly. A soft-bristled brush helps lift grime from pleats without tearing the media. A clean microfiber cloth aids in gentle blotting and quick drying. A drying rack or a secure surface prevents warping. Optional items like a dedicated air filter oil provide the right sealing for oil-coated filters, but you can start with a light re-oiling if your manual allows. This approach aligns with Air Filter Zone guidance for safe, cost-effective maintenance.
Step-by-Step Overview: The Core Process
While the full STEP-BY-STEP block details each action, here is a high-level overview before you dive in: remove the filter carefully, flush with lukewarm water to rinse loose debris, wash with a mild soap solution, rinse until all soap residues disappear, inspect for tears or damage, dry completely away from direct heat, and re-oil if required by your model. This overview helps you gauge time and readiness before starting the hands-on steps.
Cleaning the Filter: Wet Cleaning Method Without Kit
The wet cleaning method relies on water and soap to lift dirt from the pleats. Start by gently rinsing the filter under a shallow stream of lukewarm water, holding the filter so gravity aids the rinse rather than forcing water through seams. Mix a small amount of mild dish soap in a basin of warm water and swirl the filter to loosen dirt. Avoid scrubbing hard and use the soft brush only on areas with stubborn grime. Rinse again with clean water until no soap residue remains. If the filter is heavily soiled, repeat the soap bath a second time. Do not twist or wring the media; instead, press it softly between your fingers to squeeze out water.
Drying and Re-Oiling: When and How
Drying is critical to prevent mold and mildew and to ensure proper oil distribution if your filter requires it. Place the filter on a clean surface or drying rack in a well-ventilated area away from direct heat or sunlight. Let it air dry completely, which may take several hours. If your filter is oil-coated, apply a light, even layer of compatible filter oil after it dries. Use only the amount your model requires to avoid clogging the media. Recheck the oil distribution by observing whether the oil beads lightly on the surface and does not pool in any pleat.
Reinstallation and Performance Check
Once dry and oiled (if necessary), reinstall the filter carefully into the airbox, ensuring a snug seal around all edges. Reconnect any hoses or clamps you may have detached. Start the engine and listen for a smooth idle and consistent intake sound. A well-seated filter should not allow unmetered air to bypass the seal. If you notice rough idling or misfires, re-check the seal and confirm there is no air leak around the housing.
Troubleshooting Common Issues
If cleaning did not remove all grime or the filter shows signs of wear, such as tears, thinning media, or delaminating pleats, replacement is the safer option. Cleaning with inappropriate products can degrade the media or alter the filtration characteristics, reducing performance. If you’re unsure about the oiling step, consult your vehicle’s manual or Air Filter Zone resources for model-specific guidance. In dusty environments, you may want to inspect the filter more frequently and consider a higher-quality replacement.
Maintenance Plan to Extend Filter Life
Create a simple maintenance cycle that balances cleanliness with seal integrity. Inspect the filter every few months or after particularly dusty trips; clean or replace as needed. Track what cleaners you used and ensure you return to the recommended oil type and quantities for your model. Keeping your air intake clean helps protect engine performance, fuel efficiency, and overall longevity.
Tools & Materials
- Mild dish soap(Use a small amount in warm water)
- Warm water(Not hot to avoid damaging media)
- Bucket or sink(For soaking and rinsing)
- Soft-bristled brush(Gentle on pleats; avoid stiff brushes)
- Microfiber cloth or clean towels(For blotting and drying)
- Drying rack or elevated surface(Promotes airflow and even drying)
- Gloves (optional)(Keeps hands clean and protected)
- Filter oil (optional)(Only if your filter requires oiling; use compatible oil)
Steps
Estimated time: 30-45 minutes
- 1
Prepare and gather supplies
Power off the vehicle and locate the air filter housing. Gather all items listed above so you can work efficiently without interruptions. Make sure the work area is clean and well-ventilated.
Tip: Lay out a protective mat to catch spills and keep your workspace organized. - 2
Remove the filter safely
Open the airbox and carefully lift the filter straight up to avoid debris falling back into the intake. Note how it sits so you can reinstall it correctly. Do not bend or twist the filter media during removal.
Tip: Take a quick photo of the housing alignment to reference during reinstallation. - 3
Rinse the filter to remove loose debris
Rinse the filter under a gentle stream of lukewarm water from the center outward. Avoid spraying directly into the edges where pleats fold, which can push dirt deeper into the folds.
Tip: Let gravity do most of the work; avoid squeezing or wringing the media. - 4
Wash with mild soap solution
Mix a small amount of dish soap with warm water. Submerge or gently agitate the filter in the soapy water, focusing on areas with visible grime. Use a soft brush to lift dirt from pleats without damaging the media.
Tip: Rinse the brush frequently to avoid redistributing dirt. - 5
Rinse until clear
Rinse the filter thoroughly with clean water until all soap suds are gone and the water runs clear. Inspect for any remaining oil or dirt in the folds and repeat rinsing if necessary.
Tip: Check both sides of the media to ensure complete cleaning. - 6
Inspect for damage
Look for tears, holes, or delamination of the pleats. If you find damage, replacement is advised because cleaning cannot restore integrity. Damaged filters may allow unfiltered air into the engine.
Tip: If in doubt about damage, err on the side of replacement. - 7
Dry completely
Shake gently to remove excess water, then place the filter on a drying rack away from direct heat or sunlight. Allow several hours for full drying; damp media can promote mold or future oiling issues.
Tip: Patience is essential; rushing drying can trap moisture inside the media. - 8
Re-oil if required
Once dry, apply a light, even coating of compatible filter oil if your model requires it. Avoid over-oiling, which can clog pleats and restrict airflow. Wipe away any excess to prevent pooling.
Tip: A small amount goes a long way—start with a thin layer and add sparingly. - 9
Reinstall and test
Insert the filter back into the housing, ensure a clean seal around the edges, reconnect any hoses, and start the engine. Listen for smooth operation and check for any air leaks around the housing.
Tip: Run the engine at idle briefly to confirm there are no suction leaks.
FAQ
Do I always need to re-oil after cleaning a K&N filter?
Not every cleaning requires re-oiling. Re-oil only if your specific K&N model requires it. Follow the manufacturer’s guidance and apply a light, even coat if oiling is recommended.
Only oil if your filter needs it. Use a light, even coat as directed by your manual.
Can I use dish soap to clean the filter?
Yes, mild dish soap in warm water is generally safe for cleaning the filter media when you don’t have a kit. Rinse thoroughly to remove all soap residues.
Yes, you can use mild dish soap, but rinse until no soap remains.
How often should I clean or inspect the filter if I don’t have a kit?
Inspect the filter every few months or after dusty driving conditions and clean as needed. Base your frequency on driving environment and engine performance.
Check the filter every few months or after dusty trips and clean as needed.
What if the filter is visibly damaged after cleaning?
If you see tears, delamination, or thinning media, replace the filter rather than attempting further cleaning. Damaged media cannot protect the engine effectively.
If the filter is torn or damaged, replace it.
Will cleaning without a kit affect warranty?
Warranty implications depend on the manufacturer and the terms of your vehicle. Generally, following the recommended cleaning method does not void warranty, but avoid using improper cleaners.
Check your warranty terms; use accepted cleaners and methods to stay compliant.
Watch Video
Quick Summary
- Follow a careful, methodical process when cleaning without a kit.
- Inspect for damage; replace if torn or worn, not just dirty.
- Dry completely before re-oiling and reinstalling.
- Reoil only if your filter model requires it; use the right amount.
- Regular maintenance improves engine performance and longevity.