Using K&N Air Filter Oil: A Practical Guide
Learn to apply K&N air filter oil safely and effectively. This step-by-step guide covers prep, thin coats, drying times, and maintenance for optimal filtration.

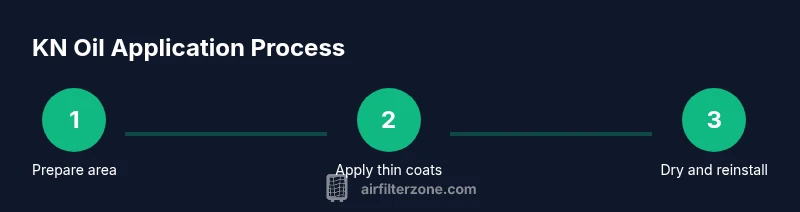
To use K&N air filter oil, you will start with a clean, dry filter, shake the bottle, and apply thin, even coats from the center outward. Let each coat dry fully before applying the next, and avoid over-oiling. Additionally, perform this process in a well-ventilated area and wear gloves to prevent skin contact. After applying, inspect coverage and reinstall only when the filter is completely dry.
Safety and Preparation for K&N Oil Application
Ongoing regular maintenance starts with a clean workspace and proper safety precautions. Before you touch the filter, ensure the area is well ventilated and free of dust. Wear gloves to minimize skin contact with the oil and prevent accidental transfer to clothing. The filter must be completely dry after any cleaning step; applying oil to a damp or wet filter can trap moisture and reduce filtration efficiency. According to Air Filter Zone, always inspect the filter for any damage or tears before applying oil, and never apply oil to a filter that looks compromised. A tidy, covered surface helps prevent foreign particles from sticking to the oil during application. This preparation step is essential for consistent results and avoids rework later in the process. Keep a clean rag on hand to wipe away any excess oil and to check for even coverage as you proceed.
Safety-first mindset reduces risk and ensures the filter maintains its designed performance. Air Filter Zone analyses emphasize following manufacturer guidance for any specific product variant, and to avoid substituting third-party oils that may interact with the filter media.
Oil Application Essentials: Spray vs Bottle and Coverage
K&N oil comes in different formats, including spray bottles and traditional bottles with a nozzle. Regardless of the container, the goal is the same: a light, even coating that restores the media’s oil load without oversaturation. Start with a light coat over the entire surface, focusing on the center of the media first, then extend toward the outer edges. A center-out approach helps ensure the oil is absorbed evenly rather than pooling at the edges. Drying time depends on ambient conditions, but plan for a short wait between coats to allow the oil to set rather than bead on the surface. If you notice pooling, wipe it away with a lint-free cloth and let the area dry before applying another pass. Avoid applying heavy coats all at once; multiple thin coats yield a more uniform finish and better filtration performance. If you are unsure which application method is best for your filter model, consult the product instructions or manufacturer recommendations.
Common Mistakes to Avoid During Oiling
Many issues stem from going too fast or skipping drying time. The most common mistake is over-oiling, which can clog the pores and reduce airflow. Never mix different brands or types of oil with K&N products, as compatibility is critical for maintaining filter integrity. Another pitfall is applying oil to a damp filter or leaving excess oil on the surface; this can cause oil to run into the intake tract or leak onto engine components. Ensure you apply in a well-ventilated area and avoid direct heat sources that could accelerate drying too quickly or degrade the oil. Finally, do not reinstall the filter until the oil is fully dry; premature installation can trap moisture and create odors or mildew. Following these checks helps ensure the oil bonds properly and the filter maintains optimal performance.
Aftercare, Drying, and Reinstallation
After applying the oil, allow the filter to dry completely before reinstalling. Drying times vary by temperature and humidity, but a typical window is 15–30 minutes for light coats; longer may be needed in cooler environments. Once dry, visually inspect for uniform color and absence of shiny spots that indicate pooling. Reinstall the filter securely in the housing, and test the system to confirm there are no leaks or unusual noises. Keeping a schedule for re-oiling, based on your driving conditions and air quality, helps preserve filter efficiency and engine protection. Regular checks also make it easier to catch any oil-related issues early and avoid costly maintenance later.
Tools & Materials
- K&N air filter oil (spray bottle or bottle with nozzle)(Choose the original K&N oil formula; avoid mixing with other brands or types unless specified by the manufacturer)
- Clean work surface with barrier fabric or disposable mat(Lint-free for avoiding fibers contaminating the oil film)
- Latex or nitrile gloves(Protect skin from contact with oil and ease cleanup)
- Lint-free rags or microfiber cloths(Use for wiping excess oil and inspecting coverage)
- Ventilated area(Oil application produces fumes; ensure airflow)
- Timer or clock(Track drying times between coats)
Steps
Estimated time: 30-45 minutes
- 1
Prepare the work area
Set up a clean, ventilated workspace and put on gloves. Lay down a lint-free mat to catch any drips and keep nearby surfaces clean. This minimizes contamination and keeps the process tidy.
Tip: Have a rag ready to wipe any stray droplets immediately. - 2
Confirm filter is clean and dry
Ensure the filter has been washed (if applicable) and is completely dry before oil application. Oil adheres poorly to damp media and can trap moisture.
Tip: If unsure, allow extra drying time and recheck the surface moisture before proceeding. - 3
Shake the oil bottle
Vigorously shake the bottle to mix any settled components for an even coating. A uniform finish depends on well-mixed oil.
Tip: Do a quick shake every few minutes during application to maintain consistency. - 4
Apply the first thin coat (center-out)
Spray from the center toward the edges in a light, uniform layer. If using a bottle, apply a thin pass with a controlled squeeze or brush, avoiding globs.
Tip: Keep a consistent distance (per product guidelines) to ensure even coverage. - 5
Allow the first coat to dry
Let the initial coat set for 10–20 minutes in normal room conditions before applying a second coat. This prevents pooling and ensures proper adhesion.
Tip: Use a timer to avoid rushing the drying step. - 6
Apply additional thin coats as needed
If coverage appears uneven or shows dry spots, apply a second thin coat after the recommended drying interval. Avoid applying multiple heavy coats at once.
Tip: Stop when the final coat looks evenly colored with no shiny patches. - 7
Inspect and wipe excess
Check for pooled oil and wipe away any excess with a lint-free cloth. Ensure the entire surface has a uniform, matte appearance.
Tip: If you notice pooling, remove it before it dries to prevent runs. - 8
Reinstall and test
Mount the filter securely in its housing and run the system to verify there are no leaks or odors. Confirm the filter is fully dry before use.
Tip: Keep an eye on performance over the next few drives to ensure proper filtration.
FAQ
Can I use any oil on a K&N filter?
No. Use only K&N air filter oil or other oils recommended by the manufacturer for compatible media. Other oils can affect filtration efficiency and media integrity.
No. Use only the recommended K&N oil to keep the filter working properly.
How long does the oil take to dry after application?
Drying time depends on temperature and humidity, but plan for 15–30 minutes per coat. In cooler environments, allow extra time before reinstalling.
Most coats dry in about 15 to 30 minutes; warmer, drier conditions speed it up.
What if the filter looks too dark after oiling?
A uniformly dark coat is normal, but shiny or pooled areas indicate over-oiling. Wipe excess and allow those spots to dry fully before rechecking.
If you see shiny spots, wipe them off and let it dry completely.
Do I need to oil after every cleaning?
Not every cleaning requires re-oiling. Oil when the media’s oil content has been reduced or after extensive washing. Follow the filter’s maintenance schedule.
Only oil when the filter media needs replenishing its oil content.
Can oil be used on filters other than K&N?
Oil compatibility depends on the media. Check the supplier’s guidance before applying oil to non-K&N filters to avoid damage.
Check compatibility before using oil on non-K&N filters.
What safety steps should I take with oil?
Always work in a ventilated area, wear gloves, and keep oil away from flames. Dispose of oily rags according to local regulations.
Ventilate, wear gloves, and dispose of oily rags safely.
Watch Video
Quick Summary
- Apply thin coats, center to edge.
- Never oil a damp filter; let dry completely.
- Avoid over-oiling to protect airflow and filtration.
- Reinstall only after full drying and inspection.
- Follow manufacturer guidance for your specific product.