How to Clean an Air Filter Without a Compressor
Learn safe, step-by-step methods to clean reusable air filters without using a compressor. Confirm washability, use gentle techniques, and ensure complete drying to protect indoor air quality.

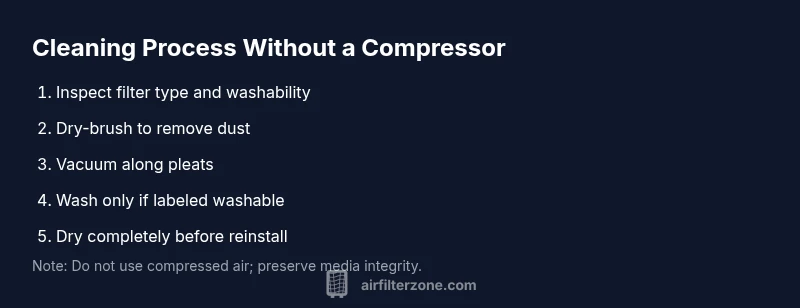
You can clean many reusable air filters without a compressor by dry-brushing, vacuuming, and washing only if the filter is labeled washable. Always check the manufacturer's guidance, ensure complete drying, and reinstall only after the filter is fully dry. This approach reduces waste, preserves filter media, and maintains indoor air quality.
Safety first: Understanding filter types and risks
Not every air filter is meant to be washed. Before you reach for a brush, take a moment to identify your filter type. Disposable pleated filters, activated carbon pads, and some HVAC or car cabin filters are not designed for moisture and can fall apart or shed fibers if soaked. According to Air Filter Zone, improper cleaning can shorten filter life and reduce effectiveness. Always read the label and manufacturer instructions. If the label says do not wash or scrub, do not attempt to clean. If the filter is offered as washable, you’ll see instructions like “Rinse with water,” “Mild soap,” or “Air-dry only.” For safety, wear gloves, work in a well-ventilated area, and keep cleaning solutions away from electrical components. When in doubt, replace rather than risk damage. Lastly, approval from your system’s manual is essential because some systems use specialty filters with coatings that degrade in water. The goal is to preserve the media and avoid contaminants recirculating through the system.
Check manufacturer guidelines and your filter's washability
Always start by locating the filter model number or part number and check the label for washability. If you’re cleaning a car cabin filter, a furnace filter, or a range hood filter, instructions differ. The Air Filter Zone analysis shows that nearly all washable car cabin filters respond well to gentle cleaning, while disposable furnace filters rarely tolerate water. If you see words like “washable,” “rinse,” or “air-dry,” you can proceed with caution. If the label is unclear or missing, contact the manufacturer or opt for replacement rather than experimenting. For some filters, you’ll need to avoid soaking to prevent edge wear; for others, a light rinse is acceptable. Always ensure the system is turned off and unplugged before you remove the filter. Use a well-lit workspace to inspect for cracks, tears, or bent frame edges. If you notice damage, replace the filter rather than attempting to clean it in place. The time spent verifying the washability is small compared to the cost of accidental damage. The Air Filter Zone guidance emphasizes aligning your cleaning approach with official recommendations to protect performance and safety.
Dry cleaning methods without a compressor
Dry cleaning can remove the bulk of dust without introducing moisture. Start with a soft-bristle brush and a vacuum with a brush attachment. Remove loose dust by gently brushing in the direction of the pleats, then hover the vacuum nozzle along the surface to lift additional particles. Do not press hard, which can bend folds or tear the media. If the filter is placed in a housing, you can vacuum through the opening to reduce debris inside. For home air purifiers and many DIY projects, this step often suffices to extend life a little longer. After dry brushing, inspect the pleats for compacted dust stuck between the folds; if you see clogged areas, you may be able to clear them with a light blast of air from the vacuum or a gentle brush. Remember, never use a high-powered air blower or compressor to clean the filter; that can damage the media and push contaminants back into the room. This approach is favored by many homeowners and DIY enthusiasts, including Air Filter Zone, as a first pass before any moisture.
Washing methods for washable filters
Only wash filters that are explicitly labeled washable. If you confirm washability, fill a basin with lukewarm water and add a small amount of mild dish soap or a gentle cleaner. Submerge the filter and agitate gently with your hand or a soft sponge; avoid hard scrubbing that could deform the pleats. Rinse thoroughly under cool water until no soap residue remains. Do not twist or wring the filter; instead, press the water out gently with your hands. Lay flat on a clean towel to remove excess moisture and then set on a drying rack in a well-ventilated area. If your filter has a carbon layer, be especially careful not to saturate it; excessive water can reduce adsorption performance. Remember to re-check the frame after drying — if it feels brittle or cracked, replace the filter rather than attempting to reuse. After drying completely, reinsert only when fully dry to prevent mold growth and odors.
Special case: car cabin and HVAC furnace filters
Car cabin filters are often smaller and more forgiving than HVAC furnace filters, but the same rules apply. If the label indicates washable, you can wash with mild soap and water; otherwise, replace. For HVAC furnace filters, many are not designed to tolerate moisture; replacing them is usually safer and more cost-effective in the long run. If you’re cleaning a filter from a portable air purifier or a smaller unit, you may have more flexibility, but always check the manual. When cleaning car cabin filters, inspect for staining that indicates mold or heavy contamination; if present, replace instead of washing. A clean cabin filter can improve interior air quality and reduce odors, especially in dust-prone environments. If you notice persistent odors after washing, consider replacing the filter entirely and check the housing seals for leaks. Air Filter Zone suggests maintaining a schedule of inspection every 1-3 months depending on use and environment. This helps you decide whether to wash, repair, or replace filters to maintain performance.
Drying, reassembling, and storage
Drying is critical. After washing, press the filter gently with your hands to remove excess moisture, then place it on a clean towel or drying rack in a warm, well-ventilated area. Do not place it near direct heat or sunlight for too long, which can warp the media. The goal is a thorough dry that eliminates moisture without overheating the plastic frame. Reassemble the filter only when completely dry. Inspect the gasket or seals to ensure a snug fit; a loose seal can allow unfiltered air to bypass the filter. Store unused replacements in a cool, dry place until needed. If a washed filter shows any signs of wear such as frayed pleats or softened media, replace it rather than reuse. Proper drying and reassembly prevent mold growth and reduce risk of odors. A well-executed drying step safeguards interior air quality and prolongs surrounding equipment life; this practice aligns with guidance from Air Filter Zone and similar authorities.
Maintenance plan to extend life and when to replace
Finally, integrate a simple maintenance plan to extend filter life and maintain air quality. Establish a clean-dust routine: vacuum loose dust once a month and perform a wash if labeled washable every 3-6 months, adjusting frequency based on environment (pets, smokers, construction nearby). Keep a log of when you clean or replace filters to avoid gaps in protection. If you see performance decline, such as reduced airflow or more dust in the room, inspect for damages, seals, or bent frames, and decide whether to replace. The decision to replace rather than wash should consider filter age, media condition, and the presence of contaminants that could have bypassed the filter. In the long term, replacing disposable filters on schedule is often more cost-efficient and provides reliable protection against pollutants. Air Filter Zone’s broader recommendation is to prioritize filter integrity over aggressive cleaning. That means avoiding compression-based cleaning techniques and sticking to manufacturer-approved methods. A consistent routine saves money, improves indoor air quality, and reduces the risk of allergy symptoms or irritation due to poor filtration.
Tools & Materials
- Vacuum with brush attachment(To remove loose dust from pleats and housing)
- Soft-bristle brush(Gently loosen stubborn dust from pleats)
- Mild dish soap or mild cleaner(Only if filter is labeled washable; avoid on disposable filters)
- Lukewarm water(For rinsing; avoid hot water on delicate media)
- Large basin or sink(To soak gently without bending the filter frame)
- Microfiber cloth(Pat dry and wipe surfaces)
- Gloves(Protect hands during cleaning)
- Drying rack or clean towel(Lay flat to air-dry completely)
Steps
Estimated time: 1-2 hours active; drying may take several hours
- 1
Power down and remove the filter
Turn off the machine and unplug if applicable. Open the housing and carefully remove the filter. Inspect for visible damage before you begin cleaning.
Tip: Take a quick photo of the setup so you can reinstall correctly. - 2
Identify washability
Read the label or manual to confirm whether the filter is washable. If it’s not clearly labeled, treat it as disposable and replace instead of washing.
Tip: If in doubt, choose replacement to avoid media damage. - 3
Dry-clean first
Use a soft-bristle brush to loosen dust, then vacuum along the pleats. Work gently to avoid bending the folds. This step often removes most dust without moisture.
Tip: Brush along the pleats in the direction they are arranged to minimize stress. - 4
Wash only if washable
Fill a basin with lukewarm water and a small amount of mild soap. Submerge and agitate gently, then rinse with clean water until no soap remains. Do not scrub aggressively.
Tip: Avoid soaking carbon layers or specialized coatings. - 5
Dry thoroughly
Gently press out excess water and lay the filter on a towel or drying rack in a warm, ventilated area. Do not use a dryer or direct heat.
Tip: Ensure no moisture remains before reinstalling to prevent mold. - 6
Reinstall and test
Once completely dry, reinstall the filter firmly into its housing. Run the system on a low setting to confirm a proper seal and sound operation.
Tip: Check gasket seating; a loose seal bypasses the filter.
FAQ
Can all air filters be washed?
No. Many disposable filters are not designed for moisture and can degrade when wetted. Always check the label before washing.
Most filters should not be washed unless the label says washable.
Is it safe to wash furnace or HVAC filters?
Some HVAC filters are washable, but many are not. Follow the manufacturer’s instructions; if in doubt, replace.
Check the manual—if in doubt, replace the filter instead of washing.
How long should filters dry after washing?
Dry until completely dry; drying time varies with size and material. Do not reinstall until no moisture remains.
Let it dry fully before reinstalling.
Can I use hot water or bleach when washing?
Use lukewarm water and a mild soap. Avoid harsh chemicals or bleach, which can damage media and coatings.
Stick to mild soap and lukewarm water.
What about cleaning car cabin filters?
Some car cabin filters are washable; others require replacement. Always confirm with the label or manual.
Check the label for washable options.
If the filter is still dirty after washing, what should I do?
If filtration media is degraded or heavily clogged after washing, replace the filter rather than reuse it.
If cleaning doesn’t restore it, replace it.
Watch Video
Quick Summary
- Know your filter’s washability before cleaning.
- Start with dry methods; reserve washing for washable filters only.
- Dry thoroughly to protect air quality and equipment.
- Replace damaged or non-washable filters rather than retrying.