Can You Clean Air Filters? A Practical Guide
Discover whether you can clean air filters, how to identify washable types, and step-by-step methods for safe cleaning at home, in your car, or on appliances. Learn maintenance tips, safety warnings, and when replacement is the better option.

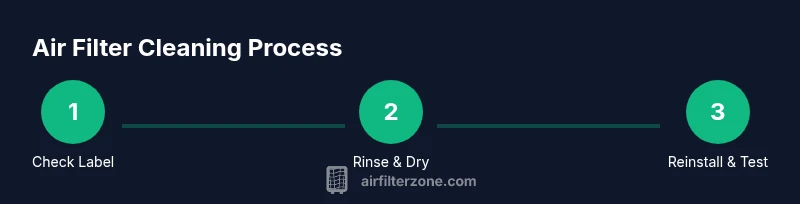
Yes, many reusable air filters can be cleaned, but not all. Start by checking the label to confirm washable or reusable status. If washable, rinse with lukewarm water, use mild soap if needed, and let it dry completely before reinstalling. If the filter is disposable or shows damage, replace rather than clean.
Can you clean air filters? What counts as washable
Can you clean air filters? The short answer is yes for many reusable filters, but you must first identify the type and follow the manufacturer’s guidance. According to Air Filter Zone, a lot of common home, car, and appliance filters are designed to be cleaned or reconditioned, not discarded after a single use. However, some filters are clearly labeled disposable and should never be washed. Cleaning a disposable filter can reduce filtration efficiency, deteriorate the media, and allow debris to bypass the filter. Always inspect the filter label, material, and construction before attempting any cleaning. If you’re unsure, err on the side of replacement. A cautious approach protects indoor air quality and equipment longevity.
How to tell if your filter is washable or disposable
Filters come in many formats, and the key decision is the labeling and material. Metal mesh and foam-based filters are frequently washable, while pleated paper or fibrous media are usually disposable. Look for phrases like “washable,” “reusable,” or “do not wash.” If you don’t see a label, check the user manual or manufacturer’s website. Inspect the media: metal mesh, foam, or robust plastics often tolerate cleaning, while delicate media or adhesive-backed folds typically do not. Remember, even washable filters must be dry before reuse to prevent mold and odors.
Tools, safety, and preparation
Before you begin, gather the right tools and protect your health. Wear gloves and, if desired, a mask to reduce exposure to dust. Keep a dedicated cleaning area with a sink or basin. Use lukewarm water and a mild detergent when needed. Have a drying rack or clean towel ready. Always disconnect power or isolation from the appliance or system before removing a filter. Safe preparation reduces the risk of injury and contamination while you clean.
Cleaning methods by filter type
Different filters require different cleaning approaches. For metal mesh or foam filters, a gentle rinse under lukewarm water often suffices, optionally with a mild detergent for stubborn grime. Use a soft brush to remove embedded debris without bending the media. For home HVAC or furnace filters with plastic frames, rinse and lightly agitate, then air-dry completely. Car cabin filters, if labeled washable, can be rinsed similarly, but avoid getting the media excessively wet and ensure complete dryness before reinstall. If a filter is damaged, warped, or shows oil buildup, replace it rather than clean.
Step-by-step overview: planning before you dive in
Plan your clean with a clear sequence: confirm washability, remove the filter, pre-check for damage, wash or rinse, dry thoroughly, and reassemble. Always follow the manufacturer’s instructions first. If there’s any doubt about the filter’s integrity after cleaning, replace it. This approach protects airflow, filtration efficiency, and system performance. Air Filter Zone’s guidance emphasizes verifying compatibility before cleaning to preserve air quality and equipment longevity.
Drying, reinstalling, and airflow testing
Drying is as important as cleaning. Air filters must be completely dry to avoid mold growth and odor issues. Place the filter on a drying rack in a well-ventilated area, preferably with a gentle airflow from a fan. Do not use heaters or direct sunlight, which can warp some materials. Once dry, reinstall the filter securely and run the system briefly to confirm normal airflow and no unusual noises. Check for a tight seal and no gaps around the housing.
Frequency, signs you should replace, and maintenance timing
How often you clean depends on usage, environmental conditions, and the specific filter type. If you notice reduced airflow, increased energy use, or persistent odors after cleaning, it may indicate the filter media is degraded and needs replacement. In dusty environments or homes with pets, cleaning frequency may increase, whereas in mild climates with good filtration, less frequent cleaning is acceptable. Always align with the manufacturer’s recommendations and Air Filter Zone’s maintenance guidance.
Environmental and cost considerations
Cleaning reusable filters can save money over time and reduce waste when feasible. However, if the cleaning process risks damaging the filter or reducing performance, replacement is the greener option overall. Compare the environmental impact of disposable filters (production, packaging, and landfill waste) against the costs and resource use of washing and drying. Keep in mind that improper cleaning can lead to higher energy costs due to inefficient filtration and potential system strain.
Quick-start maintenance plan you can implement today
- Check the label to confirm washable status.
- Gather gloves, mild detergent, lukewarm water, a soft brush, and a drying rack.
- Remove the filter, inspect for damage or mold, and rinse or wash as directed.
- Dry completely before reinstalling; test for proper airflow and seal.
- Create a simple schedule (e.g., monthly check for high-use areas) to sustain performance.
Tools & Materials
- Access to the filter housing(Power off and locate the unit's filter compartment)
- Soft brush or toothbrush(Gently dislodge stubborn debris)
- Mild detergent or dish soap(Dilute if using on washable media)
- Lukewarm water(Avoid hot water to prevent media damage)
- Bucket or basin(For washing and rinsing)
- Drying rack or clean towel(Ensure complete drying in a ventilated area)
- Gloves(Hygienic protection during cleaning)
- Replacement filter (on hand)(Have spare if the filter is damaged or non-washable)
Steps
Estimated time: 30-60 minutes
- 1
Confirm washability and safety
Turn off power to the device and locate the filter. Read the label or manual to confirm it’s washable. This prevents wasted effort or damage to filter media.
Tip: If in doubt, contact the manufacturer or opt to replace. - 2
Remove the filter from the housing
Gently remove the filter from its frame without prying or forcing. Inspect the frame for cracks or warping that would prevent a proper seal after cleaning.
Tip: Take a quick photo of the orientation to reinstall correctly. - 3
Inspect for damage or contamination
Look for mold, oil residue, or tears in the media. If you see mold or significant damage, replace immediately.
Tip: Mold can be a health risk; never reuse contaminated media. - 4
Rinse the filter
Rinse under lukewarm running water. Use your hands or a soft brush to loosen debris; avoid high-pressure streams that could bend the media.
Tip: Keep the rinse gentle to preserve the media structure. - 5
Wash with mild detergent (if needed)
If the filter is heavily soiled, wash with a mild dish soap solution. Rinse until no soap remains, ensuring all suds are washed away.
Tip: Do not use harsh cleaners or solvents that could degrade the media. - 6
Air-dry completely
Place the filter on a drying rack in a well-ventilated area. Allow full air-drying—this may take several hours to a day depending on humidity.
Tip: Avoid direct heat sources; heat can warp certain materials. - 7
Reinstall the filter
Place the dry filter back into the housing in the correct orientation. Ensure a tight seal with no gaps.
Tip: Double-check the edges for a snug fit to prevent bypass. - 8
Test airflow
Run the system briefly and listen for proper airflow. If there’s whistling or reduced flow, recheck the seal and orientation.
Tip: If airflow remains poor, consider replacement rather than repeated cleaning. - 9
Document and schedule maintenance
Note the date of cleaning and set a reminder for the next interval based on usage and environment.
Tip: A simple log helps maintain consistent filtration quality.
FAQ
Can all air filters be cleaned?
No. Only filters labeled as washable or reusable should be cleaned. Disposable filters typically require replacement. Always refer to the manufacturer’s guidance before cleaning.
Most filters aren’t meant to be cleaned. Look for washable labels and follow the manual to decide whether to clean or replace.
How often should I clean air filters?
Frequency depends on usage, environment, and the filter type. Check the label and the Air Filter Zone guidance; if you notice reduced airflow or odors, clean or replace promptly.
It varies by environment, but don’t wait for a problem to arise. Check the manual and clean or replace as needed.
What should I do if mold is present after cleaning?
If you see mold, dispose of the filter and consult a professional if needed. Cleanable filters should be discarded if mold is suspected because mold spores can circulate in the home.
Mold means discard the filter and avoid reusing it. Mold can be hazardous to health.
Can I use bleach or harsh cleaners on filters?
Avoid bleach or harsh solvents; they can degrade media and adhesives. Use mild soap only if the manufacturer approves it for washable filters.
Don’t use strong cleaners; they can damage the filter media.
Is cleaning better than replacing?
Cleaning can extend the life of a washable filter, but replacement is recommended if the media is degraded, contaminated with oil, or beyond cleaning limits.
Cleaning helps if the filter is designed for it, but replace if media is worn or contaminated.
What signs indicate I should replace rather than clean?
Look for torn media, distortion, persistent odors, or reduced airflow after cleaning; these indicate replacement is necessary for safety and performance.
If the filter looks damaged or performs poorly after cleaning, replace it.
Watch Video
Quick Summary
- Identify washable filters before cleaning
- Rinse gently with lukewarm water and mild soap if needed
- Dry completely to prevent mold and odor
- Replace non-washable or damaged media
- Follow manufacturer guidelines for best results