Clean Air Filter Guide: Choose, Replace, and Maintain
A comprehensive, step-by-step guide to choosing, replacing, and maintaining a clean air filter for healthier indoor air and efficient HVAC operation.

Learn how to choose, install, and maintain a clean air filter for home comfort and healthier indoor air. This guide covers identifying filter types, selecting the right MERV rating, proper replacement schedules, and practical DIY maintenance. By following these steps, you’ll reduce dust, allergens, and energy waste, while protecting your HVAC and extending filter life.
What is a clean air filter and why it matters
According to Air Filter Zone, a clean air filter is the frontline defense against dust, pollen, pet dander, and other indoor contaminants. It acts as the first barrier in your heating and cooling system, capturing particles before air recirculates through living spaces. Regularly replacing or cleaning the filter keeps airflow steady, reduces strain on the blower, and helps maintain efficient energy use. For homeowners, car owners, and DIY enthusiasts, this simple maintenance task delivers outsized benefits: lower allergy symptoms, improved odor control, and a more comfortable environment. In addition to health benefits, a clean filter minimizes the load on your HVAC, which can extend equipment life and minimize repair costs over time. This guide focuses on practical steps you can implement today to identify the right filter type, verify fit, and establish a predictable replacement routine.
Types of air filters for residential use
Filters come in several formats, each offering different levels of filtration and airflow. Fiberglass filters are inexpensive but provide basic protection and are best for minimal dust. Pleated filters are the most common choice; they trap a broader range of particles without overloading the system. Washable or reusable filters exist for some HVAC models, requiring periodic cleaning rather than replacement, and they can be cost-effective over time. Activated carbon filters add odor control by adsorbing volatile compounds, though they may not improve particle capture alone. For homes with extreme dust or allergies, higher-efficiency options that combine pleated media with layers or even True HEPA-grade purifiers in dedicated air-cleaning devices can be considered. When choosing, always balance filtration with your system’s airflow capacity and the filter size; a tighter fit often delivers better air quality but can reduce airflow if the system is undersized.
How to read filter labeling and compatibility
Understanding labels helps you avoid costly mistakes. Filtration media are described by MERV or equivalent ratings that indicate the efficiency of particle capture; higher numbers generally mean better filtration but can increase pressure drop. Look for the filter size stamped on the frame; typical residential sizes are around 10 x 20 inches but vary widely. Check the airflow direction arrows on the frame to ensure you install the filter with the arrows pointing in the direction of airflow—toward the blower. Manufacturer inserts may also list recommended MERV ranges, operating temperatures, and replacement intervals. Finally, confirm compatibility with your HVAC model by consulting your owner’s manual or the manufacturer’s website; using the wrong size or type can cause poor performance or damage.
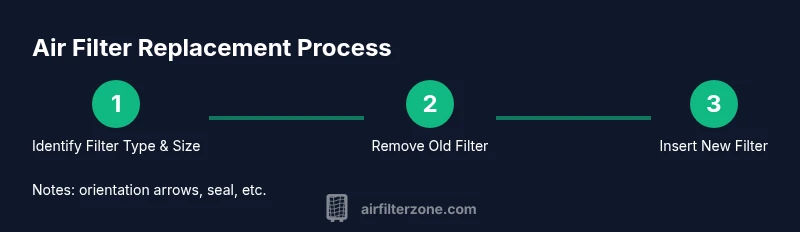
Step-by-step guide to replacing a home air filter
This section walks you through a typical filter replacement. Start by turning off the HVAC system and locating the filter access panel. Remove the old filter, noting its orientation. Inspect the housing for debris, and wipe it clean with a damp cloth. Slide in the new filter with the arrows aligned in the direction of airflow. Ensure a snug fit with no gaps around the frame. Close the access panel and restore power to the unit. Finally, reset any built-in indicator or note the replacement date in a planner. See the dedicated step-by-step widget for precise actions tailored to your model.
Best practices for choosing the right MERV rating and filter type
Air quality needs vary by household; with pets, smokers, or allergy sufferers, filtration intensity might need adjustment. For most homes, a MERV rating in the mid-range—encompassing common filtration levels—offers a good balance of particle capture and airflow while preserving HVAC performance. If you have heavy pet dander, families with small children, or seasonal allergies, consider higher-efficiency options or supplement with a dedicated purifier in living rooms or bedrooms. Always verify that your system can handle the chosen filtration level; too high a rating can cause reduced airflow, increased energy use, and uneven heating or cooling. Finally, consider additional filtration features like activated carbon layers for odors, or specialized filters designed to trap ultrafine particles.
Maintenance routines for different environments (homes with pets, allergies, or smokers)
Environment drives maintenance. In homes with furry family members, expect faster accumulation of hair and dander; with multiple occupants, air turnover is higher, so filters may clog sooner. If you or others suffer from allergies, you might choose a tighter filter and replace it more often. Smokers create more soot and volatile organic compounds, so including an activated carbon layer can help with odors and residue. Regardless of environment, set a replacement cadence and inspect the filter monthly during high-dust months. A simple rule is to check the filter every 30 days and replace if air flow seems reduced or the media shows visible soiling. Remember to seal the housing properly after replacement to maintain efficiency.
Common mistakes to avoid
Avoid selecting a filter that is too large or small for the frame; gaps around the edge bypass filtration. Never install a filter backward—the arrows must face toward the blower. Do not rely on a stubborn seal; if the gasket leaks at the edges, replace the seal or the housing. Skipping the power-down step is a safety risk. Finally, avoid using high-MERV filters for systems that require high airflow; a mismatch can reduce efficiency and shorten equipment life.
How to extend filter life and save energy
Maximize filter life by reducing load and ensuring a tight fit. Clean the housing and remove debris before inserting a new filter. Check for air leaks around the seal and replace any worn gaskets. Place filters in a consistent orientation and write the replacement date on the frame or in a calendar. Pair filter changes with other energy-saving habits, like improving insulation and sealing leaks around doors and windows. A well-maintained filter reduces energy consumption and minimizes dust recirculation, contributing to a healthier home over time.
Getting started with a simple replacement calendar
A straightforward replacement calendar helps you maintain consistency. Start with the date you install a new filter and set reminders every 30, 60, or 90 days based on your environment. Keep a log of filter type, size, and MERV rating for quick reference. If you notice reduced airflow, thicker dust buildup, or stronger odors between changes, adjust your schedule accordingly. By treating filter maintenance as a regular household task rather than a chore, you’ll sustain cleaner air and a more efficient HVAC system.
Tools & Materials
- Replacement air filter (correct size)(Identify size from the existing frame or owner's manual)
- Screwdriver (if access panel is screwed)(Flat-head or Phillips depending on model)
- Damp cloth or vacuum with brush attachment(Clean housing interior and avoid debris gaps)
- Mask or gloves(Keep hands clean and avoid irritation from dust)
- Measuring tape(Helpful if you suspect a different size)
- Marker or label(Record replacement date for calendar)
- Trash bag for used filter(Double-bag if heavy soiling)
- Owner's manual / model information(Check compatibility and orientation)
Steps
Estimated time: 20-30 minutes
- 1
Identify the correct filter size and type
Locate the filter originally installed by checking the frame dimensions printed on the edge or refer to the HVAC manual. If unsure, measure the current filter and confirm the model requirements to avoid undersized or oversized filters.
Tip: Measure the length, width, and depth; write the size on the frame for quick reference. - 2
Power down and access the filter slot
Turn off the HVAC system at the thermostat or power switch to prevent blower operation while you work. Open the filter access panel to reveal the old filter.
Tip: If there is resistance, gently release clips or screws—do not force the panel open. - 3
Remove the old filter and inspect the housing
Slide the old filter out carefully. Look for dust buildup, mold, or moisture in the housing and wipe clean as needed to prevent immediate recontamination.
Tip: Note the orientation of the old filter; most filters have arrows indicating airflow direction. - 4
Clean the housing and check gaskets
Wipe away debris and inspect seals around the frame. A dirty seal can bypass filtration and reduce efficiency.
Tip: Replace worn gaskets or misaligned panels to maintain airtight sealing. - 5
Install the new filter with correct orientation
Insert the new filter with arrows pointing toward the blower, ensuring it sits evenly. Avoid forcing the filter into a tight space.
Tip: Double-check that the filter is fully seated and there are no gaps at the edges. - 6
Close panel, restore power, and record replacement date
Reattach the access panel and turn the system back on. Reset any indicators or log the replacement date in your calendar.
Tip: Set a reminder for your next replacement based on your environment and usage.
FAQ
How often should I replace my air filter?
Most homes should replace every 90 days, but households with pets or allergies may need more frequent changes. Monitor airflow and dirt levels to adjust timing.
Most homes replace every three months, but pets or allergies may demand more frequent changes. Watch airflow and dirt to adjust.
Can I wash and reuse disposable air filters?
Most disposable filters are not washable; washing can damage the media and reduce filtration. Some washable models exist—always follow the manufacturer’s instructions.
Most disposable filters aren’t washable. Check the label; if it’s washable, follow the instructions carefully.
Which MERV rating is best for homes with pets?
For homes with pets, a mid-range MERV rating (commonly in the 8–11 range) balances filtration with airflow. Always verify compatibility with your system before upgrading.
Pets usually do well with a mid-range MERV rating, but check your system’s limits before upgrading.
Is it safe to replace a filter if the unit is hot or running?
No. Always turn off power to the unit before replacing a filter to prevent injury or damage.
No. Turn off the unit before replacing the filter.
Why does my filter look dirty quickly?
A dirty filter can indicate a high dust load, an improper size or seal, or a blocked airflow path. Recheck size, orientation, and the housing seal.
If it gets dirty fast, check the size and seal and make sure airflow isn’t being blocked.
Watch Video
Quick Summary
- Choose the right size and type for your system
- Replace filters on a regular schedule
- Inspect the housing to prevent leaks
- Maintain proper orientation for optimal filtration