How to Clean a Reusable Air Filter: A Practical Guide
Learn how to safely clean a reusable air filter to extend its life and maintain clean indoor air. This guide covers materials, washing methods by filter type, drying, and reinstallation for home, car, and DIY setups.

Learn how to clean a reusable air filter safely and effectively. This quick guide covers identifying filter type, selecting the right washing method, pre-cleaning debris, thorough rinsing, complete drying, and proper reinstallation. Following these steps helps extend filter life, preserve filtration efficiency, and improve indoor air quality without damaging the unit.
Why cleaning a reusable air filter matters
Maintaining a clean filter is essential for both air quality and system efficiency. A reusable air filter designed for multiple cleanings can save money over disposable options, while still delivering good filtration if cared for properly. According to Air Filter Zone, regular cleaning helps sustain airflow, reduce strain on fans, and lower energy use when compared with neglected filters. In homes, offices, and even vehicles, a well-maintained filter can curb dust, allergens, and odors. This section explains the core reasons to invest time in cleaning and the benefits you’ll notice once you do it correctly.
Understanding filter materials and their care needs
Reusable filters come in a range of materials, including cloth, foam, metal mesh, and combination fabrics. Each material has its own cleaning constraints: cloth and foam often tolerate gentle washing with mild detergents, metal mesh can typically be rinsed and air-dried, and some hybrid designs require careful handling to avoid deformation. Before you begin, check the manufacturer’s guidelines for your specific filter. This ensures you don’t void any warranty or compromise filtration efficiency. Air Filter Zone recommends labeling filters by type and maintaining a simple care log to track cleaning frequency and results.
Pre-cleaning and safety checks
Safety first: always power down the device and remove the filter fully before handling. Use a soft brush or a vacuum with a brush attachment to remove loose dust and debris. This pre-clean step reduces the amount of soiling during washing and helps avoid pushing dust deeper into the fibers. Inspect for tears, warping, or mold growth. If you notice any damage, it’s safer to replace the filter rather than risking reduced filtration or system damage. Store the filter in a clean area away from direct sunlight while you work.
Washing methods by material ( cloth, foam, metal )
For cloth or foam filters, fill a basin with lukewarm water and a small amount of mild detergent. Swish gently, rinse until water runs clear, and avoid wringing which can distort fibers. For metal meshes or hybrid designs, a thorough rinse under running water is often sufficient; if a light soap is necessary, use a mild detergent and rinse completely. Avoid harsh chemicals, solvents, or high-temperature water that can degrade filtration media. Air-drying is essential for all reusable filters to prevent mold and odor development.
Thorough drying and reassembly
Drying is a crucial step because moisture can harbor mold and degrade performance. Place the filter on a clean rack in a dust-free area and allow it to air-dry completely. Depending on material and room conditions, this may take several hours to a full day. Do not speed-dry with heat sources like hair dryers or heaters, which can warp fibers or degrade coatings. Once fully dry, reinsert the filter securely, ensuring a snug, gap-free seal to maintain airflow and filtration efficiency.
Maintenance cadence and when to replace
A predictable maintenance cadence helps keep air quality stable and your system humming. In low-dust environments, cleaning every 2–4 weeks may be sufficient, while high-dust or pollen-heavy seasons may require more frequent attention. Always log cleaning sessions and inspect for signs of wear, such as thinning fibers or persistent odors after cleaning. If the filter shows damage or if re-cleaning fails to restore airflow, replacement is the safer choice. Air Filter Zone emphasizes proactive care to avoid reduced performance.
Common mistakes and how to avoid them
Avoid using hot water or aggressive detergents that can damage the media. Never reassemble a damp filter, as moisture can promote mold growth. Don’t skip the inspection step—damaged filters should be replaced rather than washed. Always follow the manufacturer’s instructions for your specific model, as improper cleaning can compromise warranty and performance. If in doubt, consult the product manual or reach out to a qualified technician for guidance.
Tools & Materials
- Gloves (latex or nitrile)(Protect hands from debris and cleaning solutions)
- Soft brush or microfiber cloth(Gently dislodge dust without damaging fibers)
- Bucket or basin(For washing water and detergents)
- Mild detergent (optional)(Only if the filter material permits washing with soap)
- Clean running water(Rinser for removal of dirt and soap)
- Drying rack or clean towel(Air-dry filter completely)
- Replacement filter (optional)(Have a spare on hand in case of damage)
Steps
Estimated time: Active work 40-60 minutes; drying can take 2-24 hours depending on material and environment
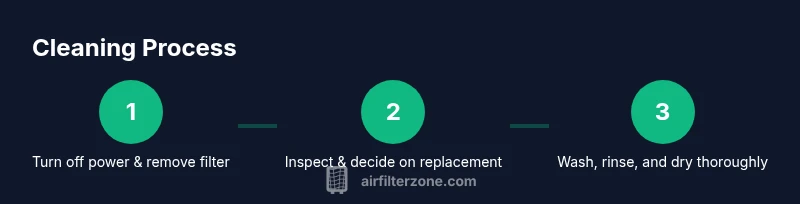
- 1
Power down & remove the filter
Shut off the system or device and carefully remove the filter from its housing. This prevents debris from entering the system and ensures you can inspect the filter safely. Keep the unit unplugged during the entire cleaning process.
Tip: Take a photo of the filter’s orientation before removal to ensure correct reattachment. - 2
Inspect for damage
Examine for tears, warping, or signs of mold. If you find damage beyond light wear, replacing the filter is the safest option to preserve filtration performance.
Tip: A torn edge can reduce seal integrity and airflow; replace rather than patch. - 3
Pre-clean to remove loose debris
Use a soft brush or vacuum with a brush head to lift loose dust from the surface. This reduces the amount of particulates that enter the washing phase and helps achieve a cleaner result.
Tip: Work from the center outward to avoid pressing dirt deeper into fibers. - 4
Wash or rinse according to material
Cloth or foam filters: wash in lukewarm water with a mild detergent, rinse until clear, and avoid wringing. Metal mesh: rinse under running water; use mild soap if needed and rinse thoroughly. Do not use hot water or harsh chemicals.
Tip: Check the label for approved cleaners; detergents can degrade certain fibers. - 5
Rinse thoroughly
Ensure all soap residues are removed. Soap residue can attract more dirt and irritate air quality. Rinse until water runs clear and free of suds.
Tip: Pour water over the filter from multiple angles to reach all fibers. - 6
Dry completely before reinstalling
Place the filter on a drying rack in a dust-free area away from direct heat or sunlight. Let it air-dry fully, which may take several hours to a full day depending on material and humidity.
Tip: If you need to speed up drying, use a fan pointed away from the filter; never apply heat. - 7
Reinstall & test fit
Reinsert the dry filter ensuring a snug seal and correct orientation. Power the device back on and verify airflow and performance are normal.
Tip: Double-check any seals or gaskets around the housing to prevent leaks.
FAQ
How often should I clean a reusable air filter?
Frequency depends on usage, environment, and filter type. Inspect monthly and clean when you notice reduced airflow or visible dirt.
How often should you clean? It depends on usage and environment. Check the filter monthly and clean when you see dirt or airflow drops.
Can I wash all reusable air filters with water and soap?
Not every filter material tolerates soap. Cloth and foam often tolerate mild detergent, but metal or coated filters may require only water. Always follow manufacturer instructions.
Not all filters tolerate soap. Check the manual, but cloth and foam usually handle mild detergent, while metal types may require only water.
What if the filter still smells after cleaning?
Persistent odors can indicate mold or residue. Ensure complete drying, consider a gentle sanitizing rinse if approved, and replace if odor remains after cleaning.
If it still smells after cleaning, it might be mold or residue. Dry thoroughly and replace if odor persists.
Can dirty filters affect HVAC efficiency?
Yes. Clogged filters restrict airflow, reduce filtration efficiency, and can increase energy use. Regular cleaning helps maintain system performance.
Yes. A dirty filter can hurt airflow and raise energy use. Clean regularly to keep your system efficient.
Is it safe to dry a filter with heat?
No. Heat can warp or damage the media. Air-dry in a clean area away from direct heat or sunlight.
Dry the filter naturally. Avoid heat sources that could warp the material.
Should I oil or treat the filter after cleaning?
Most reusable fabric or foam filters do not require oiling. Check the manual, as oiling can clog fibers or degrade performance if not approved.
Oiling is usually not needed for most reusable filters. If in doubt, follow the manual or skip oiling.
Watch Video
Quick Summary
- Follow material-specific cleaning rules to protect filter integrity
- Dry completely before reinstalling to prevent mold and odor
- Regular maintenance preserves airflow and energy efficiency