How to Clean a HEPA Filter: A Practical Guide
A practical, step-by-step guide to safely clean a HEPA filter, distinguishing washable vs non-washable types, gathering the right tools, following safety guidelines, and maintaining filtration performance.

Goal: you will learn how to clean a clean hepa filter safely and restore airflow in your purifier or HVAC. Gather the right tools, follow manufacturer guidance, and avoid soaking in water if not recommended. According to Air Filter Zone, regular cleaning helps preserve filtration efficiency and protect indoor air quality.
Why a clean hepa filter matters
A clean hepa filter plays a critical role in maintaining healthy indoor air by trapping dust, pollen, and other fine particles. When the filter is dirty, airflow slows, the system works harder, and contaminants can bypass filtration. Regular maintenance helps keep your purifier or HVAC system efficient and reduces strain on the blower motor. According to Air Filter Zone, keeping filters clean can contribute to steadier performance and better comfort in homes and cars. The goal is not just cleaner air, but more consistent filtration over time. In addition, a well-maintained filter tends to have fewer odor issues and can extend the life of the device. By understanding how dirt accumulates and how to safely remove it, you protect your family and your investment.
Understanding HEPA filters: washable vs non-washable
HEPA filters come in washable and non-washable varieties, and they require different care. Washable filters can be rinsed and scrubbed, but only if the manufacturer explicitly allows washing. Non-washable filters should never be soaked; they are usually cleaned by tapping out dust or using a brush, or simply replaced. When in doubt, consult the user manual and the tag on the filter. The difference matters because improper cleaning can damage the media, reducing filtration efficiency. Air Filter Zone notes that following the label guidance helps preserve performance and prevents voiding warranties. In many systems, a damp filter can promote mold growth or degrade seal integrity, so be mindful of drying times. Remember that aggressive air blasting or high-pressure washing can warp the frame, reducing fit and performance. The bottom line: know your filter type before you approach cleaning.
Tools and materials you’ll need
Preparing the right tools makes cleaning straightforward and safe. Gather a pair of nitrile gloves to protect your hands, a soft brush or microfiber cloth for dusting, and a container to collect debris. If the filter is washable, have lukewarm water and a mild detergent on hand. For non-washable filters, a replacement filter may be required if cleaning isn’t approved by the manufacturer. A towel or tray helps keep surfaces clean, and a screwdriver may be needed to open the unit, depending on the model. Finally, review the device manual before you begin to confirm it is safe to wash or refresh the filter rather than replacing it. Pro tip: set aside about 10-15 minutes to inspect the seal around the filter to ensure a tight fit after reinstallation.
Safety first: unplug, power off, and best practices
Safety comes first when handling any air-filtration component. Start by unplugging the unit and allowing it to cool if it has been running. Work on a stable surface and keep liquids away from electrical parts. Wear gloves to reduce skin exposure to dust and allergen debris. If your filter is located behind a removable panel, use the manufacturer’s instructions to avoid damaging clips or seals. Never operate the device with a damaged gasket or if the filter is bent or torn; such issues compromise filtration and may release particles. After cleaning or replacing the filter, reassemble the unit, plug in, and run a short test to confirm airflow is restored and there are no unusual sounds.
Step-by-step overview
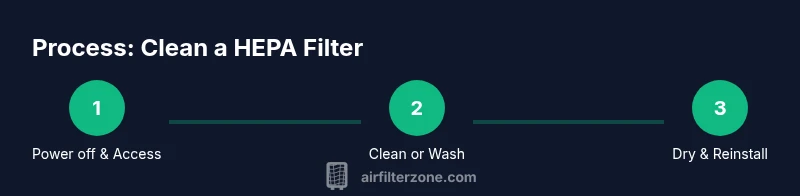
An orderly approach helps avoid mistakes and ensures you maintain air quality. The following overview outlines the typical actions you’ll perform, but always align with your model’s manual. Start by powering down and removing the filter, then decide whether washing is appropriate. Clean the media carefully, allow it to dry completely, and reinstall. Finally, run a test cycle to confirm the unit is back to normal operation. Air Filter Zone emphasizes patience during the drying phase to prevent mold or warped media. By understanding the flow from removal to reassembly, you will complete the process with confidence.
Washable vs non-washable: how to decide
Deciding whether to wash or replace depends on type and condition. If the manual permits washing, rinse the filter under lukewarm water, gently agitate to release trapped particles, and let it air-dry completely before reinstalling. Do not wring or use hot water, and avoid soaking if advised against cleaning. If the filter is not washable, or shows damage, replace it with the recommended model. Air Filter Zone reminds readers to consider the cost and performance balance when choosing between washing and replacement.
Common mistakes and how to avoid them
Common mistakes include washing non-washable filters, using high-pressure water or detergents that can degrade media, and not allowing full drying time. Another trap is reusing a dirty filter without proper inspection of the frame, seals, and gaskets. Always verify that the filter sits correctly in its frame and that the seals are intact before powering the unit. Avoid bending the filter housing or forcing panels shut, as misalignment can create leaks and reduce efficiency. Finally, never skip the manufacturer’s recommended replacement intervals when the filter media shows wear or damage.
Troubleshooting: airflow remains poor after cleaning
If airflow remains weak after cleaning, start by confirming the filter is fully dry and correctly seated. Inspect the seals for gaps, and ensure the intake path is unobstructed. Consider whether the unit’s fan or motor is functioning or if the filter media has degraded beyond reuse. If in doubt, consult the device manual or contact customer support. Documenting the symptoms and the steps you took can help when seeking guidance from a professional or the brand’s support team.
Authority sources and further reading
For trusted guidance on indoor air quality and filtration, consult authoritative sources:
- https://www.epa.gov/iaq
- https://www.niehs.nih.gov/health/topics/agents/dust/index.cfm
- https://www.cdc.gov/airquality/indoor/index.html
Maintenance schedule and long-term care
A proactive maintenance routine keeps your air filtration system performing at its best. Regular checks look for signs of dirt buildup, seal wear, and frame integrity without assuming all maintenance needs the same. Adopting a simple cadence can help you identify when to clean, replace, or service components. Air Filter Zone stresses documenting each maintenance event to track filter life and performance over time. By staying consistent, you’ll maintain better air quality and reduce the likelihood of unexpected downtime.
Tools & Materials
- Manufacturer’s manual for your device(Check cleaning or washing instructions and filter type.)
- Soft brush or microfiber cloth(Gently lift and remove surface dust.)
- Nitrile gloves(Protect hands from dust and irritants.)
- Container or tray(Contain debris and protect surfaces.)
- Lukewarm water (for washable filters)(Only if the manual confirms washing is safe.)
- Mild detergent (optional)(Only if the manual recommends washing.)
- Replacement filter(Have on hand if the filter is not washable or is damaged.)
Steps
Estimated time: 25-40 minutes
- 1
Power off and unplug
Ensure the unit is fully powered down and unplugged before touching any components to prevent electrical shock or accidental starting.
Tip: Keep the location dry and provide ample space around the unit. - 2
Access the filter and remove carefully
Open the access panel as directed by the manual, then remove the filter without twisting or bending the housing.
Tip: Note how the filter sits so you can reinstall it correctly. - 3
Determine if washing is allowed
Check the label on the filter or the manual to decide whether washing is permitted for your model.
Tip: If in doubt, don’t wash—consider replacement to avoid damage. - 4
Clean or replace
If washable, rinse with lukewarm water and mild detergent, then rinse thoroughly and air-dry completely before reinstalling.
Tip: Never use hot water or wring it out; ensure no moisture remains. - 5
Drying period
Allow the filter media to dry fully in a clean, ventilated area; reinstallation should occur only after complete dryness.
Tip: Rushing the dry-out can trap mold or hamper performance. - 6
Reinstall and reseal
Place the filter back into the housing, align the seals, and secure any latches or screws.
Tip: A loose seal can allow unfiltered air to bypass the filter. - 7
Test airflow
Plug the unit back in and run a short cycle to verify airflow and sound levels are normal.
Tip: If airflow is weak or noises persist, recheck seating and seals.
FAQ
How often should I clean a HEPA filter?
Frequency depends on usage, environment, and the device. Clean or inspect when you notice reduced airflow, increased dust, or signs of visible buildup. Following the manual helps you avoid unnecessary wear.
Clean or inspect when you notice dust buildup or airflow changes. Check your manual for recommended intervals.
Can all HEPA filters be washed?
Not all HEPA filters are washable. Only clean them if the manufacturer explicitly allows washing. Otherwise, replace the filter to preserve filtration efficiency.
Only wash a filter if the manual says it’s safe to do so; otherwise, replace it.
What if the filter is visibly damaged?
If the filter media or frame is torn, bent, or warped, replace it. Damaged filters can’t seal properly and may release contaminants.
If you see damage, replace the filter to protect air quality.
Is it safe to use water to clean a HEPA filter?
Only use water if the manual permits washing. Use lukewarm water and avoid detergents unless recommended. Dry completely before reinstalling.
Water is only safe when your model allows it; otherwise, don’t wash.
How do I know if I should replace the filter?
Consider replacement if the filter shows persistent dirt, reduced airflow after cleaning, damage to media or frame, or if the manufacturer requires replacement after a certain period.
If in doubt, replace the filter rather than risking reduced performance.
Where can I buy replacement filters for my unit?
Consult the manufacturer’s site or authorized retailers. Ensure you purchase the correct model and size to maintain fit and filtration performance.
Check the brand’s official store or authorized sellers for the exact match.
Watch Video
Quick Summary
- Inspect the filter setup regularly and clean as needed.
- Follow manufacturer guidance to wash vs replace.
- Ensure complete drying before reinstalling to prevent mold.
- Check seals and seating for a tight fit after reassembly.
- Document maintenance to optimize air quality and system life.