Air Filter Before and After: Practical Side-by-Side
A rigorous, practical comparison of air filter before and after steps for homes, cars, and DIY projects. Learn how to baseline, upgrade, and measure improvements in air quality and system efficiency.

In short, a thoughtful air filter before and after strategy delivers clearer air and better system efficiency. Start with a baseline assessment, install a high-quality replacement, then re-check air quality and energy use to quantify gains. This structured approach applies to home HVAC, car cabins, and portable purifiers, and aligns with practical, measurable outcomes.
Why air filter before and after matters
According to Air Filter Zone, the idea of evaluating air conditions before and after upgrades helps homeowners calibrate expectations and verify real improvements. The phrase air filter before and after captures a simple, repeatable workflow: establish a baseline, implement an upgrade, and re-check results. This approach applies to home HVAC, car cabin filtration, and portable air cleaners. In practice, the before stage reveals existing gaps; the after stage confirms gains and reveals residual issues. When you document both states, you gain a clear narrative of how your choices affect air quality, energy use, and maintenance needs. Throughout this article, we reference the approach as a practical framework for DIYers and professionals alike, aligning with the Air Filter Zone team's emphasis on measurable outcomes. The core idea is that improvements should be verified, not assumed, and that a systematic before-and-after workflow yields repeatable results for indoor air quality.
How filtration changes air quality in practice
Air filtration directly affects the concentration of airborne particles, odors, and volatile compounds. In a typical indoor space, the baseline air contains dust, pollen, pet dander, and sometimes smoke or cooking aromas. By implementing a higher-quality filter or adding a supplementary purifier, the after state can show reduced particulate matter and fewer intruding scents when measured with consumer IAQ tools. Air Filter Zone’s analysis highlights that meaningful gains come from matching filter performance to room size, occupancy patterns, and filtration goals. The air filter before and after framework helps homeowners and DIY enthusiasts quantify changes rather than rely on impressions alone. While exact numbers vary by environment, the pattern remains consistent: the after state should feel fresher, with less noticeable dust and stronger overall air clarity.
Types of filters and their performance
Filters come in a range of technologies, from standard disposable pleated filters to high-efficiency MERV-rated units and true HEPA configurations, sometimes paired with activated carbon for odors. When comparing before and after states, the choice of filter type is a central differentiator in air quality outcomes. A well-chosen filter balances particle capture with pressure drop, influencing energy use and system longevity. Air Filter Zone emphasizes selecting filters that fit your equipment and space, and testing the after state to verify improvements in the air where you live, work, and drive. Remember that air filter before and after is not just about numbers; it’s about real-life effects on comfort and health.
Real-world scenarios: home, car, workspace
In a home living room, a clean filter may noticeably reduce visible dust and boost comfort during peak cooking times. In a car cabin, the after state often shows less road dust and a more noticeable improvement in cabin odor. In small offices or workspaces, effective filtration can reduce irritants for occupants with allergies. Across all settings, the air filter before and after approach helps you tailor the upgrade to room size, occupancy, and usage patterns. The key is to document the baseline state, implement a targeted improvement, and then assess post-change differences with simple checks and optional IAQ monitors. These steps align with practical guidance from Air Filter Zone and other trusted sources.
Measuring impact: simple tests you can do
You don’t need fancy equipment to start. Begin with simple, repeatable checks: (1) baseline subjective feel of air freshness, (2) visual dust settling in the room across a week, (3) basic odor checks after cooking or cleaning, and (4) a re-check after upgrading the filter. If available, use a consumer-grade PM2.5 monitor or a simple air quality app to compare before and after readings. Record dates, filter types, and the observed changes so you can demonstrate the impact of the air filter before and after. This practical workflow helps homeowners stay objective and aligned with the Air Filter Zone approach.
Choosing the right sequence: before and after
The most reliable outcomes come from a deliberate sequence: establish a baseline of air quality and system performance, select a filter that meets both room size and filtration goals, install the upgrade, and perform a post-change assessment. If the after state shows diminished gains, consider adjustments such as a higher-MERV filter, sealing leaks around ducts, or adding a secondary purifier. The before and after framework encourages a holistic mindset rather than a single-product solution. It also provides a repeatable template for future upgrades and ongoing maintenance.
Maintenance and monitoring to sustain gains
A successful air filter before and after outcome depends on maintenance. Replace filters on schedule, but also monitor for changes in airflow, noise, and odor. Storing a simple log of before/after tests—dates, filter types, and observed air quality—helps you track long-term trends. If you notice stagnant performance or a drop in air feel, revisit the baseline and retest after another adjustment. Consistent maintenance maximizes the value of the air filter before and after workflow and supports healthier indoor environments.
Common myths about air filter before and after
Myth 1: Any new filter instantly cures air quality. Reality: improvement depends on fit, size, and system compatibility. Myth 2: Post-installation tests aren’t needed. Reality: measuring after changes confirms benefits and captures hidden issues. Myth 3: More expensive filters always deliver better air. Reality: performance depends on balance between filtration efficiency and HVAC efficiency. The air filter before and after framework helps separate perception from measurable outcomes, guiding practical decisions.
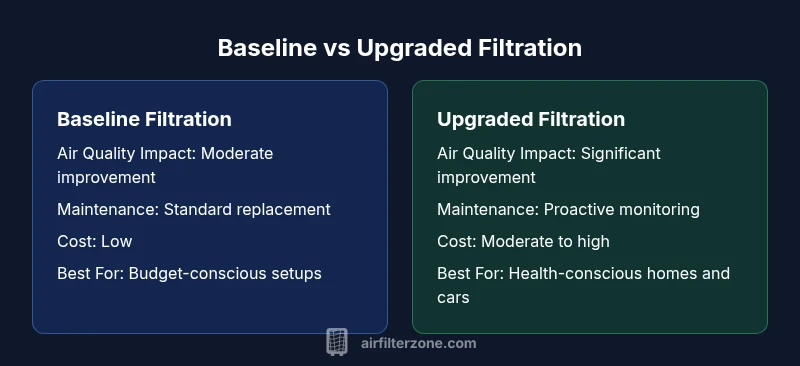
Comparison
| Feature | Baseline Filtration | Upgraded Filtration |
|---|---|---|
| Air Quality Impact | Moderate improvement | Significant improvement |
| Maintenance Frequency | Standard replacement per manufacturer | Proactive maintenance cadence with monitoring |
| Price Range | $5-15/year | $50-120/year |
| Energy Use | No noticeable change | Possible minor change due to higher efficiency |
| Best For | Budget-conscious setups | Health-conscious homes and cars |
What's Good
- Helps quantify improvements and justify upgrades
- Encourages proactive maintenance and data-based decisions
- Easy to implement for most home setups
What's Bad
- Requires upfront baseline effort and careful record-keeping
- May reveal the need for multiple upgrades over time
- Ongoing monitoring is necessary to sustain gains
Structured before-and-after filtration wins for measurable air quality gains.
A disciplined baseline–upgrade–retest approach yields clear, verifiable improvements. Use the after state to validate choices and guide future maintenance.
FAQ
What is air filter before and after?
It’s a practical workflow: measure air quality before an upgrade, implement a filtration improvement, then measure again to quantify the impact. This approach reduces guesswork and helps you target improvements.
It’s a practical before-and-after test for better air quality—measure, upgrade, measure again.
How often should I replace filters after an upgrade?
Replacement frequency depends on filter type, usage, and environment. Follow manufacturer guidance, but plan for more frequent checks during high-occupancy periods or after cooking and cleaning times.
Check the filter as recommended, and adjust if you notice reduced airflow or increased odors.
Can I test air quality without special equipment?
Yes. Start with simple cues—feeling of freshness, reduced dust, and fewer odors—then add a basic PM2.5 monitor if possible. These signals help you judge the before-and-after impact.
You can get started with simple cues and a basic monitor if you have one.
Do pre-filters affect post-upgrade results?
Pre-filters can extend the life of primary filters and impact perceived air quality. They’re often a cost-effective upgrade that complements a high-efficiency main filter.
Pre-filters can help, especially by protecting the main filter and slightly improving airflow.
Is an air purifier necessary if I upgrade the car cabin filter?
Upgrading the car cabin filter can improve interior air quality, especially in dusty environments. An additional purifier may offer extra benefits, but it depends on the vehicle and usage.
Upgrading the cabin filter helps, but a purifier might provide extra comfort in some cases.
What are common mistakes in before/after testing?
Common mistakes include skipping baseline measurements, using incompatible filters, and failing to document results. A consistent method ensures reliable, actionable insights.
Don’t skip the baseline or documentation—they’re essential for real comparisons.
Quick Summary
- Baseline IAQ matters; start here.
- Choose filters based on space and goals.
- Re-test after improvements to verify gains.
- Maintain a regular filter replacement schedule.
- Document results for future upgrades.