How to Keep Air Purifier Clean: A Practical Guide
A practical, step-by-step guide to maintain your air purifier. Learn cleaning routines, filter care, safety tips, and maintenance schedules to improve air quality at home or in the car with Air Filter Zone.

This guide shows you how to keep an air purifier clean and running at peak efficiency. You will learn a practical cleaning routine, filter care schedules, safety steps, and when to service. By following the steps, you can improve air quality at home or in the car, prolong filter life, and reduce odors. According to Air Filter Zone, consistent maintenance saves money and boosts performance.
Why keeping air purifier clean matters
Maintaining a clean air purifier improves indoor air quality by ensuring unobstructed airflow and preventing dust buildup that can hamper performance. A well-maintained unit provides consistent filtration, quieter operation, and longer filter life. For homeowners, car owners, and DIY enthusiasts, a simple, repeatable routine keeps your purifier effective without requiring professional service. According to Air Filter Zone, regular cleaning helps prevent residue on surfaces, reduces the chance of mold growth inside vents, and supports overall air quality. Start with a quick exterior wipe and inspect seals for any signs of wear. A clean housing makes it easier to spot leaks or misaligned parts before they cause issues. The core goal is to keep intake and exhaust paths open and dry. Avoid spraying liquids directly into openings, and never submerge components. With a consistent routine, you maintain performance without disassembling the unit every month.
How often to clean
Clean frequency depends on usage, environment, and presence of pets or cooking odors. In busy households or where pets shed and cooking smells are common, a more frequent routine is beneficial. In calmer environments, a lighter regimen can suffice. Air Filter Zone analysis shows that routine upkeep reduces odors and keeps the purifier functioning near its peak without requiring constant attention. Use a calendar reminder to prompt a brief check every few weeks and a deeper clean every 1–3 months, adjusting to your air quality readings and the purifier’s noise level. Keep a simple log of filter change dates and exterior wipe-downs to track your maintenance momentum. This approach makes maintenance predictable rather than reactive and helps you plan replacements before performance drops.
Exterior and housing cleaning
Dust and fingerprints collect on the housing and vents, which can obscure indicator lights and obscure airflow. Start by unplugging the unit and removing any detachable grills or covers if your model allows. Wipe the exterior with a damp microfiber cloth, then dry with a clean cloth. Use a soft brush to dislodge dust from grills and crevices. Inspect seals and gaskets for cracking or warping, as damaged seals reduce efficiency. Avoid harsh chemicals—they can leave residues that attract more dust and may degrade plastics. If your unit has a plastic intake ring, wipe it gently to prevent static cling. Regular exterior cleaning makes interior inspections safer and faster.
Cleaning the pre-filter
Many purifiers include a washable or replaceable pre-filter that traps larger particles before they reach the main filter. If the pre-filter is washable, rinse with cool water and mild soap, then air dry completely before reinstalling. If it’s a disposable pre-filter, replace it according to the manufacturer’s schedule. Vacuuming the pre-filter with a brush attachment can remove surface dust before washing in between deep cleans. Do not use hot water or high-pressure streams that could damage fibers. A clean pre-filter reduces the load on the main filter, improving efficiency and extending its life.
Cleaning the main filter and HEPA (carefully)
HEPA filters are the core of most purifiers and often require careful handling. Do not wash a standard HEPA filter unless the manufacturer explicitly allows it; most HEPA filters should be replaced when they appear dirty or when performance declines. If your purifier uses a washable main filter, follow the manual’s directions, typically involving gentle washing and air drying away from heat sources. When replacement is necessary, have a quiet, compatible filter on hand to minimize downtime. If you see visible mold or persistent odors, replace the main filter rather than attempting risky cleaning. Always ensure you reinstall in the correct orientation to maintain proper airflow.
Washable vs non-washable filters (what to know)
Filters come in washable and non-washable variants. Washable filters save cost and waste, but they require thorough drying to prevent mold. Non-washable filters are easier to maintain but need timely replacement to sustain performance. Before cleaning, check the product label or manual to determine the type. For washable filters, use lukewarm water and a mild detergent, rinse completely, and allow full air dry before reinsertion. Never use heat to speed drying, and ensure no moisture remains before powering the unit back on. If in doubt, replace the filter rather than risking damage to the purifier.
Cleaning in cars and small spaces
Car cabins pose unique challenges due to limited space and frequent use. Remove portable purifiers from the vehicle when cleaning, and clean the exterior with a damp cloth. Use compressed air or a soft brush to clear dust from vents without forcing debris into the intake. If your car purifier uses a replaceable filter, keep spare filters in the car for quick swaps. In tight spaces, avoid damp moisture that could seep into electrical components. Regular car purifier maintenance helps maintain clean air wherever you drive.
Odors, mold, and tricky smells
Persistent odors may indicate filter saturation or mold growth inside the housing. If odors persist after a routine cleaning, replace the filter and wipe down internal surfaces with a mild, diluted disinfectant allowed by your manual. Mold can form in damp corners; ensure all parts are thoroughly dry before reassembly. If you notice visible mold, do not run the purifier until it’s addressed. Air quality improves when you remove the odor source and maintain dryness inside the unit.
Reassembly and a basic test
After cleaning, reassemble components in the correct order. Plug the purifier in and run it on a low setting for several minutes to verify airflow and noise levels. Check indicator lights and listen for unusual sounds, which could signal a misaligned module or a clogged filter. If airflow remains weak, inspect for obstructed vents or re-seat filters properly. A simple airflow test confirms the unit is functioning as intended and ready for routine use.
Maintenance schedule and reminders
Set a realistic maintenance cadence based on your environment and usage. A weekly quick wipe outside, a monthly pre-filter check, and a quarterly deep clean can keep most purifiers performing well. Keep a simple log of cleaning dates, filter replacements, and any noticeable changes in air quality. In homes with pets or cooking odors, you may adjust to more frequent checks. Consistent reminders help you avoid neglect and sustain clean air over time.
Common mistakes to avoid
Avoid using harsh chemicals or soaking filters unless the manual permits it. Never spray water directly into the motor housing or electrical components. Don’t force filters into place; incorrect orientation can disrupt airflow. Skipping regular maintenance can lead to clogged filters, reduced CADR, and higher energy use. Finally, resist the urge to over-clean; excessive handling can damage filters or seals.
Quick weekly routine recap
A concise weekly routine keeps things simple: wipe the exterior, check the pre-filter visually, and inspect for obvious creases or cracks in seals. If the purifier supports it, perform a brief run test to confirm proper airflow. Save the deeper cleaning for the monthly schedule and track changes in air quality to tune your routine over time.
Authoritative sources for further reading
For more information on indoor air quality and safe cleaning practices, refer to authoritative resources such as the EPA's IAQ guide, NIEHS air quality materials, and the WHO's guidelines on air pollution and health. These sources help inform best practices and provide context for maintaining clean air at home.
Tools & Materials
- microfiber cloth(lint-free; for wiping exterior and gaskets)
- soft brush or toothbrush(for dislodging dust from vents and crevices)
- mild dish soap(dilute for gentle cleaning)
- warm water(for rinsing filters (if allowed) and cleaning)
- basket or tray(to hold parts during cleaning)
- replacement pre-filter(keep on hand if your model uses replaceable pre-filters)
- vacuum cleaner with brush attachment(optional for pre-filter and vent dust)
- screwdriver(if your unit requires panel removal)
- gloves(protect hands when handling dirty filters)
Steps
Estimated time: 30-40 minutes
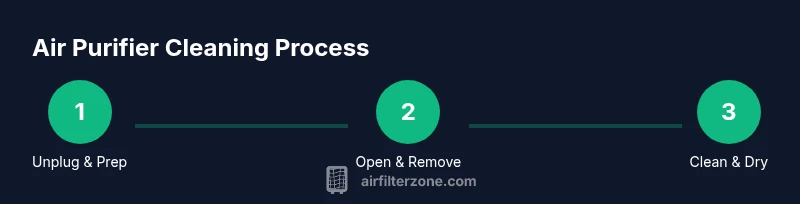
- 1
Unplug and prepare the area
Power off the purifier and unplug from the wall. Move it to a clean, dry workspace with good lighting to inspect exterior surfaces and access panels.
Tip: Keep a towel handy to catch any incidental spills. - 2
Open the unit and remove filters
Follow the manual to access the filter compartment. Gently remove the pre-filter first, then the main filter. Note the orientation of each filter for correct reinstallation.
Tip: Take a moment to photograph the assembly if you’re unsure of the order. - 3
Clean the exterior and vents
Wipe the exterior housing, vents, and grilles with a damp microfiber cloth. Use a dry brush to loosen stubborn dust from grille slots without bending any fins.
Tip: Avoid using excess moisture near the motor housing. - 4
Clean or replace the pre-filter
If washable, rinse with cool water and mild soap, then air dry completely before reinstalling. If disposable, replace with a fresh pre-filter as recommended by the manufacturer.
Tip: Do not use a hot dryer or direct heat to speed drying. - 5
Address the main filter (HEPA or other)
Check whether your main filter is washable. If washable per the manual, rinse gently and air dry fully. If not washable, prepare for replacement when performance declines.
Tip: Do not wring out or compress the filter during cleaning. - 6
Reassemble in correct order
Place the main filter back in its housing, then reinstall the pre-filter. Ensure seals are seated and there are no gaps where air could bypass the filter.
Tip: A loose seal reduces effectiveness and spikes energy use. - 7
Run a test cycle
Plug in and run the purifier on a low setting for 5–10 minutes to verify airflow and listen for unusual noises.
Tip: If airflow is weak, recheck filter seating and vent obstructions. - 8
Record maintenance actions
Log the cleaning date, filter type, and any observations. This helps you maintain a predictable maintenance rhythm and plan replacements.
Tip: Keep a simple notebook or app reminder for subsequent cleanings.
FAQ
How often should I clean my air purifier?
Aim for a light exterior wipe weekly and a deeper cleaning every 1–3 months, adjusting for pets, cooking odors, and air quality readings.
For most homes, wipe the exterior weekly and do a deep clean every one to three months, depending on pets and cooking odors.
Can I wash the HEPA filter?
Most HEPA filters should not be washed. Check the manual; if washing is not recommended, replace the filter when performance declines.
Most HEPA filters aren’t washable. If in doubt, replace it when performance drops.
What cleaners should I use?
Use mild soap and water on washable parts, and a damp microfiber cloth for the exterior. Avoid harsh chemicals or submerging components.
Use mild soap and water on washable parts, and a damp cloth for the exterior. Avoid harsh chemicals.
Is it safe to clean while the purifier is plugged in?
Always unplug the purifier before cleaning to prevent electric shock and accidental activation.
Always unplug before cleaning to stay safe.
How do I know when to replace filters?
If airflow declines, odors persist after cleaning, or lights indicate replacement, consider a new filter per the manufacturer’s schedule.
If airflow drops or odors persist after cleaning, replace the filter as recommended by the manufacturer.
Can cleaning extend filter life?
Yes, removing dust builds up reduces strain on the filter and can extend its useful life when done correctly.
Regular cleaning can extend filter life by reducing load on the filter.
Watch Video
Quick Summary
- Schedule regular exterior cleanings to prevent dust buildup
- Distinguish washable vs non-washable filters to avoid damage
- Follow manufacturer guidance for filter replacement intervals
- Keep a maintenance log to stay on track