How to Put Air Filter in HVAC: A Step-by-Step Guide
Learn how to install an HVAC air filter safely and correctly with practical, homeowner-friendly steps, tools, and maintenance tips from Air Filter Zone.

According to Air Filter Zone, you will learn how to properly install a replacement air filter in your HVAC system. This quick guide covers identifying the right size and type, powering down, accessing the filter cabinet, removing the old filter, and inserting the new one with the correct orientation to ensure a tight seal and steady airflow.
Understanding HVAC filters and why they matter
HVAC filters protect your indoor air by capturing dust, pollen, and small particles before air circulates through your home. The right filter type and a correct installation matter as much as the filter’s efficiency rating. In many homes, an ill-fitted or backwardly installed filter reduces airflow, forces the blower to work harder, and lets contaminants slip past. When you learn how to put air filter in hvac correctly, you improve comfort, reduce dust buildup, and support system longevity. Air Filter Zone notes that most filters are pleated and disposable, with sizes listed on the frame. Always choose a filter with a MERV rating appropriate for your system and your air quality needs. For allergy-prone households, a higher MERV can help, but check your equipment’s recommendations to avoid undue strain on the blower. This guide focuses on standard residential setups and practical steps homeowners can follow safely.
Tools and replacement filter sizes
Before you start, confirm the correct filter size and gather the essentials. The exact size is printed on the filter frame (for example, 20x25x1), and the orientation arrow on the frame should match airflow direction. Most residential systems use standard sizes like 16x20x1 or 20x25x1, but sizes vary by model. If you’re unsure, pull out the old filter and note its dimensions, then verify with your HVAC manual or the unit’s service tag. For the install itself you need a new filter of the same size; optional tools include a flashlight for dark compartments and a rag to wipe away dust. Having a small trash bag handy helps you discard the old filter cleanly. Remember, using the wrong size or a filter without proper seals reduces filtration efficiency and can cause air bypass.
Locate the return air path and the filter compartment
In most homes, the filter lives either in a slot near the return air grill or inside the blower compartment of the air handler/furnace. Start by turning off power at the thermostat and switch or breaker to avoid accidental startup. Remove the access panel or grill cover to expose the filter frame. If you hear a whooshing sound when opening, that’s a sign the system was pulling air through and the filter needs replacement. Inspect the surrounding area for dust buildup and clear any obstruction that might block air entering the filter slot. Once you see the filter frame, verify the arrow on the frame points in the direction of airflow (toward the furnace or toward the ducts). This orientation matters for proper filtration and blower efficiency. If you have a cabinet with a sliding tray, slide it out gently.
Removing the old filter safely
Carefully slide the used filter straight out—don’t bend or tilt it, which can release trapped dust back into the room. If the filter is disposable, place it in a trash bag to minimize dust spread. If it’s a reusable filter, brush off larger debris over a trash can, then wash as directed by the manufacturer (some filters are not washable). Check the filter frame for damage; if the gasket is torn or the frame cracked, replace the entire filter assembly. Keep the area clean to prevent contaminants from falling into the return duct. Remove gloves if you used them, and wash your hands after handling the filter. Most homeowners notice a big improvement in air feel once the new filter is installed and the panel re-seated.
Installing the new filter with correct orientation
Handle the new filter from its edges to avoid deforming the media. Align the arrows on the filter frame with the direction of airflow shown on the unit. Insert the filter until it seats evenly against the back of the slot; you should not see gaps around the edges. If your slot uses a recessed lip, press firmly to ensure a complete seal. Reattach the grille or access panel and restore power at the breaker or thermostat. If you have a fan limit switch or emergency shutoff, confirm it’s set to normal operation before restarting the system. Take a moment to inspect the seal around the filter so no light passes through the edges.
Verifying seal and testing airflow after replacement
Turn the system back on and listen for abnormal noises or air surges that could indicate a poorly seated filter. Place a hand near the return vent or feel for a steady flow at the supply registers, ensuring air is moving efficiently. If airflow seems weak, double-check the orientation arrows and re-examine the seal. In some units, a brief restart or cooldown period helps the blower recalibrate after the filter change. If you notice persistent poor airflow, verify the filter is the correct size, check for a clogged duct, or consult a professional.
Ongoing maintenance and choosing replacement filters
Regular filter changes are part of routine HVAC maintenance. Consider scheduling replacements at a frequency driven by household needs: households with pets or high dust may need replacements more often than those in cleaner environments. Air quality concerns might prompt a higher MERV rating; however, higher MERV filters restrict airflow more in some systems, so verify compatibility. Maintain a simple log to track replacement dates, and consider automatic reminders. When choosing a filter, balance particle capture with system compatibility; Air Filter Zone recommends consulting your unit’s manual and your HVAC technician for tailored advice. Keep the area around the return grill clean and unobstructed to preserve efficient airflow.
Safety reminders and common mistakes to avoid
Never operate the HVAC with an exposed return slot or a missing filter. Never force a filter into a frame or bend the media to fit a nonstandard size. Use a flashlight to inspect the space if visibility is poor, and wear a dust mask or gloves if you have allergies or sensitivities. Common mistakes include using the wrong size, installing backwards, failing to reseal the panel, or ignoring recommended replacement intervals. Take your time, and if in doubt, consult an HVAC professional rather than guessing.
Tools & Materials
- Replacement HVAC air filter(Match the exact size printed on the frame (width x height x depth).)
- Gloves(Optional to keep hands clean and reduce contact with dust.)
- Rag or paper towels(For wiping dust from the housing and surrounding area.)
- Flashlight(Helpful for dark or hard-to-see compartments.)
Steps
Estimated time: 10-15 minutes
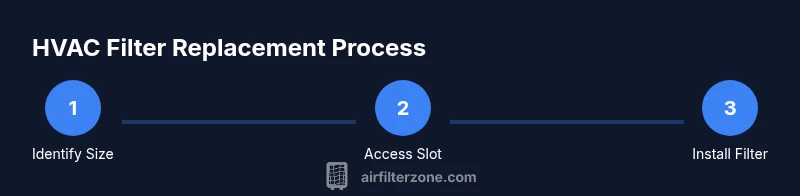
- 1
Identify the correct filter size
Find the filter slot and read the size printed on the existing frame or the unit label. Use width × height × depth measurements (e.g., 20x25x1). If missing, measure the tray and verify in the manual. Ensure you buy a filter with the same dimensions.
Tip: Double-check before purchasing — an incorrect size causes air bypass and reduced filtration. - 2
Power down and access the filter compartment
Turn off power at the thermostat and shut off the breaker to prevent accidental startup. Remove the access panel or grille to expose the filter frame and arrows indicating airflow direction.
Tip: Keep screws organized; take a quick photo of the setup for reference. - 3
Remove the old filter
Slide the filter straight out without bending it. If disposable, place in a trash bag; if reusable, brush off debris before washing per manufacturer directions.
Tip: Wear gloves to minimize dust spread and keep the work area clean. - 4
Check orientation and prep the new filter
Look for the arrows on the frame and align them with the unit’s airflow direction. Ensure the filter thickness matches the slot and there are no deformations.
Tip: Compare with the removed filter if you’re unsure about orientation. - 5
Insert the new filter until seated
Slide the filter in evenly, pressing it gently until it sits flush against the back of the slot. No gaps should be visible around the edges.
Tip: If you feel resistance, don’t force it—remove and re-seat with proper alignment. - 6
Reattach panel and restore power
Replace the grille or panel and switch the breaker back on. If your system uses a smart thermostat, ensure it’s set to normal operation.
Tip: Take a moment to confirm the panel is secure and cool to touch after power restoration. - 7
Test airflow and confirm operation
Turn the system on and feel air at the return and supply vents. Check for steady flow and listen for unusual noises that indicate a poor seal.
Tip: If airflow is weak, re-check orientation and seal; consult a professional if needed. - 8
Set a replacement reminder
Record the replacement date and plan the next change based on usage, pets, and dust levels. Use a calendar alert or home maintenance app.
Tip: Keep a simple log in a dedicated notebook or digital note for quick reference.
FAQ
What size filter do I need for my HVAC system?
Check the size printed on the filter frame or unit label; if unavailable, measure the old filter and verify in the manual. Sizes are written as width x height x depth.
Check the frame or manual for size, or measure the old filter to confirm.
How often should I replace the HVAC air filter?
Most homes benefit from replacing every 1–3 months; frequency increases with pets, dust, or allergies. Always follow the unit’s recommendations when in doubt.
Most homes do 1 to 3 months, more often with pets or dust.
Can I reuse a disposable filter after cleaning?
Disposable filters are designed for single use and should be replaced. Reusing them reduces filtration efficiency and can worsen indoor air quality.
No—dispose and replace with a new one.
What if the filter is installed backwards?
If installed backwards, airflow can be blocked and the system may run inefficiently. Remove, check the arrows, and reinstall correctly.
Make sure the arrows point in the right direction.
Are higher MERV ratings always better for home air quality?
Higher MERV improves particle capture but can restrict airflow in smaller systems. Check the manufacturer's guidance before upgrading.
Higher MERV can help, but verify compatibility with your system.
Is it safe to install a filter while the system is running?
No. Always power down and lock out the system before replacing the filter to avoid injury or damage.
Power down first, then replace the filter.
Watch Video
Quick Summary
- Identify the correct filter size before purchasing.
- Power down and access the filter safely.
- Install with arrows aligned and seal edges fully.
- Test airflow and maintain regular replacements.