How to Put Air Filter In: A Practical Guide
Learn how to put air filter in home HVAC or car cabin with a practical, step-by-step guide. Includes sizing, orientation, maintenance, and safety tips for clean air.

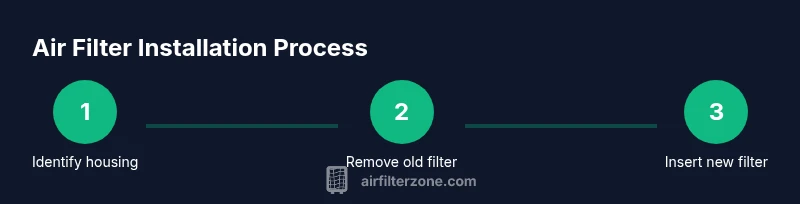
You will learn how to put an air filter in any standard system (home HVAC or car) by following a step-by-step method. Gather a clean filter of the correct size, a screwdriver if needed, and safety gloves. This quick guide will help you replace the filter quickly and safely.
Why the right filter matters
The air you breathe in your home or car is filtered by a simple component that many people overlook: the filter. The quality and fit of that filter matters because it determines how well dust, pollen, and pet dander are captured, and it can influence energy use and equipment longevity. When you learn how to put air filter in, you are not just swapping parts you are protecting your heating and cooling system and improving indoor air quality for your family. According to Air Filter Zone, using the correct filter size and MERV rating matters most because an ill fitting or under specified filter can allow bypass leaks and reduce filtration efficiency. The difference is not just theoretical; a properly chosen filter reduces the load on the blower, helps control humidity, and minimizes allergy symptoms. In this guide you will see how to select the right type, verify the size, and replace the filter with clean, confident steps.
Types and ratings explained
Air filter efficiency is defined by type and rating. The common home option is a disposable pleated filter with a MERV rating that balances filtration with airflow. For general use many households choose MERV 8 to 11; for allergy relief, MERV 13 filters may be appropriate if the system can handle them. Automotive cabin filters vary and often use activated carbon for odor reduction. While a higher rating means better particle capture, it can also restrict airflow if the system is not designed for it. In practice you should check your equipment manual or consult a professional before stepping up to a higher MERV. By understanding these ratings you can match a filter to your needs without overburdening the blower.
Where filters go in different systems
In a home HVAC or furnace, the filter sits in a slot near the return duct. In most cars the cabin air filter is behind the glove box or under the dashboard. The orientation matters; filters have an arrow indicating airflow direction that should point toward the blower. If a filter is incorrectly inserted, unfiltered air bypasses the filter media, reducing effectiveness. Always verify you are replacing the right filter for the system and not confusing it with a different size or type.
Reading filter size and labels
Filters are sized in three dimensions, usually shown on the frame as length x width x thickness, such as 16x20x1 or 20x25x1. Always measure the actual housing, not just the old filter profile. If you are unsure, pull out the old filter and check the label for the size printed on the frame. When order, use the exact size and, if needed, the MERV rating as requested by the system manual. Do not rely on texture or color to guess the size.
Safety and prep before replacement
Power off the equipment and disconnect if practical to avoid shock or startup. Wear gloves to protect your hands from sharp edges in the housing. Work in a well lit area; use a flashlight if needed to inspect the housing. If the unit sits in a tight space, take care not to force the housing open or damage adjacent components. Do not operate the system with a missing or mis seated filter; that can cause damage.
Tools and preparation checklist
Essential items include a clean replacement filter in the correct size, a flashlight, and gloves. Optional but helpful items: a small screwdriver if your unit uses screws, a thin flat tool to loosen clips, and a soft brush or vacuum attachment to remove dust around the housing before inserting the new filter.
Replacement overview
Locate the filter housing, then open the cover to expose the filter. Remove the old filter by sliding it straight out, avoiding pulling on surrounding components. Check the housing for damage or debris, wipe clean, and verify the seal area is clean. Insert the new filter with the arrows facing the direction of airflow toward the blower, then reseal the housing and replace any clips or screws. Restore power and run a brief test to confirm air is flowing through the system.
Common mistakes and how to avoid them
Using the wrong size or type is the most common mistake; double check the frame both before removal and after you purchase a replacement. Installing the filter backwards or with the wrong orientation will block airflow; watch the arrow direction. For high operation you may need to replace more frequently; consider setting a reminder on your calendar. Finally, never force a filter into a housing that is too small or damaged; this can damage the system.
Maintenance and replacement scheduling
How often you replace depends on usage, environmental conditions, and the number of occupants or pets. In a typical home you might replace every 1 to 3 months, while heavy use or allergy concerns may demand every 4 to 8 weeks. Car cabin filters often require replacement every 12,000 to 15,000 miles or once a year, whichever comes first. Always refer to your manual for exact intervals, and replace filters when you notice reduced airflow, visible dirt, or musty odors. Air Filter Zone analysis shows that replacement frequency depends on environment and pets; keeping a simple log helps maintain a regular cadence and better indoor air quality.
Disposal and eco friendly options
Used filters are considered household waste in many areas; check local guidelines. Some filters contain recyclable materials; if possible remove the frame and recycle the media where allowed. Place the old filter in a bag to prevent dust from escaping during disposal. After replacing, wash your hands and store the old packaging for reference on future orders.
Tools & Materials
- Replacement air filter (correct size and rating)(Check exact dimensions on the housing and use the correct MERV rating for your needs)
- Screwdriver (if applicable)(Some housings use screws; others are clip-in)
- Gloves(Protect hands from sharp edges)
- Flashlight(Better visibility in tight spaces)
- Soft brush or vacuum with brush attachment(Clean the housing area before inserting the new filter)
Steps
Estimated time: 15-30 minutes
- 1
Power off and access housing
Turn off the system and unplug if feasible to avoid accidental startup. This step protects you from shocks and prevents the blower from turning on while you work.
Tip: If the unit is in a tight space, prep the area with a flashlight and keep tools within reach. - 2
Locate the filter housing
Find the housing cover or access panel near the return duct or in the engine bay for cars. If unsure, consult the manual or look for the arrow label indicating airflow direction.
Tip: Label the orientation so you remember how the cover came off. - 3
Open the housing
Carefully remove screws or clips and lift the cover to expose the old filter. Do not force components; use a screwdriver if needed and keep screws in a small container.
Tip: Take a quick photo of the setup before removing anything in case you forget arrangement. - 4
Remove the old filter
Slide the old filter straight out. Avoid bending the frame or touching the media to prevent dislodging dirt into the housing.
Tip: Note which side was facing outward for orientation reference. - 5
Inspect the housing
Check for damage, mold, or debris inside the housing. Wipe the cavity with a dry cloth or brush; remove visible dust to improve filtration efficiency.
Tip: If you see mold, address root moisture issues before replacing the filter. - 6
Check filter orientation
Filters have arrows that indicate airflow direction; ensure the arrows point toward the blower/inside the unit. Incorrect orientation reduces filtration effectiveness.
Tip: If unsure, re-check the manual or the original filter for orientation marks. - 7
Install the new filter
Insert the new filter firmly into the housing with the arrows facing the correct direction. Make sure it sits evenly and seals the opening.
Tip: Gently press around the frame to ensure a tight fit without warping the media. - 8
Reassemble the housing
Close the cover and resecure screws or clips. Confirm there are no gaps and that the panel seats flush against the housing.
Tip: Do a quick check for any stray screws before powering on. - 9
Restore power and test
Reconnect power and run the system briefly to confirm air is flowing through the filter. Listen for unusual noises or reduced airflow.
Tip: If airflow is weak, re-check filter placement and seal integrity. - 10
Record the replacement date
Note the date of replacement and set a reminder for the next change. Keeping a simple log helps maintain consistent filtration.
Tip: Use a calendar alert or a label on the unit for visibility. - 11
Clean the surrounding area
Wipe down nearby surfaces to remove settled dust from the replacement process. This helps prevent recontamination of the clean air path.
Tip: Dispose of used tissues or gloves properly after completion. - 12
Schedule next replacement
Based on usage and environment, set a future replacement cadence. Regular changes sustain air quality and system efficiency.
Tip: Consider creating a standing reminder aligned with seasonal HVAC cycles.
FAQ
How often should I replace my air filter?
Most homes replace filters every 1 to 3 months, but intervals vary by usage, pets, and environmental conditions. Outdoor dust and indoor activities can shorten this window. Always follow the system manual and inspect the filter monthly during high-usage periods.
Most homes replace filters every one to three months, but it can vary with usage and pets. Check your system manual and inspect monthly during heavy use.
Can I install the filter backwards?
No. Filters are designed to be installed with airflow arrows pointing toward the blower. Installing backwards can block airflow and reduce filtration efficiency. If you are unsure, re-check the label or manual.
No, install with the arrows pointing toward the blower. If unsure, double-check the label or manual.
What if the filter is damaged or doesn't fit?
If the filter is damaged or the size is off, do not force it into place. Re-measure the housing and replace with the correct size. If necessary, contact the manufacturer or a professional for guidance.
If it doesn't fit or is damaged, re-measure and replace with the correct size. When in doubt, get expert help.
Are higher MERV filters always better?
Higher MERV filters capture more particles but can restrict airflow if the system isn't designed for them. Check your equipment specifications and consider a balance between filtration and airflow.
Higher MERV can catch more particles but may reduce airflow if the system isn't rated for it.
Can I reuse a disposable filter?
Disposable filters are intended to be replaced after a single use. Reusing them reduces filtration performance and may lead to buildup and odor. Always replace with a fresh filter.
Disposable filters should not be reused. Replace with a new one for best performance.
How should I dispose of old filters?
In many areas used filters go into regular household waste. Some components can be recycled; check local guidelines. Place the filter in a bag to prevent dust from spreading during disposal.
Dispose of old filters according to local guidelines; bag them to prevent dust spread.
Watch Video
Quick Summary
- Verify exact filter size before buying.
- Insert with airflow arrows toward the blower.
- Power off and inspect the housing for debris.
- Set replacement reminders to maintain air quality.