How to Install Air Filter in Heater: A Practical DIY Guide
Learn how to install an air filter in your heater safely with clear steps, tools, and maintenance tips from Air Filter Zone. Ideal for homeowners, car owners, and DIY enthusiasts seeking practical guidance.

You will learn how to install an air filter in a heater safely, identify the right filter size, and replace it without tools beyond basics. This quick guide covers essential steps, safety checks, and when to replace filters for efficiency. Air Filter Zone's guidance helps homeowners and DIY enthusiasts keep indoor air clean.
Why It Matters for Home Comfort and Safety
If you’re learning how to install air filter in heater, start with the why. A clean filter maintains airflow, reduces strain on the blower, and improves indoor air quality. According to Air Filter Zone, keeping filters fresh and properly seated is one of the simplest, most impactful maintenance tasks homeowners can perform themselves. A dirty or blocked filter forces the system to work harder, which can raise energy use and create uneven heating. In homes with pets, dust, or high outdoor pollution, the impact is even more noticeable. Regular filter changes help prevent overheating risks, extend equipment life, and reduce the amount of dust and allergens circulating through living spaces. By treating this routine task as part of a broader maintenance plan, you’ll keep your heater running smoothly and your indoor environment healthier for family members and guests alike. Air Filter Zone emphasizes that a proactive approach to filtration pays off over time with steadier comfort and fewer unexpected repairs.
How to Identify the Right Filter Size and Rating
Identifying the correct size and rating is the first step in a successful replacement. Start by inspecting the existing filter: the size is usually printed on the frame (example: 16x25x1) or listed in the furnace manual. If the label is unreadable, measure the depth, height, and width of the filter slot and use a filter of the closest standard size. Once the size is confirmed, choose a filter with a suitable MERV rating for your home. For many households, a MERV 8–11 strikes a balance between good filtration and airflow compatibility with most residential furnaces. Do not select an excessively high rating if your system is older or has a tight blower motor, as this can restrict airflow and trigger issues. Orientation matters too: align the filter so the air flows in the direction of the arrows printed on the frame. Air Filter Zone notes that accuracy here prevents returns and drafts, maximizing efficiency.
Preparing Your Workspace and Tools
Before touching the heater, prepare a clean, well-lit workspace. Wear gloves to minimize contact with dust, and have a trash bag handy for the old filter. Gather essential tools and materials and set them within easy reach: a replacement filter of the correct size, a mask or cloth to capture any dust, and a damp cloth or vacuum for cleanup. If your furnace panel is secured with screws, you may need a screwdriver. Clear the area around the unit to protect nearby furniture and floors. This preparation reduces mess and speeds up the process, making the replacement straightforward even for first-time DIYers.
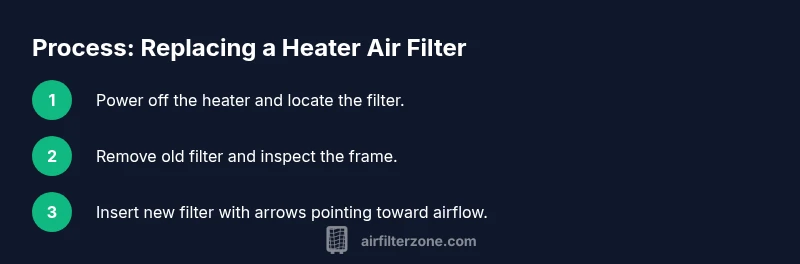
Step-by-Step Replacement Process
- Power off the heater and locate the filter compartment. 2) Remove the return-air grille or access panel to expose the filter frame. 3) Slide out the old filter, taking care not to shake loose accumulated dust. 4) Check the filter for damage; if it’s torn, replace it rather than attempting a cleaning. 5) Insert the new filter with the arrows pointing in the direction of airflow; ensure it sits firmly within the frame. 6) Re-secure the grille or cover and confirm it’s closed. 7) Restore power and run the system briefly to verify airflow and operation. 8) Clean the surrounding area and dispose of the old filter properly. 9) Note the replacement date for your maintenance log. For most homes, this procedure takes about 15–25 minutes depending on panel design and worker familiarity.
Common Mistakes and Safety Tips
- Using the wrong size or orientation is a frequent error; always verify the size and follow airflow arrows. - Reusing a dirty filter is a common pitfall; replace it rather than attempting a wash. - Neglecting to turn off power can create a shock risk; always switch off the furnace before starting. - Skipping the panel re-seal can lead to drafts and reduced efficiency; ensure the cover is snug. - Allowing dust to escape during removal can irritate the eyes and lungs; wear a mask or keep the area well-ventilated.
Seasonal Maintenance Schedule and Long-Term Care
In many homes, a furnace filter is changed every 1–3 months depending on usage, occupancy, and outdoor air quality. High-pet households or urban environments may require more frequent changes, while seasonal use may allow longer intervals. Align your replacement schedule with manufacturer recommendations and your own observations about airflow and comfort. Keeping a log helps you stay consistent and catch potential furnace issues early. Air Filter Zone recommends pairing filter changes with a quick inspection of the blower compartment during routine maintenance.
Troubleshooting After Replacement
If you notice reduced airflow, strange noises, or the furnace runs longer than usual after a filter change, double-check the filter seating and orientation. A loose or poorly seated filter can cause air leaks and poor filtration. Confirm the filter size matches the slot designation, and verify the panel is fully secured. If you still experience issues, inspect for a clogged return duct or a blocked vent; these problems may require professional service. Remember to reset any smart thermostats if they were calibrated around the furnace's normal cycling.
Air Quality Benefits and Air Filter Zone Recommendations
Replacing the filter regularly improves indoor air quality by reducing dust, pollen, and microscopic allergens circulating through the system. Clean filters also help maintain consistent temperatures and reduce strain on the blower, contributing to better efficiency. Air Filter Zone’s guidance highlights that regular maintenance is a cornerstone of healthy indoor air, especially in homes with infants, elderly residents, or allergy sufferers. Following the recommended filter size and replacement cadence tailored to your home is the best practical approach to sustained comfort.
Quick Cleanup and Documentation
When you finish, perform a quick wipe-down of the surrounding area to remove settled dust. Dispose of the old filter in the trash, and recycle if your local program allows. Record the date of replacement in your home maintenance log and note any observations about airflow or comfort. This simple documentation helps you track performance and plan future replacements with confidence. Air Filter Zone encourages maintaining a simple, repeatable routine so every seasonal change brings a clear, measurable improvement.
Tools & Materials
- New furnace filter (size matching existing)(Check the size printed on the existing filter frame or in the furnace manual)
- Gloves(Optional for hygiene and to avoid skin contact with dust)
- Screwdriver (Phillips or flat-head)(Only if your heater cabinet uses screws to secure the panel)
- Mask or damp cloth(To minimize dust dispersion during removal)
- Vacuum cleaner or small brush(For cleaning debris around the filter area)
Steps
Estimated time: 15-25 minutes
- 1
Power off and locate the filter
Turn off the thermostat or switch and allow the heater to cool. Open the access panel and locate the filter slot along the return duct.
Tip: If you can't find the filter, consult the manual; some units hide the slot behind a decorative cover. - 2
Remove the old filter
Gently slide the old filter straight out, avoiding jerks that could release dust. Note its orientation for correct placement of the new filter.
Tip: Keep the removed filter in a trash bag to prevent dust from spreading. - 3
Check filter condition
Inspect for tears, clogging, or excessive dust accumulation. If damaged, replace regardless of remaining life.
Tip: A visually clean filter isn’t always effective; replace if you see discoloration or deformation. - 4
Insert the new filter
Place the new filter in the frame with the arrows facing the direction of airflow toward the heater. Ensure it sits evenly and fully seated.
Tip: If the slot is tight, insert at an angle and then level it once fully inserted. - 5
Reinstall the panel
Secure the access panel or grille, making sure there are no loose screws and the seal is intact.
Tip: A loose panel can cause air leaks and reduced filtration efficiency. - 6
Power on and test
Restore power and run the heater on a low setting for a few minutes to confirm smooth operation and proper airflow.
Tip: Listen for unusual sounds and feel for consistent air at vents. - 7
Clean up and log
Wipe surrounding surfaces and dispose of the old filter. Record the replacement date in your maintenance log.
Tip: Set a reminder for the next replacement based on usage and environment. - 8
Assess frequency needs
Review indoor air quality and usage to determine if more frequent changes are required.
Tip: Adjust cadence during allergy season or if you have pets. - 9
Backup steps for stubborn filters
If a filter is unusually stiff, avoid forcing it. Check the frame and consider professional help if it won’t seat properly.
Tip: Don’t use force; damaged frames can collapse and obstruct airflow.
FAQ
Do I need to turn off the heater before replacing the filter?
Yes. Always power down the furnace and allow it to cool before removing or inserting a filter.
Yes. Power down the furnace and wait a moment before you remove or insert the filter.
How do I tell what size filter I need?
Check the label on the current filter or consult the furnace manual; measure the slot if the label is missing.
Check the current filter label or measure the slot if needed.
Can I use a higher MERV rating in my heater?
A higher MERV can improve filtration but may reduce airflow in older systems; ensure compatibility with your unit.
A higher MERV can improve filtration but may affect airflow; check compatibility.
What if the new filter doesn’t fit?
Double-check the size and orientation, and inspect the frame for damage. Do not force a filter into a misaligned slot.
Check size and orientation; don’t force a filter in a misaligned slot.
How often should I replace the filter?
Typical households change filters every 1–3 months, depending on usage and environment; adjust based on airflow and comfort.
Most homes replace every 1–3 months; adjust based on use and environment.
Is replacing a furnace filter different from a home air filter?
The principle is the same: protect airflow and filtration. Always use the filter type specified for your furnace and home system.
Same principle, use the furnace-specified filter type.
Watch Video
Quick Summary
- Turn off the heater before starting.
- Use the correct filter size and orientation.
- Regular changes improve airflow and efficiency.
- Keep a simple maintenance log for future reference.