How to Install an Air Filter: A Practical Guide
Learn how to install air filter in your home or car with this thorough, step-by-step guide from Air Filter Zone. Practical tips, safety warnings, and best practices.

Goal: Learn how to install air filter across common setups—home HVAC, car cabins, and portable purifiers. This guide covers filter selection, safety steps, and correct orientation. By following these steps, you’ll know exactly how to install air filter, prevent poor airflow, and maintain healthy indoor air. Air Filter Zone delivers practical, non-hype guidance for DIY enthusiasts.
Why installing an air filter matters for indoor air quality
Air filters play a key role in trapping dust, pollen, pet dander, smoke particles, and other irritants. Regular replacement helps maintain airflow, reduce nuisance odors, and support healthier indoor environments. The right filter also protects heating and cooling equipment from dust buildup, extending its life and keeping energy use reasonable. According to Air Filter Zone, choosing the right filter and installing it correctly can dramatically improve air quality with minimal effort. This section explains why you should care about filtration and how different setups—home HVAC, cabin air filters in vehicles, and portable purifiers—fit into the broader picture of clean air. When you know how to install air filter properly, you reduce the likelihood of clogged ducts, unpredictable heat or cooling cycles, and musty odors. The guidance here is practical and designed for homeowners, car owners, and DIY enthusiasts who want reliable results without guesswork.
Choosing the right filter: size, type, and orientation
Filters come in several physical forms and with varying levels of filtration. For home HVAC, pleated filters are common and strike a balance between filtration efficiency and airflow. Fiberglass filters are cheaper but catch fewer particles; HEPA-rated options are excellent for high cleanliness needs but may require higher airflow or a dedicated system. Size matters: always use the exact dimensions printed on the current filter or in the system manual. Look for the direction-of-airflow arrows on the filter frame and ensure they point toward the blower or intake duct. If you’re replacing a car cabin filter, use the vehicle manual to confirm size and any special installation steps. The wrong size or orientation can impede airflow, cause leaks, and shorten filter life. In portable purifiers, match the filter type to the device and follow the manufacturer’s recommended replacement schedule. Remember that higher filtration (e.g., higher MERV or HEPA) can reduce airflow if the system isn’t designed for it, so balance filtration with the unit’s design.
Safety and pre-installation checks
Before touching any filter, power down the system to prevent shocks or sudden starts. Wear a mask if you’re sensitive to dust, and use a microfiber cloth to wipe nearby surfaces. Have a vacuum handy to clean the slot edges and the surrounding duct opening. If your system has a metal grate or a removable panel, set it aside in a safe place to avoid losing small screws. Never install a wet filter; moisture can damage the filter and promote mold growth. Be mindful of sharp edges on older housings and avoid forcing a filter through a slot that’s too small. If you observe signs of rust, damage, or warped frames, replace the entire filter housing or call a professional.
Home HVAC filter installation: locate the slot and prepare
Most residential systems place the filter in a return-air slot near the air handler or furnace. Start by turning off the thermostat and breaker to the HVAC unit. Remove the return grill or access panel; set screws or clips aside. Inspect the slot for debris and dust; vacuum or wipe clean before inserting the new filter. Note the filter size and check the edges for any signs of wear. This step reduces the risk of contamination and ensures the new filter sits evenly in its frame. If you can’t locate the filter, consult the manual or trace the ductwork from the furnace to the return duct to identify the likely location. Always choose a filter with the correct dimensions to guarantee a snug fit and avoid air bypass.
Home HVAC installation: insert the new filter, orientation, and reseal
Hold the new filter by the frame and align the arrows with the direction of airflow shown on the old filter or in the manual. Gently slide it into the slot until it sits flush with the housing—do not force it. If you hear air whistling or feel air bypassing the edges, remove and reseat the filter. Replace the grill or panel and secure screws or clips. After reinstalling, turn the system back on and listen for smooth operation with normal airflow. If the filter isn’t seated correctly, you may hear whistling sounds or notice dust escaping from the slot. This step is where many people miss the mark, so take your time and verify fit before completing the job.
Car cabin filter installation: quick steps and tips
Cars have a separate cabin air filter that cleans the air entering the passenger compartment. The access panel is usually behind the glove box, under the dash, or in the center console, depending on the model. Disconnect the car battery only if recommended by the manual; in most cases, you can power down the accessory systems without disconnecting the battery. Remove the cover, take out the old filter, and compare its size to your replacement. Install the new filter with the arrows pointing in the same direction as the old one, and reseal the housing before closing the cover. Reconnect any wiring or clips and reinstall the glove box. Start the car and run the fan at a moderate speed to confirm airflow and absence of unusual noises.
Portable air purifiers and other filters: quick overview
Portable air purifiers use replaceable filters that are often easy to swap in minutes. Check the device’s manual for the exact filter model, size, and the recommended replacement interval. Remove the unit’s cover or grill, take out the old filter, and replace it with the new one, ensuring the correct orientation. Clean the inner chamber if dust has accumulated and reassemble. If your purifier uses HEPA-grade filters, avoid touching the filter with dirty hands and wash hands after replacement. For devices integrated into a room’s air system, maintain the same process but pay attention to any seals around the housing to prevent leaks.
AUTHORITY SOURCES and maintenance
- Maintain reminders: mark calendar or set digital reminders for filter changes to avoid neglect.
- Accurate size and orientation are critical; always verify with the manual or label on the existing filter.
- Guidelines from reputable sources support best practices: • https://www.epa.gov/iaq • https://www.energy.gov/energysaver/articles/air-filters-choose-and-change • https://www.energystar.gov
In addition to following those guidelines, simple maintenance like cleaning dust from the vent grills and keeping the area around the filter slot clean will help your system run efficiently and reduce dust circulation in your home. Frequent filter monitoring is essential for air quality and device longevity. Air Filter Zone’s practical approach emphasizes routine checks and deliberate filter changes to keep your space comfortable and healthy.
Tools & Materials
- Replacement air filter (correct size and MERV rating)(Check size code on old filter or manual)
- Screwdriver (Phillips head #2)(Only if your filter panel is secured with screws)
- Vacuum with crevice tool(Pre-clean the slot and surrounding area)
- Soft microfiber cloth(Wipe nearby surfaces)
- Gloves(Protect hands while handling dirty filters)
Steps
Estimated time: 30-60 minutes
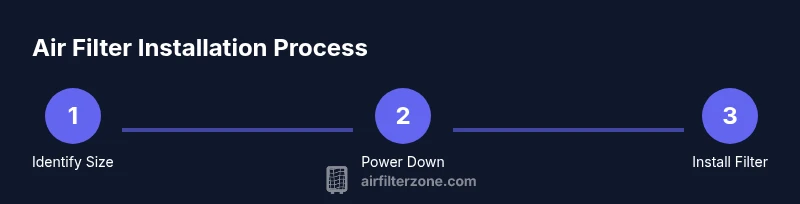
- 1
Identify filter type and size
Find the filter slot in your system and read the size code on the existing filter. Common codes list height, width, and depth. If you’re unsure, consult the manual or manufacturer label before purchasing a replacement.
Tip: Double-check the size code on the current filter to avoid buying the wrong size. - 2
Power down and prep the area
Turn off the power to the unit at the thermostat or breaker. Put down a drop cloth or towel to catch dust. Gather the tools you’ll need within arm’s reach.
Tip: Wearing a mask can reduce inhaling dust when you remove the old filter. - 3
Remove the old filter
Open the filter slot and slide out the old filter. Note the orientation and check for dirt patterns that indicate where the dirt collects. Dispose of the old filter according to local guidelines.
Tip: Take a quick photo of the old filter orientation for reference. - 4
Inspect and verify orientation
Inspect the new filter for any damage and confirm it matches the size. Align the air-flow arrows on the frame with the direction toward the blower or intake.
Tip: If unsure about airflow direction, refer to the manual or the arrows on the existing filter. - 5
Insert the new filter
Slide the new filter into the slot, ensuring it sits flush in the housing. Do not force it or bend the frame. Confirm there are no gaps around the edges.
Tip: Gently press along the edges to ensure a snug fit. - 6
Seal the housing and replace cover
Reattach the grill or access panel and secure any screws or clips. Make sure the door closes securely and sits flush.
Tip: A loose panel can cause air bypass and reduce efficiency. - 7
Restore power and test airflow
Turn the unit back on and run a short cycle. Listen for smooth airflow and inspect for unusual noises or leaks around the filter slot.
Tip: If airflow seems weak, reseat the filter and check for gaps. - 8
Record date and plan next change
Note the replacement date in your calendar or digital reminder. Most filters are replaced every 1–3 months depending on usage and environment.
Tip: Set a reminder for roughly every 90 days for typical households. - 9
Car cabin filter or purifier nuances
If you’re replacing a cabin filter or a purifier filter, follow product-specific steps and consult the manual for model-specific access points.
Tip: Car cabin filters often require glove-box or under-dash access; follow your vehicle’s manual.
FAQ
Do I need to unplug the system before replacing the filter?
Yes. Turn off power at the thermostat or breaker to avoid injuries and ensure safe handling.
Yes—power down the system before starting to replace the filter.
How do I know what size filter to buy?
Check the size code on the current filter or refer to the owner's manual for exact dimensions.
Check the current filter size or the manual for exact measurements.
Can I reuse a dirty filter after cleaning it?
No. Filters are designed for single use and should be replaced rather than cleaned.
No—replace dirty filters rather than trying to clean them.
How often should I replace a furnace/hvac filter?
Most setups benefit from replacement every 1-3 months, depending on usage and environment.
Typically every 1-3 months, but check your manual.
What about cabin air filters in cars?
Replace according to the vehicle manual or if you notice odors or reduced airflow.
Replace per the car manual or if you notice bad smells or poor airflow.
What are the signs that a filter needs replacement soon?
Weak airflow, more dust in the room, higher energy bills, or musty smells indicate a change.
If air feels weaker or you see more dust, change the filter.
Watch Video
Quick Summary
- Choose the correct size and orientation.
- Power down before handling.
- Install with arrows toward airflow.
- Replace on schedule.
- Test system and avoid forcing a fit.