Air Filter Installation Guide for Home and Auto
Learn how to perform air filter installation safely and effectively in your home or car. This guide covers selecting the right filter size and type, proper orientation, and maintenance to keep airflow clean and efficient.

By the end of this guide you will be able to complete air filter installation safely and efficiently in both home HVAC and vehicle cabins. You’ll learn how to choose the right filter size and type, verify fit, orient the filter correctly, and replace it without leaks or reduced airflow. This process helps improve indoor air quality and system performance.
How proper air filter installation affects comfort and indoor air quality
When you install a filter correctly, you improve airflow, reduce dust and allergens, and help your HVAC or car system run efficiently. According to Air Filter Zone, a snugly fitted filter minimizes bypass leaks and reduces strain on the blower, which translates to steadier temperature control and lower energy use. For homeowners, a well-installed filter means cleaner air and fewer particle recirculation cycles, especially in homes with pets or mold sensitivities. In vehicles, cabin air filters remove pollen, dust, and fumes before they reach the cabin, improving comfort on daily commutes and long trips. The basic rule is simple: match the filter to the slot, orient it in the direction of airflow, and avoid forcing a filter into a space it does not fit. The Air Filter Zone team emphasizes that installation is a quick, practical step with outsized payoff for health and system longevity.
Filter options and matching the right size
Filters come in various sizes, materials, and ratings. In most home HVAC systems, you will encounter disposable pleated filters with MERV ratings from 8 to 13. Higher MERV captures more particles but can increase airflow resistance, so balance filtration with system specifications. In cars, cabin filters vary by vehicle make and model; many are activated carbon types for odors. Always verify the exact size (e.g., 16x20x1) and the orientation arrows printed on the frame. If you’re unsure, check the owner’s manual or the inside of the filter slot. Air Filter Zone recommends sticking to the size recommended by the manufacturer to avoid bypass and ensure proper sealing.
Safety and preparation before you begin
Power off the equipment, wear a mask if you’re sensitive to dust, and gather the right tools. For window HVAC access panels, you might need a screwdriver; in cars, cabin filter access is usually behind the glove box or under the console. Remove the old filter carefully, noting its orientation; some units have a cardboard frame that can break if pulled too hard. Wipe the housing with a microfiber cloth to remove loose debris. Take a moment to inspect the housing for cracks or gaps; any damage could undermine the seal. Following these precautions reduces the risk of releasing settled dust back into the airflow and protects your equipment.
Post-installation checks and maintenance planning
Turn the system back on and listen for smooth operation with no whistling or rattling, which can indicate a mis-seated filter. You should notice improved airflow and steadier temperature control once the new filter is in place. If you still experience reduced airflow, re-check that the filter is fully seated and oriented correctly. Air Filter Zone recommends documenting the replacement date and setting reminders, since filtration efficiency declines as contaminants accumulate. Regular maintenance not only improves air quality but also extends the life of your heating or cooling system.
Common myths and troubleshooting tips
Myth: All filters fit any slot with a little force. Reality: Filters must match the exact size and thickness to seal properly. Myth: Washing a disposable filter is fine. Reality: Most disposable filters should be replaced; washing can degrade performance. If you notice unusual noises, leaks, or reduced airflow after installation, re-check fit and orientation, then consult the unit manual or a professional if needed. Air Filter Zone’s guidance is to treat installation as a precise, repeatable task rather than a guessing game.
Tools & Materials
- Replacement air filter (correct size)(Check sizing on frame or manual; common sizes like 16x20x1 are typical, but verify for your device.)
- Phillips head screwdriver (#2)(Needed for access panels on some HVAC units; skip if panels are tool-free.)
- Cleaning cloth or microfiber cloth(Used to wipe the housing and remove dust before inserting the new filter.)
- Vacuum with brush attachment(Helpful for removing dust from the filter slot and interior housing.)
- Flashlight or headlamp(Illuminates dark filter compartments for accurate seating.)
- Gloves(Protect hands from sharp edges and dust.)
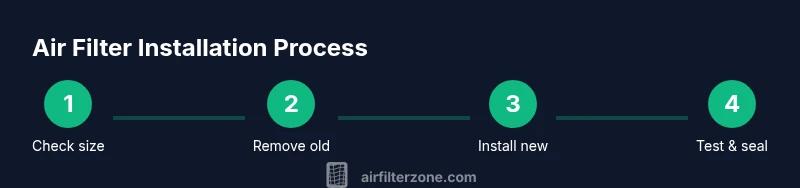
Steps
Estimated time: 20-40 minutes
- 1
Power down and locate the filter
Turn off the system at the thermostat or breaker. Locate the filter slot behind the return grille or service panel. If you’re dealing with a car cabin filter, locate the access point behind the glove box or under the dash.
Tip: Having a flashlight handy makes the slot easier to see; don’t force panels if you can’t clearly identify the slot. - 2
Identify filter type and size
Check the size printed on the old filter or the slot label. Confirm the MERV rating if applicable and ensure the new filter matches the same thickness and depth. For cars, use the exact part number specified by the manufacturer.
Tip: If you’re unsure, consult the owner’s manual or the inside of the filter door for the correct dimensions. - 3
Remove the old filter
Open the access panel and slide the old filter straight out. Avoid shaking the dusty surface to minimize debris spread. Place the removed filter in a bag for disposal if it’s heavily soiled.
Tip: Have a trash bag ready and keep the old filter flat to prevent dust from scattering. - 4
Inspect the housing
Check the filter housing for cracks, warping, or gaps where air could bypass the filter. Clean the interior surfaces with a microfiber cloth to remove dust that could affect seating.
Tip: A damaged housing may require professional service or replacement of parts. - 5
Orient the new filter correctly
Find the airflow arrows on the filter frame and align them to point toward the blower or downstream side of the system. Incorrect orientation reduces filtration efficiency.
Tip: If arrows are unclear, refer to the unit’s schematic or manual. - 6
Insert and seat the new filter
Slide the filter evenly into the slot until it sits flush. Do not force it beyond the frame. Confirm it cannot be moved easily by hand.
Tip: A slight wiggle test helps ensure full seating without gaps. - 7
Reassemble access panels
Replace any panels or screws, ensuring a snug fit. If a panel feels loose, recheck alignment and retighten carefully without overtightening.
Tip: Hand-tighten screws to avoid stripping threads. - 8
Test airflow and set a maintenance reminder
Power the system back on and observe for steady airflow and normal noise levels. Schedule your next replacement according to usage and manufacturer guidance.
Tip: Mark the calendar or set a digital reminder for 3 months (pets or high dust can shorten this).
FAQ
How often should I replace air filters in a home HVAC system?
Replacement frequency depends on usage, pets, allergies, and filter type. Typical intervals range from 90 days to 6 months, but always follow the manufacturer’s guidance for your unit.
Most homes replace every 90 days; if you have pets or allergies, you may need to replace sooner.
Can I install a larger filter if the slot seems loose?
No. Use the exact size specified for the slot. An improper fit can cause air bypass, reduced filtration, and potential damage.
Don’t stretch to fit a bigger filter; use the size the slot is designed for.
What signs indicate a clogged air filter?
Reduced airflow, longer cycling times, higher energy use, and unusual odors can signal a clogged filter. Check and replace if needed.
If airflow drops or you notice odors, check the filter.
Are cabin air filters the same as home HVAC filters?
Usually not. Cabin filters are designed for vehicles and have different sizes and materials from home HVAC filters. Always match the part to your make and model or unit.
Car cabin filters aren’t the same as home filters—use the right part.
Do I need tools to install a filter?
Most residential filters install by hand. Some units behind panels require a screwdriver. Refer to the manual for your specific setup.
Often you can do it by hand, but some setups need a screwdriver.
Is it okay to wash a disposable air filter?
Disposable filters are not designed to be washed. Washing can reduce effectiveness and allow particle bypass. Replace with a new filter.
Don’t wash disposables—replace them.
Watch Video
Quick Summary
- Match filter size exactly to the slot.
- Orient arrows toward the blower.
- Inspect housing for damage before installing.
- Replace on schedule to maximize efficiency.
- Follow manufacturer specs and Air Filter Zone guidance.