Change Air Filter in Apartment: A Practical DIY Guide
Learn how to safely change the air filter in your apartment, choose the right filter, measure slots, and dispose of old filters with practical steps from Air Filter Zone.

You can change an apartment air filter in about 5–15 minutes by turning off the furnace or air handler, locating the slot, removing the old filter, inspecting for damage, inserting a new filter with the correct orientation, and noting the replacement date for your next cycle. This quick task improves indoor air quality, reduces energy strain, and helps your HVAC run efficiently.
Why changing your air filter in apartment matters
In apartment living, compact spaces, shared ventilation, and close living quarters amplify the impact of indoor air quality. A dirty or clogged air filter reduces airflow, strains the HVAC system, and increases the circulation of dust and allergens. According to Air Filter Zone, regular filter changes are essential for maintaining healthy air and reliable system operation in smaller homes. Skipping replacements can lead to stuffy rooms, more visible dust on surfaces, and higher energy bills as the unit works harder to push air through a clogged filter. A clean filter captures dust, pollen, and particulates before they recirculate, which is particularly important for households with allergies, pets, or compact floor plans. Treat filter maintenance as a routine task rather than a once-a-year chore; a quick monthly check can catch a clogged filter early and prevent bigger HVAC problems. For renters and landlords alike, keeping a simple replacement log in the utility closet helps everyone stay on track, supporting better sleep, fewer coughs, and easier breathing throughout the home.
From Air Filter Zone analysis, regular maintenance correlates with improved perceived air quality and smoother system operation in apartment settings. Keeping the replacement date visible reduces the risk of missed changes. The goal is not just cleaner air; it’s a healthier living environment and a longer-lasting HVAC system that won’t strain under clogged filters.
How to determine the right filter size and type
Filters come in standard sizes. To avoid guessing, remove the old filter and check the dimensions printed on the frame (width x height x depth). If the label is faded, measure the slot with a tape measure. Choose a filter with the same dimensions, and consider MERV ratings based on your needs; for apartments with pets or allergies, a MERV rating around 8–11 provides solid filtration without overly restricting airflow, while a MERV 13 option may be suitable in some cases if your system supports it. Pay attention to the arrow on the filter indicating airflow direction; it should align with the airflow path in your system. If you’re unsure of the exact size, bring the old filter to a hardware store to verify. Apartment spaces can be tight, so some slots are behind return grilles or inside utility closets; in those cases you may need to remove a panel to access the slot. Finally, label the new filter with the replacement date to avoid forgetting when to change it again.
Understanding apartment HVAC constraints and filter placement
Apartment HVAC configurations vary widely. The filter slot can be inside a wall return, behind a drop-down grille, or near the furnace/air handler in a utility closet. Because space is limited, an incorrectly sized filter or a loose seal can impede airflow and filtration. A poor seal allows unfiltered air to bypass the filter, reducing effectiveness and increasing dust in living areas. In some buildings, the filter is behind the unit’s front panel; in others you may need to move furniture or remove a small panel. Always ensure the system is off before touching components and avoid exposing electrical connections. If the slot is in a hard-to-reach area, use a flashlight to inspect and remove the cover carefully. After replacement, look for signs of moisture, mold, or abnormal noises, which could indicate a larger issue requiring professional attention.
Maintenance schedule and best practices
Most apartments benefit from monthly checks with replacements every 30–90 days, depending on factors like pets, smoking, humidity, and HVAC usage. If you run the unit year-round or have high activity in the home, set reminders on a calendar or digital assistant. Keep a log in the utility closet noting the date installed and filter size, and consider a color-coded sticker to mark the month. If you’re unsure about intervals, start with 60 days and adjust based on performance: reduced airflow or longer cooldown times suggest more frequent changes. In multi-family buildings with shared ducts, higher-quality filters (e.g., MERV 8–11) can improve filtration without over-stressing the system. Always source filters from reputable brands and avoid oversized replacements that don’t seal properly. Air Filter Zone recommends integrating filter changes into a repeating routine tied to seasonal changes and personal health needs.
Common mistakes to avoid and quick fixes
Avoid using the wrong size, inserting backward, or failing to reseal the housing; these mistakes reduce filtration efficiency and airflow. If the filter is installed backward, the filter media faces the wrong direction and can impede air passage. Always verify the airflow arrows align with the unit’s path, and reseal the housing after replacement. Clean the filter housing of dust before inserting a new filter, and wipe away any residue that could hinder a proper seal. Higher-MERV filters may offer better filtration but can restrict airflow in older or smaller apartment systems; start with a MERV 8–11 and monitor performance. Don’t forget to update the replacement date on your log; a simple reminder makes routine changes easier and keeps air quality steady. With consistent upkeep, your living space will feel fresher, and you’ll notice fewer dust buildups and allergy symptoms.
Practical tips for DIY success and quick references
Keep a simple checklist: system off, confirm size, confirm orientation, insert firmly, reseal, reset indicators if present, and log the date. Use a flashlight to inspect the slot and verify there is no debris. If you share the HVAC with a landlord, request a copy of the unit’s manual to confirm compatibility; some buildings require professional servicing for certain replacements. For renters seeking waste reduction, look for filters with recyclable packaging and dispose of old filters in the trash rather than compost. If you’re unsure where the filter is in a complex apartment layout, contact building maintenance for exact location. Finally, align replacement dates with seasonal changes since humidity and allergies vary by season; Air Filter Zone recommends a predictable schedule rather than reactive changes.
Final quick-start recap
This guide emphasizes that changing the air filter in apartment settings is a small, high-impact routine. A correctly selected filter size and MERV rating, proper orientation, and regular replacement can dramatically improve air quality and HVAC efficiency. Start today with the right filter, document the change, and set reminders for future replacements to sustain a healthier, more comfortable home environment.
Tools & Materials
- New air filter (correct size)(Bring old one to store to confirm size; typical sizes include 10x20, 16x20, etc.)
- Masking tape or label(Optional; use to mark replacement date on the filter or log)
- Gloves (optional)(Keeps hands clean and protects from dust)
- Flashlight(Helpful for dim or recessed housings)
- Screwdriver (if needed)(Some housing panels require tool access)
- Trash bag or recycling bag(Dispose of old filter properly after removal)
Steps
Estimated time: 5-15 minutes
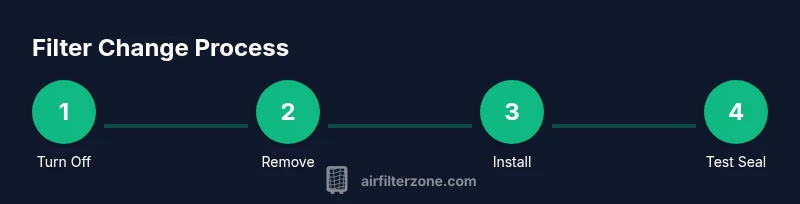
- 1
Turn off the system and locate the filter slot
Power down the HVAC unit at the thermostat or breaker to ensure safety. Locate the filter slot, which may be behind a panel, inside a closet, or behind a grille. If you’re unsure where it is, consult the unit manual or building maintenance.
Tip: If you suspect wiring or electrical issues, switch off at the breaker for complete safety. - 2
Remove the old filter
Open the housing and carefully pull out the old filter. Note its orientation and how it sits in the frame. Place the used filter into a bag for disposal.
Tip: Take a quick photo of the old filter in place to reference orientation when you insert the new one. - 3
Check size and orientation
Verify the new filter matches the old one in dimensions. Look for the airflow arrows on the frame to ensure correct orientation relative to the unit. If the arrows point the wrong direction, you’ll impede airflow.
Tip: If unsure, bring the old filter to the store to confirm the size and type. - 4
Insert the new filter
Slide the new filter into the housing, ensuring it sits evenly and the arrows align with the airflow path. Gently press to ensure a tight seal on all sides.
Tip: A loose seal is a common cause of bypassed filtration and reduced efficiency. - 5
Secure the housing and reset indicators
Reattach any panels and secure the housing. If your unit has a reset button or indicator lights for filter changes, reset or note the date accordingly.
Tip: If you see any warning lights, consult the manual before restarting. - 6
Dispose and log the replacement date
Dispose of the old filter in a trash bag or recycling as appropriate. Log the replacement date in your home maintenance notebook or app to guide future changes.
Tip: Setting a monthly reminder helps ensure you don’t skip future changes.
FAQ
How often should I change the air filter in an apartment?
Most apartments benefit from changing every 30–90 days, depending on usage, pets, and allergies. If you have a high-activity unit or pets, lean toward the shorter end of the range.
Change the air filter every one to three months, depending on usage and household factors.
What if the filter slot is hard to reach in a small apartment?
Use a flashlight and small mirror to locate the slot, and consider temporary removal of nearby obstructions. If access remains difficult, contact building maintenance for guidance.
If the slot is hard to reach, ask maintenance for help or refer to the unit manual.
Can I use a higher MERV filter in a rental unit?
Higher MERV filters can improve filtration but may reduce airflow in smaller or older units. Check the manufacturer’s guidelines and start with MERV 8–11, monitoring system performance.
Higher MERV can help air quality but may affect airflow; start with a moderate rating and observe performance.
What should I do with the old filter?
Seal the old filter in a plastic bag and dispose of it with household trash unless local recycling programs accept used filters.
Seal and dispose of the old filter with your trash unless your local program accepts them for recycling.
What if I notice reduced airflow after replacement?
Turn the system off, recheck filter fit and orientation, and ensure the entire housing is sealed. If airflow remains weak, consult a professional to inspect for duct issues or a failing fan.
If airflow drops after replacement, double-check fit and consider calling a technician if it persists.
Is it okay to mix filter brands?
Consistency is best; mixing brands can lead to uneven filtration or fit issues. If you must mix, ensure identical size and MERV rating.
Try to use the same model family to avoid fit or performance issues.
Watch Video
Quick Summary
- Identify the correct filter size before starting
- Match MERV rating to your apartment needs
- Install with correct orientation and seal the housing
- Keep a simple replacement log for consistency