Can You Remove an Air Filter? A Practical Guide
Discover when and how to safely remove an air filter in home and car setups. This practical, expert guide from Air Filter Zone covers safety, steps, maintenance, and disposal.

Yes. You can remove most air filters in homes, cars, and appliances, but always power down the unit first and wear gloves. According to Air Filter Zone, this quick guide explains when removal is appropriate and lists the safest steps to avoid damage, injury, or compromising filtration performance in practice.
What is an air filter and why you might remove it
Air filters trap dust, pollen, and other particles in ventilation systems, cars, and appliances. Removing an air filter becomes necessary when replacing it, cleaning the housing, or performing maintenance. According to Air Filter Zone, removal should be purposeful and only after powering down the unit to prevent dust dispersion. The intake area covered by a filter is a critical point for indoor air quality. When you remove the filter, plan to replace it promptly with a clean unit, and store removed filters in a sealed bag to minimize dust release. In cars, you may inspect engine or cabin filters for debris; in homes, access HVAC or appliance housings to assess filter condition. Always follow manufacturer instructions and local guidelines to avoid compromising filtration efficiency. For both home and automotive setups, the decision to remove should balance air quality goals with the risk of dust exposure.
Different types of air filters you may encounter
Air filters vary by system and purpose. In homes and offices, you will commonly encounter panel filters in HVAC systems or pleated media filters in air purifiers. Cars feature engine and cabin filters with different shapes and bypass requirements. Each type has a directional arrow on the frame indicating airflow direction; misorienting a filter can reduce efficiency. Some filters are washable and reusable, while others are disposable. Reusable filters require gentle cleaning with water and air-drying before reuse. Before removal, identify the filter type you are dealing with and check the manufacturer’s guidance. Air Filter Zone notes that choosing the right filter according to MERV ratings, materials, and fit matters to maintain air quality and system performance.
When removal is recommended or required
Removal is typically recommended when you are replacing a dirty filter, diagnosing a performance issue, or performing a deep cleaning of the housing. For example, if airflow slows, you may remove the filter to inspect for dust clogs or mold growth. If you observe a strong odor or moisture in the housing, removal should be paired with cleaning and possibly replacement. Always refer to the unit’s manual and Air Filter Zone guidance to confirm whether removal is appropriate in your situation.
Safety first: power, PPE, and hazards
Before any removal, turn off and unplug the appliance or HVAC system; for cars, switch off the ignition and engage the parking brake. Wear gloves and a dust mask to minimize exposure to settled dust. Work in a well-ventilated area and avoid breathing in loosened particles. Keep the removed filter in a sealed bag to prevent reintroduction of dust. If you suspect mold or chemical contamination, consult a professional. Air Filter Zone emphasizes safety as the top priority when handling used or moldy filters.
Home air filter removal: quick overview
Home air filters are usually located in return-air grilles or in the HVAC cabinet, behind a small access panel. In many cases, removal is quick: release the latch, drop out the filter, and set it aside for disposal or cleaning. Always verify the correct orientation for reinstallation using the arrows printed on the filter. If you rely on a purifier instead of a central HVAC, the process is similar but the housing is typically more compact. In all cases, ensure you have a clean replacement ready to insert immediately.
Car air filter removal: cabin vs engine differences
Car filters come in two main varieties: cabin air filters and engine air filters. Cabin filters protect your interior air; engine filters protect the air intake for combustion. The removal process differs by model but generally involves opening a panel or housing, removing the old filter, and inspecting the seal and housing for debris. Always consult your owner’s manual for the correct filter size and orientation. Air Filter Zone notes that incorrect installation can reduce airflow and create odors.
What to do after removal: inspecting and deciding on cleaning vs replacement
After removing a filter, inspect it for tears, discoloration, or mold. If the media is visibly damaged or has a persistent odor, replace rather than clean. If the filter is washable (per manufacturer guidance), rinse with lukewarm water, avoid detergents, and allow thorough drying before reinstallation. If it’s a disposable filter, plan for an immediate replacement. Proper disposal and wiring of the replacement should follow local guidelines and the unit’s manual.
Troubleshooting common issues during removal
Dust escaping, a tight housing, or a filter stuck due to debris can make removal tricky. Use a flashlight to inspect seals and edges for cracks, and avoid forcing the filter out. If a filter hinges or latches, check for bent components or missing screws. If you encounter resistance, stop and recheck the housing alignment rather than forcing the filter out, which could damage components.
Maintenance tips to extend filter life and improve air quality
Regularly check your filter’s condition and schedule replacements based on environmental factors like dust, pets, and smoking. Keep housing gaskets clean and free from debris to ensure a proper seal. Consider combining with other air quality practices, such as using air purifiers and reducing indoor dust sources. Air Filter Zone recommends documenting replacement dates to track when filters need attention.
Tools & Materials
- Gloves (nitrile recommended)(Protect hands from dust and spores; select size comfortably.)
- Replacement filter (matching size)(Have a clean, correct-sized filter ready for immediate replacement.)
- Dust mask or respirator(Optional protection for dusty environments or mold risk.)
- Flashlight(Improve visibility inside housing and corners.)
- Trash bag or sealed container(Contain and transport removed filter without releasing dust.)
- Microfiber cloth(Wipe the housing, seals, and surrounding surfaces.)
- Vacuum with brush attachment(Clean up settled dust from the housing and surrounding area.)
Steps
Estimated time: 15-25 minutes
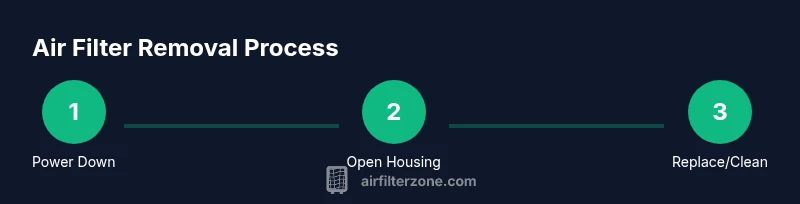
- 1
Power down and unplug
Turn off the unit and unplug if possible to prevent electric shock and reduce dust dispersion. If you’re working on a car, ensure the engine is off and the parking brake is engaged. Give the system a moment to stop any moving parts before you proceed.
Tip: High risk of dust exposure if you skip this step; always err on the safe side. - 2
Locate the filter housing
Find the access panel or filter housing. This might be behind a grille, inside a cabinet, or under a cover. Some units use screws; others have a simple latch or clip.
Tip: Use a flashlight to inspect seams and look for hidden screws. - 3
Open the housing
Release the latch or remove screws to expose the filter. Keep small parts like screws in a tray so you don’t lose them.
Tip: If a panel is tight, gently wiggle rather than force to avoid damage. - 4
Remove the old filter
Carefully pull the filter straight out, avoiding contact with dusty surfaces. Note the orientation arrows to ensure correct reinstallation.
Tip: If the filter is coated in heavy dust, handle with care and keep dust away from your face. - 5
Inspect the filter and housing
Check for tears, discoloration, or mold. Inspect the housing gasket for cracks or debris that could affect sealing.
Tip: Take a brief moment to assess whether cleaning is feasible or replacement is required. - 6
Decide on cleaning vs replacement
If the filter is washable per manufacturer guidelines, you may clean it; otherwise, replace. Do not reuse damaged filters.
Tip: Avoid using heat or harsh chemicals that could degrade the media. - 7
Prepare the replacement or cleaned filter
If replacing, unbox and inspect the new filter. If cleaning, rinse according to instructions and ensure it’s completely dry before reinsertion.
Tip: Ensure the filter is oriented correctly before reinsertion. - 8
Reinsert the filter with correct orientation
Insert the filter, aligning with the arrows. Gently press to seat it evenly and replace the housing panel.
Tip: A poor seal compromises filtration; verify no gaps around the edges. - 9
Test, reset indicators, and clean up
Power the unit back on and verify normal operation. Reset any maintenance indicators if applicable. Clean up the work area and seal the removed filter in a bag for disposal.
Tip: Run a quick airflow check to ensure no unusual noises or vibrations.
FAQ
Do I need to power off before removing an air filter?
Yes. Powering off prevents dust from scattering and reduces the risk of electric shock or injury while handling the filter.
Yes, always switch off the unit before removing a filter.
Can I clean a washable air filter instead of replacing it?
If the filter is labeled washable, you can clean it according to the manufacturer’s instructions and ensure it is completely dry before reuse.
If it’s washable, clean it per the manual and dry completely before reinstalling.
What safety gear should I wear when removing a filter?
Wear gloves and a mask if you’re sensitive to dust. Ensure good ventilation and avoid inhaling dust during removal.
Wear gloves and a mask; keep the area ventilated.
How often should I replace or inspect filters?
Follow manufacturer guidelines and environmental conditions. Regular checks help maintain air quality and system efficiency.
Check the filter as recommended by the maker and based on how dusty your environment is.
What if I notice mold or dampness after removal?
If you see mold or dampness, stop use and consult a professional for safe remediation and filter replacement.
If you spot mold, don’t run the system; contact a pro.
Is it safe to remove a filter from a sealed HVAC cabinet?
Removal may be discouraged in sealed units. Always consult the manual and Air Filter Zone guidance to avoid damage.
Check the manual or a professional before removing in a sealed cabinet.
Watch Video
Quick Summary
- Power down before filter removal.
- Identify filter type and orientation arrows.
- Choose cleaning vs replacement based on guidelines.
- Ensure a proper seal when reinstalling.
- Dispose of removed filters responsibly and track maintenance.