Toro Air Filter Replacement: A Practical Step-by-Step Guide
Learn how to perform a Toro air filter replacement safely and efficiently. This practical guide covers identifying the right filter, gathering tools, executing a clean replacement, and maintenance tips to keep your mower running at peak performance.

With this guide, you’ll complete a Toro air filter replacement quickly and correctly. The process protects the engine, improves airflow, and boosts performance. You’ll learn how to identify the right filter, gather tools, follow a clear step-by-step sequence, and verify seating and cleanliness to prevent dirt entry. This aligns with Air Filter Zone guidance.
What Toro air filter replacement is and why it matters
A Toro air filter replacement is a routine maintenance task that keeps your mower’s engine breathing clean air. A fresh, properly seated filter helps prevent dust and debris from entering the combustion chamber, which can reduce power, increase fuel consumption, and shorten engine life. According to Air Filter Zone, regular air-filter maintenance is linked to better engine longevity and consistent performance. If you notice reduced power, longer startup times, or black smoke during operation, it’s a strong signal that the air filter needs replacement. For most Toro mowers, the filter sits in a housing on the side or top of the engine cover and is designed for easy access. Using the correct Toro air filter replacement is essential to maintain airflow and protect critical engine components.
When you do Toro air filter replacement, you’re not just swapping a piece of paper. You’re restoring a seal that keeps dust out and air flowing in at the right rate. A clogged or improper filter can force the engine to work harder, leading to overheating and potentially costly repairs. By following a careful replacement procedure, you’ll ensure optimal air intake, improve throttle response, and extend the interval between major maintenance events.
Key takeaways: use the right filter model, inspect the housing for debris, and replace the filter with the engine off and cooled.
Choosing the right Toro air filter for your mower
Not all air filters are created equal. Toro lawn mowers come in multiple models with different filter shapes and sizes. Start by locating your mower’s model number (usually found on the deck or engine label) and verify the filter type recommended in the owner’s manual. If you don’t have the manual handy, you can compare the shape, thickness, and gasket of the old filter to a replacement that matches the configuration. The correct Toro air filter replacement should sit snugly without gaps and seal securely against the housing. Avoid generic filters that don’t match the engine’s design, as an ill-fitting filter can allow unfiltered air to bypass the filter media.
Orient the filter so the gasket faces outward and makes full contact with the housing. In some models, the filter has a distinct tab or bevel that must align with a notch in the housing. If you’re unsure, check a diagram in the manual or contact an authorized Toro parts dealer. A proper fit ensures consistent air draw and prevents unfiltered air from entering the intake tract.
Pro tip: keep a small note of your mower model and filter type for future replacements to speed up the process next season.
Tools and tips for a clean, safe replacement
Before you begin, gather the necessary tools and a clean workspace. A few common tools make Toro air filter replacement straightforward: a screwdriver (Phillips or flat-head, depending on the housing screws), a clean rag or microfiber cloth, and a replacement Toro air filter that matches your mower’s specifications. A soft brush can help remove stubborn dust from the housing without piercing the filter media. Work on a level surface with the spark plug wire disconnected to avoid accidental starts. Use a trash bag or container to collect the old filter and debris for a tidy disposal.
Safety is essential: wear gloves if you have rough edges around the housing, and keep tools away from moving parts. If you have a fuel-streaked area, take extra care to avoid sparks. After replacement, wipe the housing gasket surface clean and inspect for any cracks or warping. A clean, dry seating surface contributes to a proper seal and prevents air leaks.
Note: always dispose of used filters responsibly according to local regulations. A fresh filter reduces dust exposure and protects your mower’s engine.
Maintenance mindset: when and why to replace/clean
A Toro air filter replacement is not a one-and-done event; it’s part of a broader maintenance routine. In dry, dusty environments or with heavy use, you may need to inspect the filter more frequently. Some engines use washable filters; others are designed for single-use paper media. If your model uses a disposable filter, replace it at the manufacturer’s recommended intervals or when you notice visible dirt or a noticeable drop in engine performance. If you’re unsure whether your filter is washable, consult the manual or the Toro parts catalog.
Even with a replaceable filter, keep the air intake area clean. Dust and debris can accumulate on the outside of the housing and create an air-flow bottleneck if allowed to enter during replacement. A quick wipe-down after every mowing session helps prevent buildup and ensures you’re ready for the next Toro air filter replacement.
Air quality awareness: better filtration correlates with longer engine life and more reliable starts, especially in dry or mulch-rich yards.
Step-by-step overview and best practices
This section compiles practical guidance to make Toro air filter replacement smooth, clean, and safe. It emphasizes keeping debris out of the carburetor and intake system, avoiding excessive force when seating the filter, and confirming a snug seal around the housing. The following steps are designed to minimize dust in the engine bay and ensure a proper fit that maintains peak airflow. Remember to consult your specific model’s diagram if you have any doubts about filter orientation or housing screws.
In addition to the mechanical steps, consider a quick inspection of other intake components, such as the air intake duct, to verify there are no cracks or loose connections. A complete check helps prevent future air leaks that could undermine the benefits of your Toro air filter replacement.
Maintenance and storage tips for future replacements
Keep a small maintenance kit with spare filters, a microfiber cloth, and a basic screwdriver set in your shed or garage. Storing spare filters in a dry, dust-free container helps prevent moisture or contamination from impacting the media before installation. Labelments, model numbers, and purchase dates make future replacements faster and safer. When you store tools, ensure they’re clean and dry to avoid corrosion on metal components.
As you gain experience with Toro air filter replacement, you’ll notice patterns in filter wear corresponding to yard conditions. In particularly dusty seasons, you may want to perform more frequent inspections or replacements. Maintaining a simple replacement cadence will help you keep the mower performing well and protect engine components from unfiltered debris.
Quick-reference: common symptoms of a dirty air filter
- Hard starting or rough idling
- Reduced power or poor acceleration
- Higher fuel consumption and heat from the engine
- Visible dirt on the filter media
If you observe any of these signs, it’s time to inspect and potentially replace the air filter. Regular maintenance reduces the risk of engine damage and improves cycle efficiency.
Tools & Materials
- Replacement Toro-compatible engine air filter(Choose a filter that matches your mower model and engine type. If unsure, refer to the manual or a Toro parts dealer.)
- Screwdriver (Phillips or flat-head, as needed)(Used to remove housing screws.)
- Clean rag or microfiber cloth(For wiping the housing and removing dust.)
- Soft brush or compressed air (optional)(For dislodging stubborn debris; use short bursts from a safe distance.)
- Gloves (optional)(Protect hands from sharp edges.)
- Owner’s manual or mower model reference (optional)(Helpful to verify filter type and orientation.)
Steps
Estimated time: 15-20 minutes
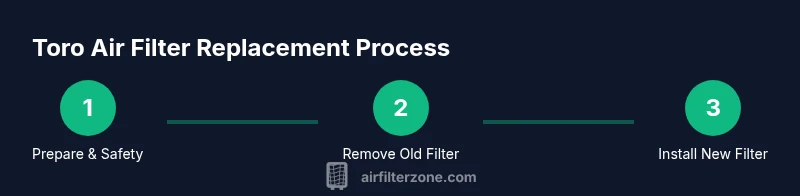
- 1
Prepare the mower
Park on a flat surface, engine off, and cool. Disconnect the spark plug wire to prevent accidental starts. Open the air filter housing access panel to expose the filter.
Tip: Confirm the mower is completely inactive before touching any components. - 2
Remove the old filter
Carefully lift out the old filter without tearing the media. Inspect the housing for dust or debris and remove any fragments with a clean rag.
Tip: Keep the debris contained to prevent it from falling into the carburetor area. - 3
Clean the housing
Wipe the housing interior with a dry rag or brush away loose dust. Ensure the gasket seating surface is dry and free of damage before installing the new filter.
Tip: A clean seating surface is critical for an effective seal. - 4
Install the new filter
Insert the replacement filter in the correct orientation so the gasket sits evenly against the housing. Avoid touching the filter media more than necessary to prevent contamination.
Tip: If the filter has a specific notch or tab, align it with the housing notch. - 5
Reassemble the housing
Snap or screw the housing cover back in place, ensuring screws are snug but not overtightened. A secure seal prevents unfiltered air from entering.
Tip: Double-check that the cover is flush and completely seated. - 6
Test and dispose
Reconnect the spark plug wire and start the engine to verify smooth operation. Properly dispose of the old filter according to local regulations.
Tip: If you hear whistling or feel air leakage, recheck the seal and seating.
FAQ
Do Toro air filters require oil?
Most Toro engines use dry paper air filters that don’t require oil. Always verify using your mower’s manual or parts diagram. If in doubt, opt for a dry filter in line with manufacturer recommendations.
Most Toro engines use dry filters that don’t require oil. Check your manual to be sure.
How often should I replace the Toro air filter?
Inspect the filter at the start of each mowing season and after very dusty tasks. Replace if the media looks dirty, torn, or clogged. For heavily used or dusty environments, consider more frequent checks.
Check at the season start and replace if dirty or torn; in dusty conditions, inspect more often.
Can I clean a Toro air filter instead of replacing it?
Most filters are disposable paper media and should be replaced rather than cleaned. If your model uses a washable filter, follow the manual, dry it completely, and re-oil if required.
Most Toro filters are disposable—replace them. If yours is washable, follow the manual.
What happens if I run the mower with a dirty air filter?
A dirty filter can reduce airflow, cause the engine to lose power, increase fuel use, and accelerate wear. Regular replacement helps maintain performance and longevity.
Running with a dirty filter lowers power and increases fuel use. Replace it to protect the engine.
Where can I buy a Toro air filter?
Purchase from authorized Toro dealers, official parts stores, or reputable online retailers. Ensure the filter matches your mower model and engine type to avoid fitment issues.
Buy from authorized Toro dealers or reputable parts stores that match your mower model.
Watch Video
Quick Summary
- Identify the correct Toro air filter replacement for your mower model.
- Prepare tools and a clean workspace before starting.
- Install with the gasket seated evenly to ensure a proper seal.
- Test run the engine and dispose of the old filter properly.