How to Stop Air Filter from Whistling
Learn practical, step-by-step methods to stop air filter whistling in HVAC and automotive systems. Diagnose causes, apply safe fixes, and maintain quiet operation with easy routines from Air Filter Zone.

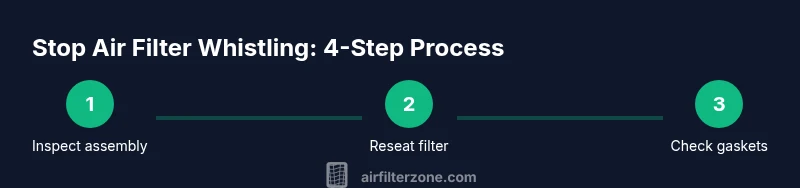
Stop air filter whistling by inspecting the filter fit, sealing gaps, and tightening mounting hardware. Start with simple checks: reseat the filter, replace worn gaskets, and verify there’s no debris in the housing. This step-by-step guide from Air Filter Zone helps homeowners quickly quiet noisy filters without unnecessary replacements.
Why air filter whistling happens
Whistling is typically a sign that air is leaking around the filter or through a poorly sealed housing. In many cases, the sound comes from small gaps between the filter frame and the housing, a mis-seated filter, or worn gaskets. According to Air Filter Zone, the most common culprits are loose fittings, insufficient gasket compression, and debris that prevents a tight seal. When air escapes along the edges, it creates a whistling or high-pitched sound as the system pulls air through the compromised path. Understanding the exact point of escape is the first step toward a quiet, efficient system that performs as designed. By identifying the source, you can choose a targeted fix rather than replacing components prematurely, saving time and money while preserving airflow efficiency.
Common culprits you can check first
Start with the easiest fixes: reseat the filter so it sits flat with even edges; inspect the housing for cracks or warped seals; replace torn or stiff gaskets; and clear any dust or debris from the gasket groove. Air Filter Zone analysis shows that diagnosing the issue often reduces noise by addressing gaps rather than replacing the whole unit. If the filter is old or damaged, replacement is often more cost-effective than chasing a fragile seal. In most cases, addressing fit and seals eliminates the whistle without changing the overall air flow. Keep a spare gasket kit on hand for quick swaps and avoid using substitutes that don’t match your model.
Tools and safety you need before you start
Before you begin, power down the system and wear eye protection. Have a clean, well-lit work area and collect the necessary tools. Keep a flashlight handy to inspect tight corners and gasket grooves. Use a soft cloth to wipe away dust and avoid harsh cleaners that could degrade plastics or rubber. Safety first means unplugging the unit and following the manufacturer’s disassembly instructions to prevent shocks or injuries.
Step-by-step diagnostic checklist
- Inspect the housing for visible gaps, cracks, or warped edges that could let air pass around the filter. - Remove the filter and check seating; ensure it sits flat and square against all edges. - Examine the gasket for cracks, stiffness, or deformation; replace if damaged. - Clean the gasket groove and surrounding housing to remove debris that may interfere with a seal. - Reinstall the filter, align edges evenly, and gently press to seat the gasket fully. - Power the system and listen for changes in sound; if whistling persists, proceed to step 5 for deeper fixes. - If the noise remains after these steps, consider a gasket upgrade or unit replacement.
Sealing gaps and reseating the filter
Begin by reseating the filter so its edges align with the housing channels. Check for visible gaps at all sides, especially near the corners. Use even pressure around the entire frame to compress the gasket uniformly. If you see a small crack in the gasket, replace it with a compatible kit rather than attempting a temporary repair that could fail later. After reseating, run the unit briefly to confirm the whistle is reduced or eliminated before proceeding to more involved fixes.
Replacing gaskets and mounting hardware
If the gasket is damaged or degraded, replace it with the one specified for your filter model. Check mounting hardware—screws, latches, and clamps—for looseness or corrosion, and tighten to manufacturer-recommended torque. Be careful not to overtighten, which can deform the housing or crush the gasket and create new gaps. After completing gasket and hardware replacements, clean any residue from the seal surfaces and retest for noise.
Cleaning and maintenance to prevent future whistling
Regular maintenance helps prevent future whistles. Clean dust from the housing and gasket grooves, wipe down the edges, and inspect seals monthly. Replace filters on schedule to avoid degraded seals from long use. Consider applying manufacturer-recommended silicone lubricant to rubber gaskets if included in your manual. Maintaining a clean, well-sealed housing reduces air leaks and prolongs component life.
When to call a professional or replace the filter
If you have performed all the checks and the whistle persists, it may indicate a more serious air leak, a cracked housing, or an internal duct issue that requires professional evaluation. Persistent noise after gasket and seating fixes may also suggest the filter itself is past its life expectancy and should be replaced. In HVAC systems, a professional assessment can ensure proper airflow and avoid duct damage. In cars, a persistent whistle might indicate a broader intake or vacuum issue that needs expert attention.
Quick maintenance routine you can do monthly
Set aside 15–20 minutes for a quick inspection: reseat and inspect the filter, wipe seals with a damp cloth, check for cracks, and ensure clamps or screws are snug. Replace the filter if it looks dirty or damaged. Keeping a small toolkit handy for periodic reseating and gasket checks reduces the chance of noise returning and keeps airflow steady.
Tools & Materials
- Screwdriver set (flathead and Phillips)(Phillips #2 and flathead sizes commonly used in filter housings)
- Flashlight(Inspect gaps and seals in dark housing)
- Lint-free cloth or compressed air(Clean debris from housing and gasket grooves)
- Replacement gasket kit or silicone sealant(Only if worn or damaged; select size to match model)
- Vacuum with hose attachment(Optional to remove dust around area)
- Measuring tape or ruler(Confirm gasket seating and filter alignment)
- Gloves and eye protection(Protect hands and eyes during disassembly)
- Owner's manual for filter model(Specific removal and reseating steps)
Steps
Estimated time: 20-60 minutes
- 1
Power down and locate the filter housing
Turn off the system, unplug the unit, and locate the filter housing. This prevents electrical shocks and ensures your safety while inspecting for leaks or misalignment.
Tip: Always start with safety; a quick power-off reduces risk during disassembly. - 2
Inspect for gaps and reseat the filter
Remove the filter and check seating. Look for gaps along the edges and ensure the frame sits flush against the housing. Reseat with even pressure to compress the gasket uniformly.
Tip: Work slowly around all edges to avoid creating new gaps. - 3
Check seals and replace worn gaskets
Examine gasket integrity; replace any cracks, stiffness, or deformation. Clean grooves before reinstalling the new gasket to ensure a solid seal.
Tip: If manufacturer recommends lubrication, apply a light coat to the gasket only. - 4
Tighten mounting hardware and test fit
Reattach the filter and fasten screws or clamps to the recommended torque. Avoid overtightening which can warp the housing and create new leaks.
Tip: Use a torque wrench if the unit specifies a torque value. - 5
Clean housing and remove debris
Vacuum or wipe around the inner housing and gasket grooves to remove dust. Debris can prevent a proper seal and reintroduce whistle.
Tip: A clean surface helps ensure the gasket seats properly on reassembly. - 6
Run the system and listen for remaining noise
Power the system back on and listen carefully. If the whistling persists, proceed to advanced steps or consider replacement.
Tip: If needed, use a stethoscope or listen at the outlet to localize the noise.
FAQ
What causes air filter whistling?
Whistling usually comes from air leaks around the filter, a mis-seated filter, or worn gaskets. Debris in the housing can also create a whistling sound. Start by inspecting fit and seals.
Whistling is typically caused by leaks or a loose fit around the filter.
Do I need to replace the gasket or hardware to fix whistling?
Often yes; inspect for cracks or deformation and replace worn gaskets. Tighten mounting hardware to recommended torque. This usually resolves the issue without replacing the entire unit.
Yes—check and replace worn gaskets and any loose hardware.
Can I fix whistling without tools?
You can often fix by reseating the filter and cleaning the housing. However, basic tools are typically needed to properly remove and reseal components.
Sometimes reseating and cleaning the housing is enough.
When should I replace the filter or unit?
If the gasket is damaged or the housing is cracked, or if noise persists after fixes, replacement is advisable. A new filter often restores proper seal and airflow.
If noise continues after fixes, consider replacement.
Is whistling dangerous?
Whistling itself isn’t typically dangerous, but persistent leaks can reduce efficiency and indicate underlying issues that should be addressed.
Usually not dangerous, but don’t ignore persistent noise.
How often should I inspect filters to prevent whistling?
Inspect monthly; reseat and clean the housing if needed. Regular maintenance reduces the likelihood of leaks and noise.
Inspect monthly to prevent leaks and noise.
Watch Video
Quick Summary
- Identify the exact cause before replacing components.
- Seal gaps and reseat the filter first.
- Replace worn gaskets to stop noise.
- Persisting noise may require professional assessment.