Air Filter Change: A Practical DIY Guide
Learn how to perform an air filter change with a step-by-step approach for home HVAC and car cabins. Discover how to choose the right filter, avoid common mistakes, and establish a simple replacement schedule for cleaner air.

An air filter change is a quick, DIY task that improves airflow and protects HVAC and vehicle systems. You’ll replace a correctly sized filter, orient it properly, and test the unit. See our detailed step-by-step guide for home or car filter changes.
Why Air Filter Change Matters for Indoor Air Quality
According to Air Filter Zone, a scheduled air filter change helps maintain proper airflow, protects your heating and cooling equipment from dirt buildup, and improves indoor air quality. The Air Filter Zone team notes that routine changes can reduce the amount of dust and allergens circulating in the home, which is especially beneficial for households with pets, children, or allergy sensitivities. When filters are neglected, debris accumulates and the system must work harder to move air, often resulting in higher energy use and more noticeable musty odors. In vehicles, the cabin air filter reduces pollutants entering the passenger compartment, contributing to a more comfortable ride. Across both settings, a simple filter change can mean quieter operation, steadier temperatures, and a healthier indoor environment. This section sets the stage for selecting the right filter and understanding when a change is needed, so you can approach the task with confidence.
How to Choose the Right Filter for Home and Car
Selecting the correct filter depends on the system you’re servicing. Home HVAC filters come in several materials (fiberglass, pleated, and polyester) and must match the size printed on the old filter frame. Look for a rating system (often denoted by MERV) that balances capture efficiency with your system’s airflow capability; selecting too-high a rating can impede airflow in some setups. For your vehicle, the cabin air filter is a separate component from the engine air filter, and you’ll want to match the exact part number or size listed in the owner’s manual. Always verify fit before purchasing. If you have pets or smoke indoors, a higher-quality pleated filter may capture more contaminants, but confirm compatibility with your HVAC or car. In all cases, check the installation direction arrows and ensure the filter seats evenly to prevent bypass around the edges.
Signs That a Filter Needs Replacement
A filter’s condition is best judged by appearance and airflow. If you notice visible dirt on the filter, reduced airflow from vents, longer periods of blower operation, or a faint dusty or musty odor, it’s time to replace. Streaks of dust around vents or frequent allergy symptoms are additional indicators. In cars, if the airflow from the HVAC vents feels weaker or the cabin seems dustier than usual, inspect and replace the cabin air filter. Regular checks help you avoid waiting until the system starts showing symptoms and ensure you’re protecting your heating, cooling, and cabin comfort.
Prepare and Inspect the Filter Housing
Before you begin, turn off the system or engine and set a clean workspace. Remove the access panel or cover to expose the filter housing. Inspect the housing for any debris, damage, or signs of mold; wipe the interior with a dry microfiber cloth if needed. Have a fresh replacement filter ready and ensure you can access the correct size without forcing it into place. Keeping a small trash bag on hand helps manage the used filter easily. By taking a moment to inspect the housing, you reduce the risk of reinstalling a dirty or damaged filter that could compromise performance.
Maintain and Document Your Replacements
Establish a simple replacement cadence and record each change. Put a reminder on your calendar or a note on the HVAC panel to check filters monthly, and replace on a schedule that matches your usage and environment. Label the new filter with the date of installation to track when the next change should occur. Keeping logs helps avoid guesswork, especially in homes with multiple occupants or during seasons with high usage. A consistent workflow saves time and preserves system efficiency over the long term.
Authority Sources
For a deeper dive into indoor air quality and filter recommendations, consult reputable sources:
- https://www.epa.gov/indoor-air-quality-iaq
- https://www.energy.gov/energysaver/air-filters-and-air-quality
- https://www.osha.gov/indoor-air-quality
How to Implement Your New Filter in a Few Minutes
With the right filter on hand, most changes can be completed in under half an hour. Start by opening the unit, removing the old filter, and cleaning the housing. Align the new filter so the airflow arrows point in the correct direction, then reseat the cover and restore power. This quick routine can be performed during a regular maintenance day and helps keep air clean and systems efficient.
Tools & Materials
- Replacement air filter (home HVAC) - correct size and rating(Check the size printed on the old filter frame and verify the MERV rating compatible with your system)
- Replacement cabin air filter (car) - correct part(Match the vehicle’s year, make, and model; consult the owner’s manual or parts counter)
- Lint-free rag(For wiping the housing interior; avoid leaving fibers behind)
- Gloves(Protect hands from dust and sharp edges)
- Screwdriver or panel tool(Useful if fasteners are present on the access panel)
- Vacuum with hose attachment(Optional for cleaning loose debris from the housing)
- Flashlight(Helpful for inspecting the filter slot in dark spaces)
Steps
Estimated time: 20-40 minutes
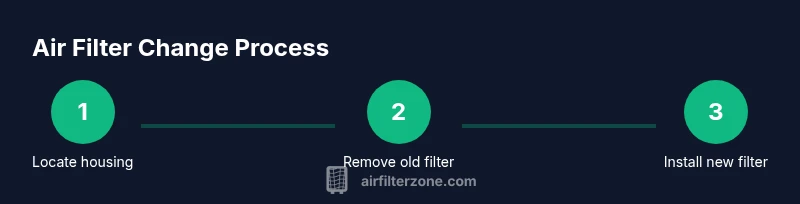
- 1
Power down and locate the filter housing
Turn off the HVAC system (or engine for cars) and open the access panel. Locate the filter housing and confirm you have the correct replacement filter on hand. Take a quick photo of the old filter orientation if helpful for reference.
Tip: Note the filter orientation before removal to ensure proper installation. - 2
Remove the old filter
Carefully slide the filter out without shaking or bending it. Hold it by the edges to avoid transferring dirt to your hands. Check the frame for sizing printed on the edge and keep the old filter as a reference for the new one.
Tip: If the filter is tight, don’t force it; re-check the slot size and try again gently. - 3
Inspect housing and clean
Wipe the interior of the housing with a dry rag to remove loose dust. Vacuum the slot if debris persists. Make sure there’s no mold or residue before inserting the new filter.
Tip: Ensure the housing is dry before installing the new filter to prevent mold growth. - 4
Install the new filter with correct orientation
Insert the new filter with the airflow arrows pointing toward the blower (in most cases). Gently press until it sits evenly and snugly. Recheck that the filter sits flush and there are no gaps.
Tip: Always double-check the arrows; a misoriented filter can reduce effectiveness. - 5
Reassemble and test
Close the housing cover and secure any fasteners. Restore power and run the system briefly to verify proper airflow. Listen for unusual noises and check for air leaks around the housing.
Tip: If you hear whistling or feel reduced airflow, re-inspect the filter seating and gasket seal. - 6
Car cabin filter quick swap
For cars, locate the cabin filter access panel behind the glove box or under the dashboard, remove the old filter following the vehicle manual, and insert the new filter with the correct orientation. Reassemble and test by turning on the blower.
Tip: Keep the vehicle engine off while replacing to avoid accidental startups.
FAQ
What is the best frequency for changing air filters in a home?
Frequency depends on usage, environment, and household factors. Inspect monthly and replace when you notice dirt, reduced airflow, or odors.
Check your filter monthly and replace when it looks dirty or airflow slows down.
Can I reuse an old filter after cleaning it?
Most filters aren’t designed to be reused after cleaning. Replacing with a new filter is typically recommended to maintain filtration efficiency.
Usually not; replace with a new filter.
Is replacing a cabin air filter the same as changing a home HVAC filter?
No. Cabin filters and home HVAC filters serve different systems and require the correct part for each installation. Always follow the respective manual.
They’re different; use the proper filter for the system you’re servicing.
What tools do I need for a typical air filter change?
Usually just the replacement filter is required. A screwdriver or panel tool may help if the housing is tight.
Typically, only the new filter is needed; you might use a screwdriver if the panel resists.
Are air filters recyclable?
Recycling options vary by material and local programs. Check the packaging and your local guidelines to determine disposal options.
Some filters can be recycled; check local programs for guidance.
What should I do if the new filter doesn’t fit?
Double-check the exact size and model, and confirm the slot is clear. Do not force a filter that doesn’t fit.
If it doesn’t fit, verify size and model first, and don’t force it.
Watch Video
Quick Summary
- Check size and MERV compatibility before purchasing.
- Install with the correct orientation to prevent bypass.
- Inspect the housing and seal for a clean fit.
- Keep a simple replacement schedule and log dates.