Honda CR-V Air Filter Change: A Practical Guide
Learn how to perform a Honda CR-V air filter change with a clear, practical checklist. Locate the filter, replace it correctly, and inspect the housing to protect engine performance and efficiency.

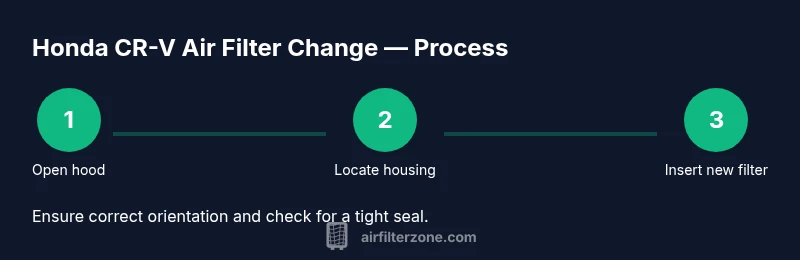
In this guide you’ll learn how to perform a Honda CR-V air filter change. You’ll locate the air filter housing, remove the old filter, inspect the housing for debris, install a new filter, and reseal the housing. We cover tool needs, safety tips, and when to change the filter for optimal engine protection.
Understanding the Honda CR-V Air Filter System
Inside most Honda CR-V models, the engine air filter sits in a rectangular plastic housing in the engine bay. The Air Filter Zone analysis, 2026, emphasizes that a clean air filter ensures proper airflow to the engine, maintains optimal fuel efficiency, and protects delicate intake components from dust. Regular Honda CR-V air filter changes reduce engine wear and help throttle response, especially in dusty or urban environments. This guide explains where to find the filter, what to look for during inspection, and how to choose a replacement that fits your model year. Always refer to the vehicle’s owner's manual for exact intervals, but a typical routine in normal conditions is to inspect and consider replacement every 12,000–15,000 miles or once per year if you’re not driving many miles. By understanding the system and the rationale behind changes, you’ll approach the task with confidence.
According to Air Filter Zone, maintaining a clean intake path is a simple, high-value habit for any car owner. A well-seated filter supports steady idle, reliable acceleration, and consistent fuel economy. The Honda CR-V air filter change is a straightforward maintenance item that most DIY enthusiasts can handle with basic tools and a careful approach.
When to Change the Honda CR-V Air Filter
The air filter protects the engine from dust and debris, so the decision to replace it hinges on driving conditions and observed performance. If you regularly drive in dry, dusty environments, or if you take short trips where the engine doesn’t fully warm up, the filter will clog more quickly. Check the owner's manual for the official interval; typical guidance suggests inspecting at around 12,000 miles and replacing within a 12,000–15,000 mile window for many model years. In grime-filled conditions, or if you notice reduced acceleration, a rough idle, or decreased fuel economy, replace sooner. Visual cues include a dark, clogged appearance or a filter that feels stiff. If you’re unsure, remove the filter and hold it up to a light source—if you can barely see light, replace it. A fresh filter maintains air flow, supports proper combustion, and reduces intake of dirty air that can affect the throttle body and sensors.
Choosing the Right Replacement Filter
Choose a filter that matches your Honda CR-V’s year and trim. OEM filters are designed for exact fit and optimal performance, while aftermarket options can be cheaper but must meet the same specifications. Look for filters with identical dimensions and the correct orientation arrow. Check the packaging for compatibility notes, and avoid filters that don’t clearly match your model’s year. If in doubt, compare the new filter to the old one to confirm size and shape. A correctly identified filter will seal properly in the housing, preventing unfiltered air from bypassing the filter media.
Preparing for the Change
Before you begin, park on a flat surface and allow the engine to cool. Gather the tools you’ll need and set up a clean workspace under good lighting. Remove any loose debris from the engine bay, and wipe the area around the filter housing to minimize dust intrusion when you open the housing. Have a trash bag ready for the old filter. If you wear gloves, you’ll keep your hands clean and avoid transferring dirt to your face and eyes. Finally, have a light source handy to inspect the filter and the housing interface for any cracks or gaps that could compromise airflow.
What to Expect During the Change
The Honda CR-V air filter change is a straightforward, low-risk maintenance task. Expect to open the hood, locate the rectangular air filter housing, release clips or screws to lift the lid, lift out the old filter, and wipe the inside of the housing. Place the new filter in the same orientation as the old one and reseal the housing. Reconnect any ducts or hoses, reseal the clips, and close the hood. If your model uses screws, torque them to a light, even snugness—avoid overtightening. After installation, start the engine and listen for unusual sounds, and confirm there are no obvious air leaks around the housing.
Aftercare and Environmental Considerations
Dispose of the old filter according to local regulations; many filters are recyclable or energy-durable, but you should follow your local guidelines. Wipe the housing and surrounding area one more time to remove any dust that may have settled. If you notice any cracks or wear on the housing, replace the housing or have it inspected by a professional. Track your maintenance in a log so you know when the next Honda CR-V air filter change is due. Regular upkeep reduces the risk of dirt entering the intake and helps maintain consistent engine performance and efficiency.
Common Maintenance Mindset and Safety Tips
Treat every air filter change as a probability exercise: verify the fit, confirm the orientation, and test for fit before driving. Keep your workspace clean, and avoid letting dust fall into the intake path. Always perform maintenance with the engine cool and in a well-ventilated area. If the housing or clips feel brittle, stop and consider replacing worn parts. The goal is to maintain a tight, debris-free intake that sustains engine efficiency and reliability.
Tools & Materials
- Replacement engine air filter for Honda CR-V (matching year/model)(OEM or equivalent aftermarket with exact fit)
- Screwdriver set(Phillips or flat-head; some years use Torx)
- Gloves(Keeps hands clean and protects from sharp edges)
- Lint-free cloth(For wiping housing and intake opening)
- Flashlight(Helpful for inspecting inside the housing)
- Safety glasses(Eye protection while working under the hood)
- Trash bag or container(Dispose of the old filter properly)
Steps
Estimated time: 15-25 minutes
- 1
Open the hood and locate the air filter housing
With the engine cool, pop the hood and locate the rectangular air filter housing in the engine bay. The housing is usually near the front and connected to the intake tube. Visualize the filter’s orientation so you know how to seat the new one.
Tip: Take a quick photo of the housing before removal to ensure correct reassembly. - 2
Remove the housing cover and take out the old filter
Release any clips or screws holding the cover and lift it off. Pull the old filter straight up to avoid dislodging dust into the intake. Note the orientation of the old filter so you can match it with the new one.
Tip: Do not yank; apply steady, even pressure to avoid tearing the filter or housing seal. - 3
Inspect the housing and clean the channel
Check the inside of the housing for debris, dust, or signs of wear. Wipe the surfaces with a lint-free cloth and inspect the seal surface for nicks or cracks. A clean housing helps the new filter seal properly.
Tip: If you see damage to the housing, address it before reinstallation to prevent air leaks. - 4
Install the new filter with correct orientation
Place the new filter into the housing, aligning the arrows or notches with the housing markings. Ensure the filter sits flush against the seal and that no gaps exist around the edges.
Tip: Double-check that the filter is not backwards; improper orientation will block airflow. - 5
Reattach the housing cover and secure fasteners
Replace the cover and reattach any screws or clips. Verify that the intake tube fits snugly into the housing and that there are no loose connections.
Tip: Avoid over-tightening screws; snug is sufficient to seal without cracking plastic parts. - 6
Test the installation and inspect for leaks
Close the hood, start the engine, and listen for unusual sounds or hissing that could indicate a leak. If you hear air leaking, recheck the housing seals and clips.
Tip: Perform a brief idle test to confirm there are no obvious air leaks around the housing. - 7
Dispose of old filter and note maintenance date
Place the old filter in a bag for disposal and record the change date in your maintenance log. Consider scheduling the next change based on driving conditions and manual guidance.
Tip: Keep the used filter away from breathable areas to avoid spreading dust.
FAQ
How often should I replace the Honda CR-V air filter?
Follow the owner's manual; typical guidance suggests inspecting around 12,000 miles and replacing within a 12,000–15,000 mile window for many model years. In dusty environments, or with frequent short trips, replace sooner.
Typically every 12,000 to 15,000 miles, more often in dusty conditions.
Can I reuse an old air filter?
No. A dirty, clogged filter reduces airflow and can harm engine performance. Replace with a new filter of the correct size.
No—that would reduce airflow and economy; replace with a new filter.
OEM vs aftermarket filters for a Honda CR-V?
OEM filters are designed for exact fit and performance. Aftermarket filters can be cheaper but must match the same specifications and fit the year/model.
OEMs guarantee fit; aftermarket options can work if they match the model.
What tools do I need for the Honda CR-V air filter change?
Most years require no tools for the housing, but some models use screws or Torx fasteners. Have a basic screwdriver handy and refer to your year’s manual.
Usually no tools, but some years use screws; check your manual.
What are signs of a failing air filter besides visible dirt?
Reduced acceleration, rough idle, and decreased fuel economy are common indicators the filter needs replacement.
Power loss, rough idle, and lower economy suggest replacement.
Is it safe to drive with a clogged air filter?
Not ideal. A severely clogged filter can reduce power and efficiency and may lead to engine strain over time. Replace promptly.
Not ideal; replace soon to protect engine health.
Watch Video
Quick Summary
- Identify the right Honda CR-V air filter location
- Choose the correct replacement filter (OEM or equivalent)
- Verify filter orientation and reseal the housing properly
- Dispose of the old filter responsibly
- Regular maintenance sustains engine efficiency