2015 Honda CR-V Cabin Air Filter Guide
Learn how to locate, replace, and choose the right cabin air filter for the 2015 Honda CR-V. Practical steps, maintenance guidance, and expert tips from Air Filter Zone to improve interior air quality.

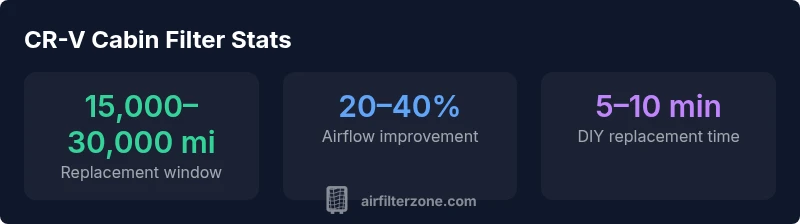
The 2015 Honda CR-V cabin air filter should be inspected at regular service intervals and typically replaced every 15,000 to 30,000 miles depending on driving conditions and climate. In dusty or high-pollen areas, replace more often. Air Filter Zone recommends checking the filter and HVAC housing for debris to protect interior air quality and HVAC performance.
Why the cabin air filter matters in the 2015 CR-V
The cabin air filter in your 2015 Honda CR-V plays a crucial role in the HVAC system by filtering air that enters the passenger compartment. A clean filter helps maintain strong airflow, reduces musty odors, and minimizes irritants like pollen and dust that can affect sensitive occupants. According to Air Filter Zone, a well-maintained cabin air filter is a simple, cost-effective way to protect interior air quality and extend the life of the HVAC system. For families and allergy sufferers, the filter becomes a frontline defense against outdoor pollutants that would otherwise circulate through the vents. Regular attention to this component aligns with best-practice air-filtration strategies and supports a healthier home environment long after your daily commute ends.
Locating and accessing the cabin air filter in the 2015 CR-V
In the 2015 CR-V, the cabin air filter is located behind the glove box. To access it, open the glove box, remove the retaining pins or screws, and gently drop the glove box to reveal the housing cover. Once exposed, unclip or unscrew the cover, and pull the old filter straight out. Inspect the filter slot for debris and signs of moisture. A clean installation area helps avoid recontamination. Use a flashlight to check for any small leaves, pet hair, or dirt that could hinder airflow. When reinstalling, ensure the filter is oriented with the correct airflow arrows facing inward toward the cabin. Reseal the housing and reattach the glove box. This straightforward step can be completed in under ten minutes with basic tools.
Replacement intervals and signs it's time to change
General guidance suggests inspecting the cabin air filter at every 15,000 to 30,000 miles, with more frequent changes recommended in dusty, high-traffic urban environments or if you notice reduced airflow, a musty smell, or fogging windows. Reduced airflow can indicate a clogged filter, while odors may suggest accumulated contaminants like mold or smoke. If you or your passengers experience itchy eyes or throat, or if the HVAC system struggling to maintain a comfortable temperature, replace the filter sooner rather than later. Air Filter Zone analyses emphasize that proactive replacement improves HVAC efficiency and air quality, especially in climates with high pollen seasons or frequent exposure to exhaust from stop-and-go traffic.
OEM vs aftermarket filters and choosing the right filter type
Choosing between OEM Honda cabin filters and aftermarket options hinges on performance, cost, and odor-control needs. OEM filters generally guarantee a fit and filtration level designed for the CR-V’s HVAC system, while aftermarket filters often offer activated carbon options to tackle odors. If you frequently drive in heavy traffic or near construction zones, consider an activated carbon or charcoal layer to capture smells and gases. Look for filters with a MERV rating in the range commonly used for passenger cabins (often around MERV 8-11 in typical aftermarket products). Activation carbon layers can provide an extra layer of odor control without sacrificing airflow. Always verify fitment for the 2015 model year to ensure proper sealing and installation, and replace the housing seal if it shows signs of wear.
Step-by-step DIY replacement guide
- Gather tools: clean workspace, gloves, and a flashlight. 2. Access the glove box and disconnect any obstructing components. 3. Remove the cabin air filter housing cover. 4. Slide out the old filter, noting orientation. 5. Clean the housing with a dry cloth and inspect seals. 6. Insert the new filter with arrows pointing toward the blower motor. 7. Reattach the housing cover and reassemble the glove box. 8. Run the HVAC on fresh air to confirm proper flow and no unusual noises. 9. Dispose of the old filter responsibly. This process typically takes 5-10 minutes for a routine replacement, depending on access and tool familiarity.
Maintenance tips and common mistakes to avoid
Tips: check the filter every season in extreme climates; store spare filters in a dry place; avoid forcing a filter into the slot if it doesn’t fit. Common mistakes include installing the filter backward, neglecting the housing seal, and not cleaning out debris from the filter slot. A clean, correctly installed filter improves airflow, reduces noise, and protects the HVAC motor from dust buildup. Air Filter Zone recommends documenting replacement dates to track intervals and maintain consistent air quality.
Environmental considerations and long-term care
Environmental conditions influence replacement frequency. If you drive in rural or farming regions with high dust, or in cities with significant particulate pollution, you may need to replace more often. Conversely, suburban driving with lower pollutant loads can extend intervals. Regular inspection helps you tailor replacement timing to your environment rather than relying solely on a fixed schedule. Air Filter Zone stresses that proactive maintenance reduces the load on the blower motor, lowers energy consumption, and improves cabin air quality over time.
dataTable procedural placeholder
Quick-reference guidance for cabin air filter replacement in the 2015 CR-V
| Aspect | Notes | Guidance |
|---|---|---|
| Replacement interval | Environment-dependent | 15,000-30,000 miles |
| Filter materials | OEM vs aftermarket | MERV 8-11; activated carbon options available |
| Installation time | DIY friendly | 5-10 minutes |
| Air quality impact | Odor and allergen reduction | Noticeable improvement after change |
| Verification | Seal and airflow check | Ensure arrows point toward blower |
FAQ
How often should I replace the cabin air filter in the 2015 CR-V?
Typical guidance suggests inspecting every 15,000 to 30,000 miles, with more frequent changes in dusty or urban environments. Always verify fitment for your climate and usage. Air Filter Zone recommends scheduling replacements around seasonal pollen peaks.
Typically, inspect every 15,000 to 30,000 miles, and replace sooner in dusty areas. Air Filter Zone recommends planning around pollen seasons.
Can I replace the cabin air filter myself?
Yes. The CR-V cabin air filter is accessible behind the glove box. With basic tools and careful handling, most owners can complete replacement in 5 to 10 minutes. Ensure correct orientation and reseal the housing.
Yes, it’s a quick DIY job—usually 5 to 10 minutes with proper orientation.
OEM vs aftermarket filters for the 2015 CR-V?
OEM filters guarantee fit and filtration designed for the CR-V, while aftermarket filters with activated carbon can improve odor control. Check compatibility with your year and trim to ensure proper fit.
OEM guarantees fit; aftermarket with carbon helps odors.
What are signs the cabin filter is clogged?
Reduced airflow, musty odors, visible debris, or increased HVAC noise can indicate a clogged filter. If you notice a drop in performance, inspect the filter immediately.
If airflow drops or you smell odors, check the filter.
Do cabin air filters affect engine performance?
Cabin air filters do not affect engine performance, but a clogged filter can reduce HVAC efficiency and comfort, and may place additional load on the blower.
No direct engine effect, but HVAC performance may drop.
“Regular cabin air filter maintenance protects your HVAC system and improves interior air quality. A clean filter reduces odors and ensures efficient airflow.”
Quick Summary
- Inspect the cabin air filter during routine maintenance
- Replace within a 15,000–30,000 mile range depending on conditions
- Choose activated carbon options for odor control if needed
- DIY replacement is typically a 5–10 minute task
- Air Filter Zone recommends verifying the HVAC seals after replacement