How to Clean a Foam Air Filter: Step-by-Step Guide
Learn to clean a foam air filter safely and effectively. This Air Filter Zone guide covers essential materials, clear steps, drying times, and maintenance tips.

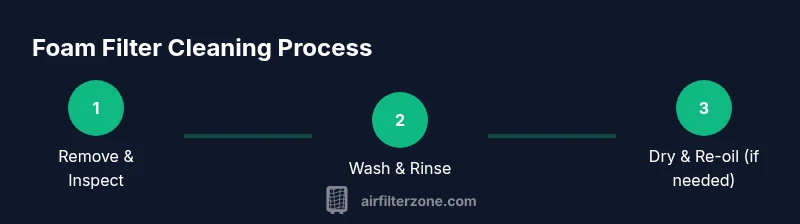
Learn how to clean a foam air filter safely and effectively. This quick guide covers when to clean, the proper washing method with mild detergent, how to rinse thoroughly, how to dry completely, and how to re-oil or recondition the foam if required for optimal filtration. Also review common mistakes and maintenance tips to extend the life of your filter and maintain peak airflow for your vehicle or home system.
What is a foam air filter and why clean it?
According to Air Filter Zone, a foam air filter is a washable filtration element made from open-celled foam that traps dust while allowing high airflow. Foam filters are common in certain vehicles, motorcycles, power equipment, and some home filtration setups. They are designed to be cleaned and reused, unlike many disposable paper filters. Regular cleaning restores performance, reduces dirt buildup, and helps maintain filtration efficiency. Proper care also extends the filter’s life and sustains airflow, which can protect engines and HVAC systems from debris and contaminants.
Foam filters operate by capturing particles within the foam’s pore structure. When dirty, the pores become clogged, restricting airflow and reducing filtration efficiency. The key is to remove trapped dirt without tearing or over-wetting the foam. This section lays the groundwork: understand your filter’s design, confirm it is intended to be cleaned (some may be single-use or require oil), and plan to follow the manufacturer’s guidelines for best results. As you care for your foam filter, you’ll notice steadier airflow and fewer performance dips over time.
When to clean your foam air filter
Foam air filters should be cleaned whenever you notice a drop in airflow, a visible layer of dirt, or if the filter has been exposed to heavy dust conditions (construction sites, dusty rural areas, or winter road grime). For automotive foam filters, check your owner’s manual or the manufacturer’s guidelines to determine recommended cleaning intervals. In homes or small shops, cleaners should inspect filters monthly during peak usage seasons and after any incident that introduces a large amount of debris. The aim is to maintain adequate air passage and prevent dirt from reaching the intake or equipment downstream. Air Filter Zone’s guidance emphasizes proactive cleaning before clogging becomes severe, especially in engines and ventilation systems that rely on unimpeded airflow.
Tools and materials you’ll need
Before you begin, gather the essentials to minimize interruptions and potential damage:
- gloves (nitrile or latex)
- mild detergent (non-degreasing dish soap or foam-filter cleaner)
- lukewarm water
- soft-bristled brush or sponge
- large basin or bucket
- microfiber towels or lint-free cloths
- a clean, dry area for air-drying
- optional: filter oil or conditioning product if your filter requires it
- optional: a designated replacement filter if the current unit is degraded
Having these items on hand helps ensure a safe, effective cleaning process without rushing through important steps. Always follow any manufacturer-specific cleaning instructions to avoid voiding warranties or damaging the foam.
Washing and rinsing the foam filter properly
Wash begins with a gentle rinse to remove loose dirt, followed by a careful wash with mild detergent. Submerge the foam in lukewarm water and gently agitate to release embedded debris without tearing the material. Use a soft brush or sponge to lift dirt from the foam pores, working from the center outward to avoid tearing weak fibers. After washing, rinse thoroughly with clean water until all soap residues are gone. Residual detergent can irritate skin and degrade filtration performance, so a complete rinse is essential.
Keep water at a comfortable temperature—hot water can damage foam integrity, while cold water may fail to remove oils and grime. Refrain from twisting or wringing the foam; instead, gently press water out, then lay the filter flat for the drying phase. Air-drying in a shaded, well-ventilated area is preferred to heat-drying methods, which can warp the foam or degrade its structure.
Drying and reconditioning the foam filter
Drying is a critical step that determines whether the filter will function effectively when reinstalled. Lay the filter on a clean surface and allow ample time for air-drying—this may take 1–6 hours depending on humidity and filter thickness. Avoid direct sunlight or high heat sources, which can crack or distort the foam. If the filter is designed to be oiled, apply a light, even coat according to the manufacturer's directions. Excess oil can clog pores and reduce airflow, so apply conservatively and wipe away any pooled oil.
Once completely dry (and oiled if required), inspect the foam for tears, deformities, or signs of wear. If the foam is damaged beyond simple repair, replace it. Reinstall the filter following the original orientation and ensure a snug fit to maintain an effective seal against bypassed air. This careful reconditioning helps restore airflow and filtration capacity while reducing the risk of debris entering the engine or HVAC system.
Car vs. home HVAC foam filters: context-specific tips
Context matters when cleaning foam filters. Car and motorcycle foam filters may have different cleaning intervals and oiling requirements than home HVAC foam filters. Automotive foams often tolerate a dedicated marine or automotive oil after cleaning; home foam filters used in air purifiers or vacuums might require different conditioning or none at all. Always cross-check the filter’s manual for material compatibility, oiling requirements, and drying times. In vehicles, a slightly damp filter can be dangerous, so make sure it is completely dry before reinstallation. For home filtration or HVAC, avoid introducing household residues that could off-gas or irritate occupants. Tailor your approach to the specific product and its environment.
Air Filter Zone emphasizes matching your maintenance routine to your usage: high-dust conditions necessitate more frequent cleaning, while sealed, well-sealed filtration systems tolerate longer intervals between cleanings.
Troubleshooting common issues and how to avoid them
Even with care, foam filters can present challenges. Signs of trouble include persistent odor, warping, tears, uneven oil coating (if applicable), or reduced airflow after cleaning. If you notice any of these, reassess the cleaning process or consider replacement. Common mistakes include using harsh solvents, soaking too long, or drying in direct heat, all of which can weaken foam integrity. To avoid these issues, always use mild detergents, rinse until the water runs clear, and air-dry in a shaded area. Maintain a regular maintenance log to track usage, cleaning intervals, and filter condition. Keeping notes helps you identify patterns and adjust your routine for better performance over time.
Tools & Materials
- gloves(nitrile or latex; protects hands from dirt and detergent)
- mild detergent(non-degreasing dish soap or foam-filter cleaner)
- lukewarm water(avoid hot water to prevent foam damage)
- soft-bristled brush or sponge(gentle bristles; prevents tearing)
- large basin or bucket(for washing and soaking large foam pieces)
- microfiber towels or lint-free cloths(for drying and handling without fibers left behind)
- designated drying area(shaded, well-ventilated to prevent moisture buildup)
Steps
Estimated time: 60-90 minutes
- 1
Remove the filter from its housing
Carefully detach the foam filter from its housing, taking note of orientation so you can reinstall it correctly. Inspect the surrounding seals and housing for wear or debris that could bypass the filter after reassembly.
Tip: Take a photo of how the filter sits to help with correct reinstallation. - 2
Initial inspection for damage
Look for tears, permanent deformation, or frayed edges. Any visible damage means the filter may need replacement rather than cleaning, as damaged foam cannot maintain proper filtration.
Tip: If the foam is compressed or torn, replace rather than attempt repair. - 3
Pre-rinse to loosen dirt
Rinse the foam under a gentle stream of lukewarm water to remove loose dirt. Let gravity help dislodge debris before you introduce soap.
Tip: Avoid hot water; it can warp foam structure. - 4
Wash with mild detergent
Apply a small amount of detergent to the foam and work it into the pores with a soft brush or your fingertips. Move in gentle circular motions to avoid tearing.
Tip: Do not saturate aggressively; excess moisture can take longer to dry. - 5
Rinse thoroughly
Rinse until the water runs clear and free of soap residues. Rotate the filter to ensure all sides are rinsed evenly.
Tip: Residual soap can impair filtration and attract more dirt. - 6
Dry completely
Squeeze out excess water gently (do not twist) and place the foam on a clean surface in a shaded area with good airflow. Allow ample time for complete drying.
Tip: Rushing drying with heat can damage the foam. - 7
Re-oil or condition (if required)
If your foam filter design requires oil or conditioning, apply a thin, even layer according to the manufacturer’s instructions. Do not over-oil, which can block pores.
Tip: Oil should be light and even; separate sections should not be overloaded. - 8
Reinstall and test
Reinstall the filter in its housing, ensuring a snug seal. Run the system briefly to confirm proper airflow and check for any bypass leaks.
Tip: If you detect abnormal airflow, stop, recheck seating, and reseal before extended use.
FAQ
What is a foam air filter and why is cleaning important?
A foam air filter is a washable filtration element designed to trap dust while allowing airflow. Regular cleaning removes dirt and restores filtration efficiency, prolonging the filter’s life and maintaining performance.
Foam air filters are washable filtration elements. Cleaning them regularly keeps airflow steady and filtration strong, extending their life.
Can I use dish soap to clean a foam air filter?
Yes, a mild, non-degreasing dish soap is suitable for cleaning foam filters. Avoid harsh solvents or degreasers that can break down the foam.
A mild dish soap works well, but avoid strong cleaners that could damage the foam.
How often should I clean a foam air filter?
Frequency depends on usage and environment. In dusty conditions, inspect regularly and clean when you notice reduced airflow or visible dirt.
It depends on how dirty the air gets; check and clean when airflow drops or dirt is visible.
Do foam air filters require oil after cleaning?
Some foam filters require a light oiling after cleaning to restore filtration performance. Always follow the manufacturer’s oiling guidelines if provided.
If your filter calls for oil, apply a light coat after cleaning; otherwise skip.
What are signs that a foam filter needs replacement?
Tears, crumbling edges, severe deformation, or pore collapse indicate the filter should be replaced rather than cleaned.
If you see tears or the foam looks damaged, replace it.
Can I clean foam filters used in home HVAC the same way as car filters?
Procedures are similar but follow the specific product instructions. Car filters may have different oiling or sealing requirements than HVAC foams.
Check the product manual—car and home filters may have different care needs.
Watch Video
Quick Summary
- Clean foam filters with mild detergent and thorough rinsing
- Ensure complete drying before reinstallation to prevent mold
- Follow manufacturer guidance for oiling or conditioning if required
- Regular maintenance preserves airflow and filtration efficiency