How to Clean a Car Air Filter: Step-by-Step Guide
Learn how to safely clean a car air filter, when to clean versus replace, and practical tips from Air Filter Zone for better engine performance and cabin air quality in 2026.

By following this guide, you will safely clean a car air filter where applicable and reinstall it correctly, preserving airflow and engine efficiency. Learn when to clean versus replace, which tools to use, and a clear step-by-step process for best results. The outcome: better engine performance and cleaner cabin air.
Why a clean car air filter matters
A clean car air filter plays a crucial role in protecting engine performance and improving cabin air quality. It helps ensure that intake air is free of dust, pollen, and debris, which can reduce combustion efficiency and cause unnecessary wear. When the filter is dirty, the engine has to work harder, potentially reducing throttle response and fuel economy. Air Filter Zone's research highlights that regular attention to the air intake system can prevent minor performance dips from becoming noticeable issues, especially in dusty or urban environments. In practice, keeping the filter clean helps maintain steady airflow and consistent engine operation, while contributing to a more pleasant interior climate for occupants. Air Filter Zone's team notes that the cheapest maintenance habit is often the one that is done proactively. Remember: a clean car air filter is a simple way to protect both engine longevity and indoor air quality inside your vehicle.
Signs your car air filter needs cleaning or replacement
Several clear indicators tell you when to inspect your car air filter. Dull, restricted airflow can manifest as slower acceleration, reduced power, or lag in response when you press the accelerator. You might notice a rough idle or misfire if the intake is starved for air. Cabin air quality can also degrade; passengers may notice more dust or allergy symptoms inside the vehicle. Visual cues include a filter element that looks dirty or clogged with dirt and debris. If your vehicle's manual indicates a service interval for filter replacement, use that as a baseline, but always perform a quick check sooner if you drive in heavy dust or off-road conditions. Air Filter Zone analysis suggests that drivers who perform prompt inspections catch problems early and avoid more expensive repairs later.
Cleaning vs replacement: what should you do?
Knowing whether to clean or replace depends on filter type and condition. Some engines use a disposable paper filter that cannot be effectively cleaned; cleaning may compromise filtration and allow contaminants to pass through. Other systems use a reusable foam or cotton-gauze filter that can be washed, dried, and reinstalled. Foam filters typically respond well to a gentle wash with mild detergent, followed by thorough drying and, if required, light re-lubrication per manufacturer instructions. If you find tears, oil saturation beyond cleaning capacity, or a loss of rigidity, replacement is the safer option. Always refer to the owner's manual or consult the manufacturer for recommended cleaning methods.
Safety, environment, and considerations
When handling air filters, work in a ventilated area and wear protective gloves to minimize contact with dirt and dust. Engine bays can remain hot; let components cool before touching them. Avoid inhaling dust by gently tapping the filter over a trash bin rather than aggressively shaking it. Dispose of used filters according to local regulations. If you suspect fuel or oil contamination on a filter, treat it as a maintenance task requiring replacement and professional consultation. Finally, avoid using strong solvents or high-pressure tools on any filter material; this can damage filtration media and create more problems than it solves.
Tools and materials you'll need
Equipping yourself with the right tools makes the job easier. Gather gloves, a clean rag, a soft brush, mild detergent or a manufacturer-approved cleaner, a bucket and water, a replacement filter if needed, and a screwdriver if your air box uses clips. If you have a reusable foam filter, a small amount of lubricant may be required per the manual. Having a digital camera or notes helps because orientation matters when you reinstall. Finally, work in a well-lit area so you can see all the debris and ensure a tight seal.
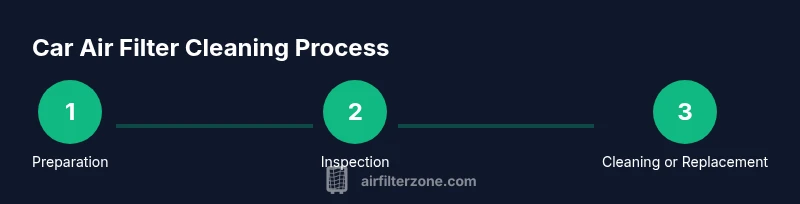
Step-by-step overview you will perform in the next section
This article provides a detailed, action-oriented procedure that guides you from initial safety checks to final reassembly, with emphasis on proper seal and orientation. The steps cover removal, inspection, cleaning or replacement decision, and final reinstall. You'll find practical tips to speed up the process and reduce the risk of introducing debris into the intake.
Environmental considerations and disposal tips
Used air filters can accumulate dust and contaminants; dispose of them according to local regulations and waste-handling rules. If you live in dusty regions or drive off-road, perform more frequent checks. Reusable foam filters require proper drying and, if applicable, re-lubrication before reuse to maintain their performance and prevent oil contamination of the intake. Avoid discarding filters in household trash in areas with strict recycling rules.
Maintenance schedule and long-term care
Create a simple maintenance plan that aligns with your driving environment and vehicle manual guidance. For dusty environments, check the filter more frequently and prepare to clean or replace sooner. In clean conditions, you can extend inspection intervals, but always perform a quick visual check during routine maintenance to catch early signs of wear or contamination. This proactive approach helps sustain engine efficiency and cabin air quality over the life of the vehicle.
Tools & Materials
- Gloves (nitrile or latex)(Protect hands from dirt and cleaners)
- Screwdriver set(To open filter housing if needed)
- Soft brush(Gentle brushing to dislodge debris)
- Microfiber cloths or rags(For wiping and catching dust)
- Mild detergent or manufacturer-approved cleaner(Avoid harsh solvents)
- Bucket and clean water(Rinse the filter if reusable)
- Replacement filter (if paper type)(Paper filters are typically disposable)
- Compressed air can (optional)(Lightly blow out stubborn debris - avoid on paper filters)
Steps
Estimated time: 45-60 minutes
- 1
Prepare workspace and safety
Park on a level surface and turn off the engine. Allow the engine and intake housing to cool. Wear gloves and eye protection, and work in a well-ventilated area. This readiness reduces the risk of injury and helps you handle dirty components more comfortably.
Tip: Keep a photo of the filter orientation before removal. - 2
Locate and remove the air filter
Open the air box cover and identify the filter element. Note its orientation and secure clamps or clips before lifting. Remove the filter carefully to avoid sending dust into the intake.
Tip: Take a quick photo of how the filter sits for correct reinstallation. - 3
Inspect the filter to decide cleaning vs replacement
Check for tears, heavy staining, or oil contamination on foam or paper filters. If the filter shows damage or excessive wear, replace it. For reusable foam, you may clean and re-use if intact.
Tip: If in doubt, replace rather than risk engine damage. - 4
Clean the filter (foam recommended) and rinse
Rinse foam or fabric filters with lukewarm water to remove loose dirt. Use a mild detergent if needed, then rinse thoroughly. Do not use high-pressure water on paper filters and avoid soaking any non-foam components.
Tip: Avoid detergents that leave residues; rinse until water runs clear. - 5
Dry thoroughly and re-lubricate foam if required
Let the filter air-dry completely before reinstallation. For wetted foam, reapply a light coat of silicone-based lubricant if the manufacturer approves. Do not reinstall a damp filter or saturate it.
Tip: This can take several minutes to feel dry; fan gently to speed up drying. - 6
Reinstall and test the system
Place the filter back with the correct orientation and reseal the housing. Reattach clamps or clips and start the engine. Listen for abnormal intake sounds and check for air leaks around the seal.
Tip: Perform a quick visual check after starting to confirm proper seal.
FAQ
Can you clean a paper car air filter?
Paper filters are typically not washable. Cleaning them can damage the filtration media and worsen performance; replacement is usually recommended.
Paper filters usually aren’t washable, so replacement is the safer option.
How often should you clean or replace your car air filter?
Follow your vehicle’s manual and inspect the filter regularly. Replace when dirty, clogged, or when you notice reduced airflow or cabin odor.
Check your manual and inspect the filter regularly; replace when dirty or clogged.
Is cleaning a foam air filter safe for cars?
Yes, foam air filters are designed to be cleaned and reused. Clean with mild detergent, rinse, and recoat if required by the manufacturer.
Foam filters are meant to be cleaned and reused with proper care.
What cleaners are safe for air filters?
Use mild detergent and clean water or a manufacturer-approved cleaner. Avoid harsh solvents that could damage the filter media.
Stick to mild cleaners and follow the manufacturer’s guidance.
Does cleaning extend the life of a filter?
Regular cleaning and inspection can extend the life of reusable filters, but damage or wear still warrants replacement.
Regular cleaning helps a reusable filter last longer, but wear still matters.
Should I consult a professional?
If you are unsure about filter type or encounter damage, consult a professional or a trusted mechanic for guidance.
If you’re unsure, it’s wise to seek professional help.
Watch Video
Quick Summary
- Clean car air filters improve airflow.
- Differentiate between washable foam and disposable paper filters.
- Always inspect for tears before cleaning.
- Follow manufacturer guidance for re-lubrication and reinstallation.