Bike Air Filter Clean: Step-by-Step Maintenance Guide
Learn how to clean your bike air filter safely and effectively with practical steps, the right tools, and maintenance tips from Air Filter Zone.

By the end of this guide, you will be able to safely clean your bike air filter, extend its life, and protect engine performance. This process covers removable and reusable filters, appropriate cleaners, drying times, and reinstallation. With the right tools and a clean workspace, you can complete a thorough bike air filter clean in under an hour, without specialized gear.
Why Clean Bike Air Filters Matter
A clean bike air filter is essential for optimal engine performance, smooth idling, and consistent throttle response. When a filter is clogged with dust, dirt, and debris, it restricts airflow, causing the engine to work harder and possibly waste fuel. According to Air Filter Zone, regular cleaning helps maintain airflow and reduces the wear on intake seals, contributing to longer filter life and lower maintenance costs. By treating the filter with proper care, riders protect both performance and resale value.
In addition, a clean air filter supports healthier combustion by allowing the engine to mix air and fuel more efficiently. This becomes especially important for riders in dusty or urban environments where contaminants accumulate quickly. A well-maintained filter also minimizes backfire and engine hesitation, making rides safer and more enjoyable.
This section will guide you through the basics, from understanding filter types to choosing the right cleaners, so you can perform a bike air filter clean with confidence.
Types of Bike Air Filters and Cleaning Needs
Motorcycle air filtration varies by design. The most common types are foam, cotton/cellulose, and paper filters. Foam and cotton-cellulose filters are typically washable and reusable; they benefit from a gentle cleaning, thorough rinsing, and optional re-oiling. Paper filters, by contrast, are usually single-use or require careful handling to prevent damage; many riders replace them when dirty. Knowing your filter type guides your cleaning approach, drying method, and whether you should oil the filter after cleaning.
Foam and cotton filters typically tolerate rinsing with mild soap and warm water. They also accept a light coating of oil or filter conditioner to improve particle capture. Paper filters should be inspected for tears or swelling and cleaned only if the manufacturer permits. For any filter type, always refer to your bike’s service manual for compatible cleaners and oils.
Air Filter Zone analysis suggests that using the correct cleaner and allowing complete drying are among the biggest factors in successful filter maintenance. Maintaining a clean, well-seated filter also helps prevent unfiltered air from entering the intake tract, which can compromise engine performance.
Safety and Prep Before You Start
Before you begin, gather your tools, protect the workspace, and wear gloves to keep hands clean. Work in a well-ventilated area to avoid inhaling fumes from cleaners. Disconnect any battery power from nearby systems if you’re performing maintenance around electrical components, and avoid pressure washers that can damage seals.
Prepare a dedicated cleaning station with a tray or tub to hold the filter, a few lint-free towels, and a place to lay the filter flat while it dries. Keep all cleaners and oils labeled and handy, and avoid mixing products unless the manufacturer approves. A clean, organized workspace reduces mistakes and speeds up the process.
Cleaning a Reusable Foam/Cotton Filter
- Remove the filter housing cover and take out the filter itself. Handle gently to prevent tears. 2) Rinse off loose dirt with lukewarm water and inspect for deep grime. 3) Apply a mild soap or specialized cleaner and agitate with a soft brush, working from the clean side outward to prevent embedding dirt into the filter. 4) Rinse thoroughly until water runs clear and there are no suds left. 5) Gently wring out excess moisture and lay the filter on a clean surface to dry completely in a dust-free area. 6) Once dry, apply a light coat of filter oil if your filter design requires it and re-install the filter. 7) Reconnect the housing and perform a test fit, ensuring a proper seal.
Pro tip: Photograph the housing orientation before removal so you can reassemble quickly and accurately. Warnings: Avoid using strong degreasers that can degrade the foam, and never use heat to dry the filter as it can damage the material.
Cleaning a Paper/Disposable Filter
- Confirm that your bike uses a disposable paper filter or a non-washable element. If cleaning is not recommended by the manufacturer, prepare for replacement instead. 2) If cleaning is allowed, use a soft brush to remove loose dirt from the outside surfaces only, never submerge. 3) If the instruction allows, wipe with a damp cloth and let the filter dry completely before reinstalling. 4) Do not oil paper filters; oiling can clog pores and reduce filtration efficiency. 5) Reinstall with a snug, dust-free seal and replace the housing cover.
Note: Most riders opt for replacement when a paper filter is dirty or damaged to protect the engine.
Drying, Re-oiling, and Reinstalling
Air drying is critical. Place the filter in a dust-free, warm area away from direct heat sources and ensure it is fully dry before reinstalling. For foam/cotton filters that require oil, apply a light, even coat along all pleats or fabric threads, avoiding oversaturation. If oil is not recommended for your filter type, skip this step and simply ensure a clean, dry surface.
Reinstall the filter into the housing, align seals, and secure any clamps or screws. Take care to avoid pinching the filter edges during installation, which can cause leaks. After assembly, run the bike at idle in a safe environment to verify there are no air leaks and that the engine responds crisply.
Maintenance Schedule and When to Replace
Riders should plan to inspect the air filter during every routine service or after long dusty rides. Signatures of wear include visible wear, tears, or compressed pleats that don’t recover after cleaning. If you can’t restore performance with cleaning, or if the filter shows structural damage, replacement is the safest option. Record cleaning dates to track maintenance cycles and order replacements proactively.
Regular checks also help you avoid small issues that can lead to bigger engine problems. A well-maintained filter consistently supports the right air-fuel balance and reduces fuel waste, so you benefit from smoother rides and potentially lower maintenance costs over time.
Common Mistakes and How to Avoid Them
- Using high-pressure water or powerful degreasers that can tear or deform filter media. - Don’t oil disposable filters; it clogs pores and reduces filtration. - Never reinstall a dirty or damp filter; moisture can lead to corrosion or mold growth in the intake tract. - Avoid mixing cleaners; stick to products recommended by the filter and bike manufacturer. - Skipping drying time can trap moisture and promote mold or rust inside the housing.
Being mindful of these mistakes helps you achieve a clean filter without damaging components or reducing performance.
Build Your DIY Bike Filter Cleaning Kit
A simple, cost-effective kit makes bike air filter maintenance easier. Include a mild cleaner, a soft brush, warm water, lint-free towels, gloves, a dry space for air-drying, and a small container for soaking if the filter type permits. Keep spare filters or replacement elements on hand to minimize downtime after rides when it’s time to replace rather than clean. A dedicated kit reduces clutter and ensures you have everything you need for a thorough bike air filter clean.
Tools & Materials
- Bike-specific air filter cleaner or mild detergent(Follow label directions; test on a small area first)
- Warm water(Rinse and soak as needed)
- Soft-bristled brush(Non-metal; use gentle scrubbing to avoid tearing)
- Lint-free towels or rags(Pat dry; avoid fabric that sheds fibers)
- Protective gloves(Keep hands clean and protected from cleaners)
- Filter oil or oiling agent (if filter requires oiling)(Only apply to foam/cotton filters per manufacturer)
- Screwdrivers/pliers (optional)(For removing housing clips or screws)
- Small tray or bucket(Contain dirty water and prevent spills)
- Old toothbrush or soft brush(For stubborn grime on pleats)
Steps
Estimated time: 60-90 minutes
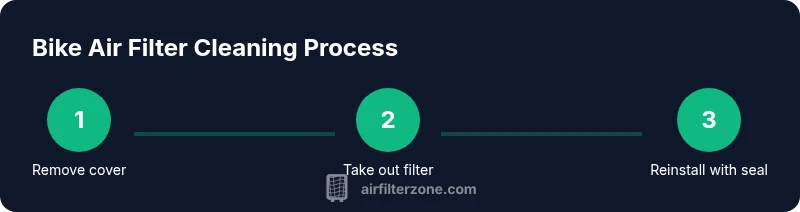
- 1
Remove the filter housing cover
Locate the air filter housing on your bike and carefully remove the cover or clips. Set the filter aside gently to avoid tearing and note its orientation for reinstallation.
Tip: Take a photo of how the filter sits in the housing before removing it. - 2
Take out the air filter
Carefully remove the filter element from the housing, handling it by the edges to prevent damage. Inspect the housing for any debris that may have accumulated.
Tip: Keep the orientation consistent to ensure a proper seal on reinstallation. - 3
Inspect the filter for wear
Check for tears, creases, or swelling on foam/cotton filters. Paper filters should appear intact with no obvious tears. If damaged, replace rather than attempt a cleaning.
Tip: A damaged filter can let unfiltered air into the engine and cause wear. - 4
Clean foam/cotton filters
Rinse with lukewarm water and apply a mild detergent. Gently scrub with a soft brush, focusing on dirty pleats, then rinse until clear. Wring gently without twisting.
Tip: Avoid aggressive scrubbing that can collapse folds or tear fabric. - 5
Clean paper/disposable filters
If permitted by manufacturer, brush off dirt and wipe with a damp cloth. Do not saturate with water or oil, and ensure it dries completely before reinstalling or replace if advised.
Tip: Paper filters rarely tolerate washing; replacement is often the best option. - 6
Dry the filter completely
Place the cleaned filter on a clean surface in a dust-free area. Allow ample time for air drying—do not use heat sources that might deform the media.
Tip: Moisture trapped in the filter can promote mold and reduce performance. - 7
Re-oil (if required) and reinstall
Apply a light, even coat of oil to foam/cotton filters as directed by the manufacturer. Reinstall the filter with clean hands, ensuring seals are tight and the housing clips sit properly.
Tip: Oil should be evenly distributed; heavy oversaturation clogs pores. - 8
Test and verify
Reassemble the housing, start the bike, and listen for airflow noises or leaks. If you detect a hiss or whistling, reseat the filter and recheck seals.
Tip: A proper seal prevents unfiltered air from entering the intake.
FAQ
Can I use household cleaners on a bike air filter?
Yes, if the cleaner is mild and the filter type allows washing. Always rinse thoroughly and avoid harsh chemicals that can degrade media. When in doubt, consult the bike or filter manufacturer’s guidelines.
A mild cleaner works, just rinse well and check the manufacturer’s guidance.
How often should I clean the bike air filter?
Frequency depends on riding conditions. Regular inspections during service checks help determine whether cleaning or replacement is needed. In dusty environments, more frequent checks are advised.
Check it during service and after dusty rides to know when it needs cleaning or replacement.
Are disposable paper filters reusable after cleaning?
Most disposable paper filters are not designed to be washed and reused. If the manufacturer permits cleaning, follow exact instructions; otherwise replace with a new paper filter.
Paper filters usually aren’t reusable—follow the maker’s directions or replace.
What should I avoid when cleaning filters?
Avoid high-pressure water, harsh solvents, and over-oiling disposable filters. Do not bend or tear the media and never skip drying. Use only recommended cleaners and oils.
Avoid strong cleaners and high-pressure water, and don’t skip drying.
How can I tell if a filter needs replacement?
If the filter shows tears, deformities, swelling, or cannot be cleaned to remove dirt adequately, replacement is recommended to protect engine performance.
Look for tears or swelling; if it won’t come clean, replace it.
Watch Video
Quick Summary
- Clean bike air filters improve engine performance
- Different filter types require different cleaning methods
- Drying thoroughly is critical to prevent mold and corrosion
- Follow manufacturer guidance for oiling and replacement intervals