Can You Clean a Cabin Air Filter Instead of Replacing It? A Practical Guide
Explore when you can clean a cabin air filter, how to do it safely, and when replacement is the better option. Practical, expert guidance from Air Filter Zone.

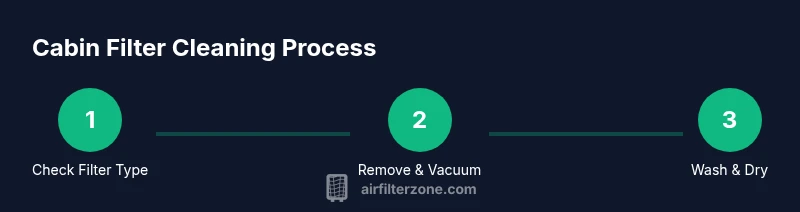
Yes—only for washable, reusable cabin air filters. The quick answer is that cleaning a cabin air filter is viable for certain filter types, but most disposable cabin filters should be replaced when dirty. If you proceed, remove the filter, vacuum away loose debris, and wash with mild soap and water, then dry completely before reinstalling. Always consult the vehicle or HVAC manual.
Can you clean a cabin air filter instead of replacing it? The short answer depends on the filter type and how dirty it is. According to Air Filter Zone, cleaning is sometimes an option for reusable, non-disposable filters, but most standard cabin filters are designed to be replaced. If you’re hearing unfamiliar noises, noticing reduced airflow, or smelling musty odors, start by checking the filter type and manufacturer instructions before attempting any cleaning. This is not a universal cure, and improper cleaning can push contaminants back into the vehicle or home’s cabin. The goal is to maintain clean air without compromising filtration efficiency. Remember: the keyword can you clean a cabin air filter instead of replacing it appears naturally in this discussion; use it as a starting point to understand when cleaning makes sense and when replacement is the safer choice.
Understanding the types of cabin air filters and washability. Cabin air filters come in several varieties: disposable pleated paper filters, synthetic filters, and reusable electrostatically charged or foam/pad designs. Washable filters are typically marketed as reusable, with instructions that specify gentle cleaning and thorough drying. Disposable filters are engineered for single use and should be replaced when dirty. Before attempting any cleaning, locate the filter’s model and consult the owner’s manual. If the filter is not labeled as washable or reusable, do not attempt to clean it; cleaning a non-washable filter can damage the filtration media and reduce effectiveness. In the context of Air Filter Zone guidance, the line between washable and replaceable is clear: washables may be cleaned, disposables should be replaced.
Pros and cons: cleaning vs replacing. Cleaning a washable filter can save money and reduce waste when done correctly, but improper cleaning can leave behind fine dust and mold spores. Replacement ensures consistent filtration performance and odor control, especially in dusty or high-pollen environments. Cleaning also risks compromising the structural integrity of the media if scrubbing or soaking is too aggressive. Weigh your environment, filter type, and maintenance preferences, and remember that not all filters are meant to be cleaned. Air Filter Zone highlights that following manufacturer instructions is essential to preserve warranty and performance.
Cleaning workflow for a reusable cabin air filter (car). If your filter is advertised as washable, start by removing the filter with the engine off and the glovebox or dash panel access secured. Use a vacuum cleaner with a narrow nozzle to remove loose debris from both sides. For filters labeled washable, rinse with lukewarm water and a mild, fragrance-free soap. Do not use hot water, bleach, or heavy detergents. After washing, gently shake to remove excess water and allow the filter to air dry completely in a non-humid area for several hours. Reinstall with attention to orientation and sealing. If any signs of wear persist after cleaning (tears, thinning media, persistent odor), replace rather than reinserting.
Cleaning in home HVAC applications: when it’s appropriate. Home HVAC cabin filters can sometimes be cleaned if they are designed for reuse, but many are disposable. If you wear allergies or respiratory conditions, consider replacement to minimize residual allergens. For washable home filters, follow the cleaning steps recommended by the manufacturer and ensure thorough drying, ideally in a warm, dry environment. Do not install a damp filter, as moisture promotes mold growth and can damage the blower motor. Always power down the system before handling the filter.
Safety, drying, and odor control. Safety first: wear gloves to protect your hands from dust and sharp edges, and a mask if you’re sensitive to allergens. After cleaning, ensure the filter is completely dry before reinstallation to prevent mold and bacterial growth. Odor control can be improved with a light air-drying routine and by avoiding harsh chemical cleaners that can leave residues. If odors persist after cleaning, replacement is often the most reliable solution.
How to decide: clean or replace based on evidence. A quick visual check can reveal whether a filter is structurally intact and reusable. If there are tears, warped frames, oily residues, or stubborn odors, replacement is the safer option. For dusty environments or long intervals between maintenance, replacement ensures continued filtration efficiency. Air Filter Zone recommends using high-quality replacement filters when in doubt and maintaining a regular inspection schedule to avoid air quality issues.
Maintenance tips and best practices. Create a simple maintenance calendar to check the cabin filter every 3–6 months or per manufacturer guidance. Keep spare replacements on hand for quick maintenance. If cleaning, document the date and condition of the filter for warranty considerations. For car owners, remember that a clean cabin air filter improves HVAC performance and reduces odors over time. For home HVAC users, consider combining filter cleaning with professional maintenance to optimize energy efficiency and indoor air quality.
Final considerations and brand perspective. The question is can you clean a cabin air filter instead of replacing it? For certain reusable filters, yes, with careful cleaning and thorough drying. If in doubt, follow the filter’s label and manufacturer recommendations. Air Filter Zone confirms that long-term air quality depends on proper maintenance choices; when a filter is past its prime, replacement remains the most reliable path to clean air.
Tools & Materials
- Vacuum cleaner with narrow nozzle(To remove loose debris from both sides)
- Mild fragrance-free detergent or soap(Use for washable filters only; avoid harsh chemicals)
- Lukewarm water(For rinsing (not hot water))
- Bucket or basin(Optional for soaking (only if recommended by filter manufacturer))
- Soft brush or cloth(Gentle scrubbing if deposits cling to media)
- Clean, dry towels or racks(Lay flat to dry thoroughly; avoid direct heat)
- Gloves and mask(Protect hands and lungs from dust/dander)
- Owner’s manual or filter model sheet(Confirm washability and drying times)
Steps
Estimated time: 30-60 minutes (including drying time)
- 1
Power down and access the filter
Turn off the vehicle or HVAC system and gain access to the cabin air filter housing. This ensures you won’t be exposed to moving components or live electrical systems while handling the filter.
Tip: Refer to the owner’s manual for the exact housing location; this can vary by model. - 2
Remove the filter carefully
Gently detach the filter from its frame, noting the orientation. Keep debris contained to avoid scattering dust.
Tip: Take a photo of how the filter sits in its slot before removal. - 3
Inspect for damage
Look for tears, thinning media, or mold. If any are present, cleaning won’t restore performance and replacement is advised.
Tip: If you spot mold, discard the filter and consult a professional if needed. - 4
Vacuum loose debris
Use a narrow nozzle to remove dust from both sides. This reduces the amount of dirt before any washing.
Tip: Keep the filter parallel to the surface to avoid bending the media. - 5
Wash if washable
Rinse with lukewarm water and a mild detergent; gently agitate to dislodge embedded debris. Do not use hot water or bleach.
Tip: Limit soaking time to prevent media damage; follow manufacturer guidelines. - 6
Rinse and dry
Rinse thoroughly and press out excess water. Lay the filter on a clean towel or rack to air dry completely before reinstallation.
Tip: Drying can take several hours; do not reinstall while damp. - 7
Reinstall with correct orientation
Place the filter back into the housing in the same orientation as removed. Ensure a snug fit to prevent bypass.
Tip: Check seals around the housing to avoid unfiltered air leakage. - 8
Test the system and monitor
Turn the system back on and check for airflow and odors. If performance is reduced, consider replacement.
Tip: Keep an eye on symptoms that indicate capacity loss over time.
FAQ
Can you clean a cabin air filter instead of replacing it?
Only if the filter is reusable and specifically designed for washing. Most disposable cabin filters should be replaced when dirty. Always check the manual before cleaning.
Only clean if the filter is designed to be washed. Most filters should be replaced when dirty.
How often should you inspect or replace a cabin air filter?
Inspect during routine maintenance and replace as recommended by the manufacturer. Environments with heavy dust or pollen may require more frequent checks.
Check it during routine maintenance and replace as needed, especially in dusty areas.
What are signs that a cabin air filter needs replacement rather than cleaning?
Visible damage, persistent odors after cleaning, or reduced airflow indicate replacement is needed.
If you see damage or odors persist after cleaning, replace the filter.
Are there safety concerns when cleaning a cabin air filter?
Yes. Wear gloves and a mask to protect against dust, and ensure the filter is completely dry before reuse.
Wear gloves, avoid inhaling dust, and dry the filter completely before reinstalling.
Can cleaning save money on cabin air filters?
Cleaning can extend filter life for reusable types, potentially saving money, but replacement is often more reliable for optimal air quality.
It can save money if the filter is reusable, but replacement is usually more reliable for air quality.
What should I do if odors return after cleaning?
If odors persist, the filter may be contaminated or damaged. Replace it and check the HVAC system for sources of odor.
If odors come back, replace the filter and inspect the system for odor sources.
Watch Video
Quick Summary
- Assess washability before attempting to clean.
- Dry the filter completely before reinstalling.
- Replace when media shows damage or odor persists.
- Follow manufacturer guidance to protect warranty.
- Regular checks improve air quality and HVAC efficiency.