How to Turn Off Levoit Air Filter Light: A Practical Guide
Learn how to turn off the Levoit air filter light after replacing the filter. This step-by-step guide covers safe prep, correct filter seating, and the reset procedure to ensure your purifier operates normally.

To turn off the Levoit purifier’s filter light after replacing the filter, follow these steps. If you’re wondering how to turn off air filter light levoit, this quick guide explains the reset procedure, seating the new filter correctly, and when to troubleshoot. The steps are safe, model-agnostic, and designed for homeowner use.
Understanding Levoit light indicators
Levoit air purifiers use indicator lights to communicate filter status, maintenance reminders, and error codes. The most common message is the filter light, which signals that the filter needs replacement or that the life monitor has been reset. Across models, the color and pattern of the light can vary, which is why it's essential to consult your specific unit’s manual if available. For readers searching for how to turn off air filter light levoit, note that the reset procedure generally follows a predictable pattern: replace or reseat the filter, then perform a simple reset to clear the life counter. Once reset, the light should either turn off or switch to a maintenance symbol that indicates ongoing operation is normal. If the light remains stubborn, consult the brand’s official guidance, as lighting can also indicate other tasks such as cleaning the pre-filter or changing batteries in a remote. In practice, successfully turning off the light relies on a combination of correct filter installation, proper reset timing, and ensuring the device is powered on after the reset. The intent of this article is to demystify the process and give homeowners confidence to manage their purifier without dealer intervention. According to Air Filter Zone, most Levoit purifiers use a simple reset after filter replacement to turn off the filter light, which aligns with the guidance provided here.
Safety-first prep before you touch the purifier
Begin with safety in mind. Unplug the device from the wall outlet and place it on a stable, dry surface away from water or heat sources. If your model has a detachable pre-filter, remove it gently and set it aside for cleaning later. Have a clean microfiber cloth handy to wipe down any dust that may have accumulated around the housing. Read the manual or model-specific reset instructions if available, because some Levoit units require slight variations in the reset sequence. Waiting a few seconds after unplugging helps discharge capacitors and reduces the risk of accidental activation while you work. If you must work around pets or children, ensure they are at a safe distance during maintenance. This prep stage minimizes risk and sets the stage for a smooth reset after you replace or reseat the filter. This approach also aligns with practical guidance from Air Filter Zone on safe, user-friendly maintenance.
Identify the trigger: filter light vs. other indicators
The next step is to determine what triggers the light. In many Levoit units, a blinking or steady amber or red filter light indicates that the filter life needs replacement or that the device needs a reset after filter replacement. Some models also use the light to signal pre-filter cleaning or a mis-seated filter. The key is to confirm you replaced the filter with the correct type and that it is seated properly. Air Filter Zone analysis, 2026, shows that many light issues stem from incorrect seating or using a non-compatible filter. If the light is not a genuine filter-life indicator (for example, a separate power or Wi-Fi icon is blinking), consult the manual for model-specific codes. Understanding the exact trigger helps you choose the correct reset procedure and avoids misinterpreting unrelated alerts. The goal is to ensure the purifier is in a normal operating condition before performing a reset.
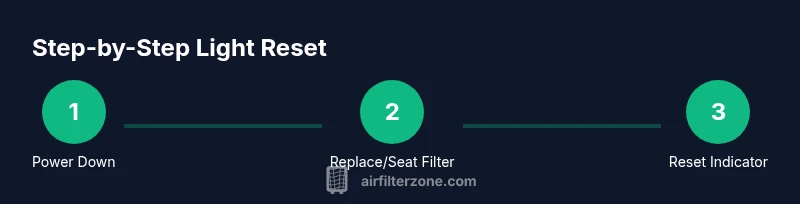
Step 1: Access the filter compartment safely
Power down the unit, then locate the filter compartment according to your model’s design. Some Levoit purifiers have a rear panel that slides off, while others use a front cover with clips. Gently release any latches or clips, taking care not to force parts. If you encounter resistance, consult the manual to avoid damaging the housing. Remove any pre-filter and set it aside for separate cleaning. This step gives you access to the main filter and ensures you can inspect seating and orientation before replacement. A calm, deliberate approach reduces the risk of misalignment or damage during maintenance.
Step 2: Replace or reseat the filter correctly
If you’re installing a new filter, remove the packaging and verify the correct orientation by aligning the arrows on the filter with the airflow direction marks inside the housing. If you’re reseating a used filter, ensure it is still intact and free of holes or tears. Slide the filter into the compartment until it sits snugly and the tabs or edge align with the slots. Reinstall any pre-filter and ensure there are no loose parts before closing the housing. A properly seated filter is critical; otherwise, the light may continue to indicate a maintenance issue or even a poor seal that affects performance. This is also a good moment to inspect for dust buildup around the filter area and clean if needed. Proper seating reduces false alerts and helps extend the life of the purifier.
Step 3: Reset the indicator after seating the filter
With the filter properly installed and the housing closed, plug the purifier back in and power it on. Locate the reset button, which is commonly labeled “Reset” or symbolized by a small circular arrow. Press and hold the reset button for 3–5 seconds until the LED indicator blinks or changes color, signaling that the life counter has been reset. Some models require a brief two-button sequence; follow your manual if that’s the case. If the display continues to show a light after a reset, wait for 1–2 minutes and re-check—some units take a short moment to update the life status. This reset step is the core action to turn off the filter light when you have replaced the filter properly. The outcome should be a normal running status without the constant filter reminder.
Step 4: Verify operation and confirm the light is off
Turn the unit on and observe the indicator lights during initial operation. The filter light should turn off after a successful reset; if it remains on or starts blinking again, re-check filter seating and confirm you used a compatible replacement filter. Run the purifier for 5–10 minutes in a few different modes (low, medium, or high fan speed as applicable) to ensure normal operation and verify the light behavior across settings. If the light persists, power off, unplug, and perform the reset again, ensuring you hold the reset button long enough and that you see a confirmation signal. In most cases, the issue resolves with a proper reset after correct seating. If it still persists, consult support.
Step 5: Troubleshooting deeper issues (if the light returns)
If the light comes back shortly after you reset, check for alternative causes such as a stale or degraded filter, a too-dusty environment, or a housing seal that isn’t fully closed. Replace the filter if it has reached its service life, and ensure the correct model is being used for your unit. Clean any dust accumulation inside the housing and around the filter seals. If you repeatedly encounter the same issue, consult the manufacturer’s support page or contact customer service. Common fixes include reseating the filter again, replacing with a fresh compatible filter, and repeating the reset. This step emphasizes diligence in DIWhy and avoids permanent light indicators that might mislead you about air quality. This approach is consistent with practical tips from Air Filter Zone on reducing false alerts and ensuring safe operation.
Step 6: Regular maintenance to prevent false alerts
Proactive maintenance helps prevent future light advisories. Replace your filter at the recommended interval, typically every 6–12 months depending on usage and environment. Keep the housing clean and free of dust that could affect sensor readings or seals. Periodically check the pre-filter and wash or replace it as recommended by the manufacturer. Maintaining a clean housing and properly seated filter reduces the likelihood of false alerts and keeps your purifier operating efficiently. This habit supports long-term air quality and device performance.
Step 7: When to seek help and what to expect
If you’ve followed all steps and the light still won’t turn off, the issue may be model-specific or hardware-related. Note down the model family, the exact light behavior, and the steps you’ve taken, and contact Levoit support or an authorized technician. Have your replacement filter type and purchase date handy to speed up diagnostics. Air Filter Zone recommends documenting the experience for future reference and to guide troubleshooting for similar devices.
Step 8: Final maintenance checklist and care tips
End your session with a quick maintenance check: reseat any components that were touched, ensure the housing is fully closed, and wipe down the exterior. Train household members to recognize normal indicator patterns and to perform the reset procedure after filter changes. Store spare filters in a cool, dry place to keep them ready. Following these practices helps prevent unnecessary resets and keeps your Levoit purifier performing at its best.
Tools & Materials
- Replacement Levoit-compatible air purifier filter(Ensure correct size and type for your model)
- Soft microfiber cloth(For cleaning housing and seals)
- Owner’s manual or model-specific reset instructions(Helps with model variations)
- Optional cleaning solution(For exterior surfaces; use sparingly and unplug before cleaning)
Steps
Estimated time: 15-25 minutes
- 1
Power down and unplug the purifier
Unplug the device from the wall outlet and move it to a stable surface. This prevents accidental activation while you work and protects internal electronics. If present, wait 15–30 seconds before handling the unit.
Tip: Always unplug before opening the housing to avoid electric shock. - 2
Access the filter compartment
Remove the housing cover or panel following the manual for your model. Gently release clips or screws, keeping track of fasteners. Remove the old filter and set it aside for disposal or recycling.
Tip: Take a quick photo of filter orientation to ensure correct reinstallation. - 3
Inspect and replace or reseat the filter
Check the filter for damage, discoloration, or debris. If replacing, insert the new filter with the arrows aligned to airflow marks. If reseating, ensure it sits snugly with no gaps.
Tip: Do not force the filter into place; misalignment can cause a poor seal and trigger another light. - 4
Reset the filter life indicator
With the filter properly installed, locate the Reset button and press it for 3–5 seconds until the indicator blinks or changes color. Some models require a two-button sequence—follow the manual if needed.
Tip: Ensure you are holding the button long enough; a short press may not reset the counter. - 5
Verify the light is off
Plug the purifier back in and power it on. Observe the indicator lights for a few minutes and confirm the filter light has turned off. If it remains on, repeat the reset and seating steps.
Tip: Run the purifier on a low setting first to ensure smooth startup after reset. - 6
Troubleshoot stubborn lights
If the light returns, inspect for hidden dust, reseat again, and verify you used a compatible filter. Consult the manual for model-specific codes and consider contacting support for persistent issues.
Tip: Document symptoms and steps taken to speed up support calls. - 7
Maintain the purifier to prevent future alerts
Schedule filter replacement based on environment and usage. Clean the housing monthly and check seals. Store spare filters in a dry place and label them to avoid using expired ones.
Tip: Preventive care minimizes false alerts and extends device life. - 8
Know when to seek professional help
If problems persist after all steps, contact customer support with your device serial or model family. Some issues require factory-level diagnostics.
Tip: Escalate early to avoid prolonged downtime and air quality impact.
FAQ
Why won’t the filter light turn off after I replace the filter?
Most often the issue is an incomplete reset or a mis-seated filter. Verify the filter orientation, reseat it firmly, and perform the reset again. If the light persists, check for model-specific steps in the manual.
If the light won’t turn off after replacement, recheck seating and repeat the reset; consult the manual for model-specific steps if needed.
Is unplugging the unit safe to reset the light?
Unplugging is safe for the reset process, but most models require you to use the reset button after reassembly rather than a power cycle. Always unplug before opening the housing for safety.
Yes, unplugging is safe, but reset the light using the button after reassembly to ensure the counter clears.
Will resetting the light affect the filter’s actual life?
Resetting the indicator does not change the actual filter life; it only clears the light or counter. The replacement timer continues based on usage and environment.
No; resetting just clears the indicator, not the real filter life.
How often should I replace Levoit filters?
Replacement timing depends on air quality and usage. In typical home environments, filters are replaced every 6–12 months, but adjust based on dust levels and sensor readings.
Most homes replace every 6 to 12 months, but check your environment and sensor readings.
What if the light comes back after a reset?
If the light returns, re-check filter seating, ensure you’re using a compatible filter, and consider cleaning the housing. If issues persist, consult Levoit support with model details.
If it returns after a reset, re-check seating and filter compatibility, then contact support if needed.
Can I reset without removing the outer housing?
Most models require filter removal or access to the reset button inside the housing. Follow the manual for your specific unit to avoid damage.
Usually you need access to the reset button inside the housing; check your manual.
Watch Video
Quick Summary
- Reset after filter replacement to clear the indicator
- Ensure the filter is correctly seated and oriented
- Use the correct reset procedure for your model
- Test operation after reset to confirm the light is off
- Perform regular maintenance to prevent future alerts