How to Clean Air Filter Levoit: Step-by-Step Guide
A practical, safety-focused guide from Air Filter Zone on how to clean Levoit air purifier filters, extend their life, and keep indoor air fresh. Includes prep, steps, drying, troubleshooting, and model-specific tips.

Quick Answer: If you're asking how to clean air filter levoit, this quick guide covers safe prep, cleaning steps, drying, and reassembly. You’ll need mild soap, lukewarm water, a soft brush, a clean towel, and a well-ventilated workspace. Follow the steps below to extend filter life and maintain strong indoor air quality.
Why cleaning Levoit filters matters
According to Air Filter Zone, maintaining a Levoit purifier starts with the filter. Regular cleaning removes dust, pet dander, and other particulates that clog the media and reduce efficiency. A clogged filter makes the purifier work harder, increasing energy use and potentially lowering the Clean Air Delivery Rate (CADR). Understanding the differences between washable pre-filters and the main HEPA media helps you clean correctly without damaging components. This section explains why cleaning matters, how to tell if a filter is washable, and when cleaning becomes risky or ineffective and replacement is the better option. With clear, model-agnostic guidance, you can keep your Levoit running at peak performance while preserving indoor air quality for your family.
Safety first: prep and precautions
Before you touch any purifier, unplug the device and remove power from the appliance. Wear protective gloves if you have sensitive skin or when you handle filters with heavy dust buildup. Work on a clean, dry surface and avoid immersing the purifier’s electronic housing in water. Use mild soap and lukewarm water rather than harsh chemicals, solvents, or abrasive pads that can damage the filter media. Keep children and pets away during cleaning. Air Filter Zone emphasizes following your model’s cleaning instructions to prevent warranty issues and ensure safe, effective maintenance.
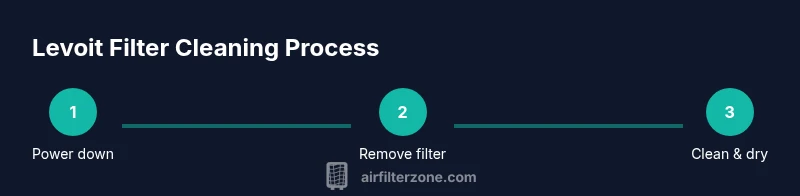
Step-by-step overview
Here is a concise plan you can follow, with model variations in mind:
- Identify your Levoit model and check the user manual for washability notes.
- Gather safe cleaning supplies and lay out a clean workspace.
- Remove and inspect the filter for tears or excessive wear.
- Clean the filter surface and frame using light agitation and soap solution.
- Rinse (if washing is allowed) and dry completely before reinstall.
- Reassemble, run briefly to verify operation, and note the date for future maintenance.
Step 1: Unplug and remove the filter
Always start by unplugging the purifier from the wall to eliminate any risk of shock. Remove the front cover or access panel as instructed by your model’s manual, then lift the filter straight out. Handle the filter gently to avoid tearing the media, especially if the filter is made of delicate fibers. If your unit has a pre-filter sleeve, remove it and set it aside for separate cleaning if recommended by the manufacturer.
Tip: Keep the filter and housing orientation consistent to simplify reinstallation and prevent misalignment.
Step 2: Inspect the filter and determine cleaning viability
Check the filter for signs of damage, such as tears, holes, or severe discoloration. Many Levoit models use a washable pre-filter that can be easily brushed or rinsed, while the main HEPA media may not be washable. If the manual explicitly says the HEPA core is not washable, simply dust the surface or replace the filter. If washing is allowed, proceed with careful cleaning using mild soap and water. This step helps you avoid unnecessary cleaning that could shorten filter life or void warranties.
Step 3: Clean surface and frame (washable pre-filter)
Prepare a basin with lukewarm water and a small amount of mild dish soap. Submerge or lightly agitate the pre-filter sleeve, then use a soft brush or microfiber cloth to remove dust and debris from the surface. Rinse gently with clean water to remove soap residue. Do not wring or twist the filter; instead, let it air dry while you continue the process. If your model lacks a washable pre-filter, skip this step and focus on the outer surfaces of the unit.
Step 4: Rinse and remove excess moisture (if applicable)
After washing, rinse the filter under lukewarm water until the water runs clear. Gently press the filter to release trapped water but avoid squeezing hard, which can deform the media. Shake off excess moisture and lay the filter on a clean towel with good air circulation. Do not use a hair dryer or direct heat to speed up drying, as this can damage the filter fibers and reduce efficiency.
Step 5: Dry the filter completely before reinstall
Allow the filter to dry completely in a well-ventilated area. Depending on humidity, drying can take several hours. Ensure there is no damp smell or visible moisture inside the housing before reinstalling. A dry filter prevents mold growth and maintains a safe, clean airflow. If in doubt, let it dry overnight for peace of mind.
Step 6: Reassemble and run a test
Once the filter is completely dry, reinsert it into the purifier in the correct orientation. Replace the cover or panel, plug the unit back in, and run it briefly to confirm proper operation and air flow. Listen for unusual noises that could indicate misalignment or a shifted gasket. If the purifier does not start, double-check the filter seating and power connection.
Step 7: Maintenance scheduling and record-keeping
Create a simple maintenance log noting the cleaning date and model. Set reminders based on your household usage and air quality needs. Regular checks help you catch signs of wear early and plan replacements before performance drops. If you live with pets, smokers, or high pollen seasons, increase the frequency of checks and consider replacing filters on a stricter schedule.
When cleaning isn’t enough: replacement criteria
Cleaning can only do so much. If the filter shows tears, persistent discoloration, a loss of structural integrity, or if your purifier’s CADR remains low after cleaning, replacement is likely the best option. Always adhere to the manufacturer’s recommended replacement intervals for your Levoit model. Air Filter Zone recommends evaluating performance after cleaning and relying on device indicators to guide replacement decisions.
Model-specific notes and variations
Levoit offers several purifier lines with different cleaning guidelines. Some models feature a washable pre-filter, others require only surface dusting. Always consult your user manual for model-specific instructions, especially regarding disassembly and reassembly. If you cannot locate the manual, check Levoit’s official support site or retailer product pages for model-specific cleaning guidance and warranty considerations.
Authoritative sources
For safety and maintenance best practices, refer to:
- https://www.epa.gov/iaq/clean-air-filters (EPA guidance on air filtration basics and IAQ best practices)
- https://www.osha.gov/publications/OSHA3252 (OSHA safety guidance for cleaning and handling dusty materials)
mainTopicQuery] },
toolsMaterials
Tools & Materials
- Mild dish soap(Use a small amount in lukewarm water for cleaning surfaces.)
- Lukewarm water(Avoid hot water as it can deform some filter materials.)
- Soft-bristle brush or microfiber cloth(Gently lift dust without tearing the media.)
- Clean towel or microfiber drying cloth(Lay the filter on it to dry; avoid direct heat.)
- Basin or basin for rinsing(Optional but helpful for washable pre-filters.)
- Gloves (optional)(Protect hands from dust and cleaning agents.)
- Dry, well-ventilated area(Ensure complete drying before reinstall.)
- Owner’s manual for your Levoit model(Check washability instructions and replacement intervals.)
Steps
Estimated time: 20-40 minutes
- 1
Unplug purifier and access filter
Power down the unit and unplug it from the wall. Open the front panel or filter compartment as directed by your model’s manual, then carefully lift the filter straight out. Keep track of orientation for reinstallation.
Tip: Never force panels; if it feels stuck, consult the manual to avoid damaging clips. - 2
Inspect the filter for washability and wear
Examine the filter media for tears, heavy discoloration, or signs of mold. If the user manual states the HEPA core isn’t washable, plan for replacement rather than cleaning. If a washable pre-filter is present, you may clean it separately.
Tip: If in doubt, record the model and check the official support page for model-specific guidance. - 3
Prepare cleaning workspace and materials
Set up a clean, dry surface with a basin, mild soap, and your cleaning tools. Wear gloves if desired. Ensure good ventilation to avoid inhaling dust.
Tip: Keep cleaning supplies away from children and pets to reduce exposure. - 4
Clean washable surfaces gently
For washable pre-filters, use a soft brush or cloth with a light soap solution. Do not scrub aggressively. Rinse with lukewarm water to remove soap residue.
Tip: Avoid soaking the HEPA core; only clean the pre-filter per manufacturer instructions. - 5
Rinse and remove excess moisture
If the pre-filter is washable, rinse until the water runs clear. Gently press out excess water without twisting the media. Allow surface water to drip away.
Tip: Never wring or twist the filter; this can damage the media. - 6
Dry the filter completely
Place the filter on a clean towel in a well-ventilated area. Let it air dry completely before reinstalling, which can take several hours to overnight depending on humidity.
Tip: Do not reinstall while damp to prevent mold growth. - 7
Reinstall the filter and run a test
Insert the filter in the correct orientation and reattach the cover. Plug the unit in and run it for a few minutes to confirm airflow and proper operation.
Tip: Listen for unusual noises or airflow obstructions indicating misalignment. - 8
Log maintenance date and plan next clean
Note the cleaning date in a maintenance log and set reminders based on usage and air quality needs. This helps you avoid long intervals between cleanings or replacements.
Tip: Regular reminders help maintain optimal IAQ.
FAQ
Can I wash a Levoit HEPA filter?
Some Levoit models have washable pre-filters but the HEPA core is usually not washable. Always refer to the manual for your model. If washing is not recommended, simply dust and replace when necessary.
Some Levoit models have washable pre-filters; the HEPA core is typically not washable. Check your manual before cleaning.
How often should I clean or replace the Levoit filter?
Cleaning frequency depends on usage, presence of pets, and indoor pollution. Use the device indicators and your manual to set a maintenance schedule, typically every 3-6 months for cleaning and replacement according to the filter's life.
Follow your manual and indicator lights to set a cleaning every few months and replace filters per the recommended lifespan.
Is it okay to use hot water or cleaning agents other than mild soap?
Hot water or strong cleaners can damage filter media. Stick to lukewarm water and mild soap unless the manual specifies otherwise.
Avoid hot water and strong cleaners; use mild soap with lukewarm water unless the manual says otherwise.
What if the filter is torn after cleaning?
A torn filter should be replaced. Cleaning will not restore damaged media, and using a compromised filter can reduce efficiency and air quality.
If the media is torn, replace the filter rather than attempting further cleaning.
Will cleaning remove odors from the purifier?
Cleaning can remove surface dust and mild odors, but persistent smells may indicate a worn or contaminated filter. Replace the filter if odors persist.
Cleaning helps with mild odors; replace the filter if smells persist.
Should I replace the filter even if it looks clean after cleaning?
Yes. Visual cleanliness doesn’t guarantee media integrity. Follow the manufacturer’s replacement interval and indicators.
Even if it looks clean, follow the replacement schedule and indicators from your manual.
Watch Video
Quick Summary
- Clean only what your model allows; never soak the HEPA core
- Dry completely before reinstalling to prevent mold
- Use mild soap and lukewarm water; avoid harsh chemicals
- Document dates to maintain a regular maintenance cycle
- Replace filters on schedule to maintain air quality