k n air filter cleaning: A Step-by-Step Home Guide
Learn practical methods for k n air filter cleaning, including when to clean, essential tools, a clear step-by-step process, and safety tips. Air Filter Zone Analysis, 2026.

Learn how to perform k n air filter cleaning at home or in your vehicle, including the right tools, safety precautions, and a clear sequence of steps. This guide covers when cleaning is appropriate versus replacement and how to avoid damaging filters. According to Air Filter Zone, using proper technique protects indoor air quality and extends filter life.
What is k n air filter cleaning and why it matters\n\nClean air starts with clean filters. The practice of k n air filter cleaning involves removing dust and debris from an air filter so that air can pass through efficiently without channeling around the filter. The goal is to restore airflow, extend the filter life, and reduce particle buildup in the HVAC system or car intake. According to Air Filter Zone, maintaining clean filters helps improve indoor air quality by limiting dust and allergens that re-enter living spaces. The process differs slightly between home HVAC filters, car cabin filters, and appliance filters, but the core principles are the same: gentle handling, no soaking that could deform the media, and ensuring the filter is dry before reuse or replacement. Be mindful of the manufacturer’s guidance; some filters are designed to be never washed while others are purposely washable. In all cases, the objective is to keep the media free of fibers that block air paths while preserving the structural integrity of the filter media.
Choosing the right filter and tools\n\nFilters come in several media types: disposable pleated paper, washable cotton or polyurethane media, and hybrid designs. Each type has different care requirements, so start by identifying your filter model and reading the label for cleaning instructions. Tools you’ll want on hand include a vacuum with a soft brush, a non-abrasive sponge or brush, mild detergent, warm water, lint-free towels, and a clean workspace. Avoid harsh solvents that can degrade media. For car cabin filters, ensure you’re working in a well-ventilated area and do not contaminate the vehicle interior. Remember to verify that the tool you choose won’t snag or tear the media, which can shorten the filter’s life.
Step-by-step overview and checks\n\nBefore you dive into cleaning, perform a quick inspection. Look for visible tears, moisture staining, or deformation. If any of these signs are present, replacement is the safer option. For washable filters, rinse gently with lukewarm water and let air-dry completely before reinstalling. For disposable filters, do not attempt to wash; either vacuum off loose debris or replace. Keep orientation marks visible so the filter slots back correctly in its housing. This section provides an overview; the detailed step-by-step section below breaks down each action.
Common pitfalls and safety practices\n\nCommon mistakes include using high-pressure water or heat to dry a filter, which can warp media or set creases that impede airflow. Never slam a filter back into place; misalignment can cause leaks and performance loss. If you work in a dusty environment, consider wearing a mask and gloves to minimize exposure to irritants. Make sure the area is dry and free of standing water before reassembly to prevent mold growth. Always unplug or switch off power to HVAC or automotive systems before removing filters to avoid shock or accidental activation.
Maintenance routines and replacement cues\n\nA proactive maintenance routine helps prevent clogged systems. Schedule regular checks at least monthly in high-dust areas, and increase cadence during peak pollen or wildfire seasons. Replace filters that are visibly dirty, damaged, or when airflow drops despite cleaning. Keeping records of filter changes helps you judge when to shift from cleaning to replacement and can prevent inefficiencies in heating and cooling.
Measuring air quality impact after cleaning\n\nAfter cleaning, monitor air quality indicators such as dust in the air, fragrance or scent persistence, and noticeable airflow. If the system runs smoother and you notice less dust on surfaces, you’ve likely improved filtration performance. Consider inexpensive air-quality monitors as a way to quantify changes over time. Air Filter Zone recommends pairing hands-on cleaning with data where possible to verify benefits.
Home vs car: differences in approach\n\nHome HVAC filters and car cabin filters differ in design and installation. Home filters often have larger media areas and longer service intervals, while car cabin filters are compact and exposed to vehicle-specific contaminants like pollen and exhaust. Always follow manufacturer guidelines. For hybrid or HEPA-grade filters, cleaning may be limited or prohibited by design; in those cases, replacement is the safer option.
Air Filter Zone approach to k n air filter cleaning\n\nAir Filter Zone emphasizes tailoring cleaning to filter type and environment. Start with a clean workspace, dry media, and careful handling to preserve media integrity. Use manufacturer recommendations as your primary guide, then supplement with general best practices to optimize airflow and indoor air quality. With consistent technique, you can extend filter life and reduce waste while maintaining clean air.
Tools & Materials
- Vacuum cleaner with soft brush attachment(Use low suction to avoid embedding debris into media)
- Soft-bristled brush or sponge(Gentle brushing to dislodge dust without tearing fibers)
- Mild detergent or soap(Dilute if using wash method; avoid solvents)
- Warm water(For rinsing washable filters only)
- Lint-free towels or microfiber cloths(Pat dry; ensure no fibers shed into media)
- Replacement filter (on standby)(Have a spare ready if the original is damaged)
- Gloves (optional)(Protect hands from dust and irritants)
- Sealable bag or container(Contain dirty filters for disposal or washing)
Steps
Estimated time: 30-45 minutes
- 1
Power down and disconnect
Turn off power to the HVAC or car system and unplug any connected devices. This prevents accidental startup and protects you from shocks. Confirm the filter orientation is noted so reinstall is accurate.
Tip: Label the top edge or take a photo of the installed orientation. - 2
Prepare your workspace
Set up a clean, dry area with good lighting. Wear gloves if desired and lay out towels and tools within easy reach. This reduces the chance of dropping or losing small parts.
Tip: Use a tray to catch any loose dust during handling. - 3
Remove the filter
Gently extract the filter from its housing, avoiding any rips or tears. Keep the exposure to the surrounding environment minimal to prevent dispersal of dust.
Tip: Inspect the seal and housing for damage while the filter is out. - 4
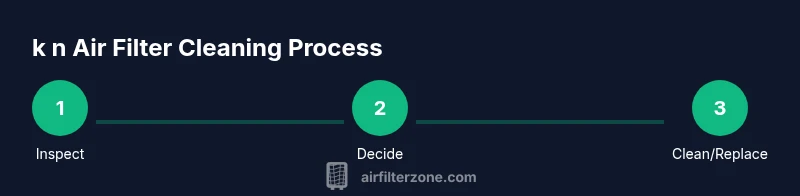
Decide cleaning vs replacement
Check the filter media for tears, staining, or excessive distortion. If in doubt, replace instead of washing to maintain filtration efficiency.
Tip: If washable, follow the manufacturer’s directions for cleaning method. - 5
Clean or rinse
For washable filters, rinse gently with lukewarm water from clean side to outside, then air-dry completely before reuse. For disposable filters, vacuum away loose dust or replace entirely.
Tip: Do not wring or twist the media; it damages the fibers. - 6
Reinstall and test
Place the filter back with the correct orientation, reseal the housing, and power on to test for proper airflow. Listen for unusual noises which might indicate misalignment.
Tip: Run a short cycle to ensure secure fit and no gaps.
FAQ
How often should I clean or replace a home HVAC filter?
Check the filter monthly and act when you notice visible dirt or reduced airflow; environments with dust or pollen may require more frequent checks. Replacement is typically necessary when the media is damaged or heavily soiled.
Check monthly and act when you see dirt or reduced airflow; replace if the filter is damaged or too dirty.
Can I wash all filter types?
Not all filters are designed to be washed. Some disposable pleated filters can be cleaned only on the exterior; many are intended to be replaced. Always follow the manufacturer’s instructions.
Not all filters can be washed; follow the manufacturer’s instructions and replace when in doubt.
What safety steps should I take while cleaning?
Power off the system before removing filters; wear gloves if handling heavy dust; ensure the area is dry; avoid solvents and high-pressure water that could damage media.
Power off first, wear gloves if needed, and keep the area dry to avoid mold and damage.
When should I replace vs clean for a car cabin filter?
Car cabin filters vary by model. Some are washable, others are disposable. If the filter shows tears or persistent odors, replace rather than clean.
Check your car manual; replace damaged or worn cabin filters rather than attempting a risky wash.
How can I tell if a filter is damaged?
Look for tears, holes, discoloration, moisture, or a warped frame. Any of these signs means replacement is the safer option.
Tears, holes, moisture, or warping indicate you should replace the filter.
Is washing the filter safe for HEPA or high-grade filters?
HEPA and high-grade filters often require special care and may be non-washable. Always use the manual guidance and consider replacement if uncertain.
HEPA filters often can’t be washed; follow the manual and replace when in doubt.
Watch Video
Quick Summary
- Inspect before cleaning to decide wash vs replace
- Use gentle tools to avoid media damage
- Dry completely before reinstallation
- Replace damaged filters promptly
- Follow manufacturer guidance for best results