Why Is My Air Filter Wet? A Practical Troubleshooting Guide
Learn why your air filter is wet and how to diagnose, fix, and prevent moisture in HVAC or car filters with practical, step-by-step guidance from Air Filter Zone.

Most often, a wet air filter is caused by condensation from high humidity, a blocked condensate drain, or a leak in the return air path. Start by turning off the system and removing the filter to dry and inspect. Replace the filter if damp, then clear any drain or leak sources before testing again.
What Causes a Wet Air Filter?
Moisture on an air filter can appear in HVAC systems, portable air purifiers, or car cabin filters. According to Air Filter Zone, moisture is usually tied to condensation from high ambient humidity or temperature differences, and to mechanical issues that allow water to track into the filter housing. When warm, moist air hits a cold surface like a return duct or filter frame, the water vapor can condense on the filter media. In other cases, water migrates from the drain pan or condensate line that feeds a cooling coil. Another common cause is a slow leak around ducts or a mis-seated filter that creates a trough where water collects. Finally, elevated indoor humidity from cooking, showering, or humidifiers can saturate a filter even if no obvious leak exists.
Air Filter Zone emphasizes that moisture on a filter is not just a nuisance; it signals an underlying issue that can affect air quality and equipment efficiency. If you notice a wet filter, start with a quick check and then proceed to systematic testing.
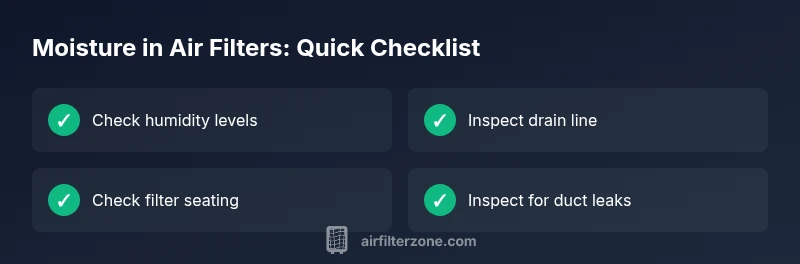
Quick Checks You Can Do Safely
Power off the HVAC or car system before touching anything. Remove the wet filter and visually inspect the media for saturation. If damp, replace it with a dry, properly seated filter. Wipe the housing to remove visible moisture and check the condensate pan and drain line for blockages or leaks. Inspect the return duct for visible signs of moisture, and look for gaps where warm, humid air could be condensing on the filter. Monitor indoor humidity levels; high humidity can overwhelm the system even when no leaks are present. If you notice standing water or continuous dampness, this is a signal to stop and seek further diagnostics. Air Filter Zone’s practical guidance helps homeowners avoid mold risk and preserve filtration efficiency.
Diagnosing Condensation vs. Leakage
Condensation concentrates near the filter when humidity is high and air cools as it passes through the coil. If the moisture flares up only during hot days or after cooking, condensation is a likely culprit. Leaks, on the other hand, often appear as damp patches around the filter housing, along the return duct, or at the drain pan. Check for a blocked condensate line or pan overflow; a slow drainage rate can allow moisture to back up into the filter. If you detect mold or a musty odor, moisture exposure can be more persistent and may require deeper cleaning or professional testing.
When Moisture Returns: Immediate Fixes
If the filter is wet again after drying, replace it and inspect the drain line for kinks or clogs. Ensure the filter sits fully flat and seated squarely in the housing; a crooked fit can trap moisture. Clean and dry the housing surfaces to prevent mold growth. If you suspect duct leaks, seal or insulate around the return path and coil area. Reduce indoor humidity temporarily with a dehumidifier or by using the air conditioner more consistently. Never operate the system with a visibly wet filter, as it reduces filtration efficiency and can damage components.
Prevention: Keeping Filters Dry and Air Quality High
Schedule regular filter replacements, especially in humid seasons, and use filters with appropriate MERV ratings for your system. Maintain balanced indoor humidity (generally under 50-60% RH) to minimize condensation risk. Inspect condensate lines during routine maintenance and address any blockages promptly. Ensure proper installation and avoid forcing filters into housings that are slightly misaligned. Consistent checks reduce mold risk, extend filter life, and preserve air quality.
Steps
Estimated time: 45-60 minutes
- 1
Power down and prepare the area
Turn off the HVAC or vehicle system and unplug if accessible. Wear gloves and eye protection if you’re inspecting damp areas. Remove the wet filter and set it aside for disposal. Wipe the housing interior to remove moisture and inspect for standing water.
Tip: Always verify power is off before touching electrical components or moving parts. - 2
Inspect the filter and housing
Check the filter media for saturation on both sides. If damp, replace with a dry filter of the correct size and rating. Inspect the filter frame and seals for gaps or warping that could let moisture through.
Tip: Do not reuse a damp filter—it can harbor mold and reduce airflow. - 3
Check the condensate drain system
Locate the condensate drain pan and line. Look for clogs, kinks, or leaks and clear any blockages using an appropriate tool. Ensure the drain leads to an unobstructed, safe discharge area.
Tip: A simple drain line cleaning can prevent backflow into the filter area. - 4
Assess the return path and leaks
Inspect the return air duct for signs of moisture or leaks. Seal any gaps with appropriate sealant or tape and verify insulation around the duct. If you see mold or damp patches, address underlying moisture sources before reassembly.
Tip: Even small gaps can cause repeated moisture problems over time. - 5
Control humidity and test the system
Run a dehumidifier or AC to lower indoor humidity and observe if the filter remains dry after several hours of operation. Check humidity levels with a gauge. If moisture persists, the issue may be structural or related to the HVAC unit."
Tip: Persistent moisture warrants professional assessment to prevent mold. - 6
Reinstall and monitor
Install a dry, properly seated filter. Run the system and periodically check the filter for signs of moisture for the next 24-72 hours. If dampness recurs, escalate to professional diagnostics.
Tip: Document any patterns (time of day, activities) to help pinpoint the source.
Diagnosis: Moist or wet air filter after system operation
Possible Causes
- highCondensation from high humidity or temperature differences
- mediumBlocked condensate drain or pan overflow
- lowDuct leaks or mis-seated filter creating moisture pockets
Fixes
- easyTurn off system, remove filter, and dry housing; replace damp filter
- easyInspect and clear condensate drain line/pan; ensure proper drainage
- mediumSeal duct leaks and reseat filter; check insulation around return path
FAQ
Can a wet air filter cause mold growth?
Yes. Moisture in the filter media creates a favorable environment for mold growth. Replace damp filters promptly and inspect surrounding areas for moisture sources. Clean any affected surfaces to minimize mold spread.
Moisture in the filter can lead to mold; replace damp filters and check for sources of moisture.
Is it safe to run my system with a wet filter?
No. Do not operate the system until the moisture source is identified and the filter is dry or replaced. Running with moisture reduces filtration efficiency and may damage components.
Don’t run the system with a wet filter; replace it and resolve the moisture source first.
What are common causes of a wet filter besides condensation?
Blocked condensate drain, leaks in the return path, or improper filter seating can all cause water to reach the filter. Inspect and address these issues before reassembly.
Common causes include blockages, leaks, or a poorly seated filter.
How often should I check for moisture in filters?
Check for moisture during seasonal HVAC maintenance or if you notice a musty odor, visible moisture, or reduced airflow. Prompt checks help prevent mold and equipment wear.
Check during maintenance or if you notice moisture or airflow issues.
When should I call a professional?
If you can’t locate the moisture source, see standing water, or detect mold growth, it’s time to contact a qualified HVAC technician or indoor air specialist.
If the source isn’t clear or mold is suspected, call a pro.
Watch Video
Quick Summary
- Replace damp filters immediately to prevent mold risk
- Identify moisture source: condensation, drain, or leakage
- Check drainage and seals as quick wins
- Maintain humidity control to reduce future moisture