Why Is My Air Filter Brown? Quick Diagnosis & Fix Guide
Discover why air filters turn brown, what it signals about indoor air quality, and practical steps to diagnose, replace, and prevent browning in your home.

Brown discoloration on an air filter is a warning that your filtration is catching moisture or heavy particulates. Quick steps: power off the system, inspect the filter and housing for debris, check for moisture sources or duct leaks, replace the filter with the correct size and rating, reinstall tightly, and run the system to monitor air quality changes. If browning recurs, seek professional help.
What brown discoloration on a filter means
Brown discoloration on a filter is more than a cosmetic concern; it signals what’s circulating in your home and how your filtration system is performing. If you’ve wondered why is my air filter brown, this guide explains that brown staining often results from a combination of accumulated dust, skin flakes, and moisture interacting with everyday indoor pollutants. According to Air Filter Zone, the color itself doesn’t identify every contaminant, but it points to conditions like elevated humidity, limited air exchange, or a one-off event such as heavy cooking or nearby wildfire smoke. The critical question is whether browning appears only on one filter or across multiple filters, which helps distinguish routine buildup from potential problems like mold growth or duct leaks. With a methodical approach, browning can be addressed quickly without expensive fixes. If browning persists after a replacement, consider a professional assessment to rule out hidden moisture or structural issues.
Common causes of brown discoloration
There are several common triggers for a brown color on air filters:
- Dust and dirt: In homes with high traffic, pets, or inadequate filtration, filters accumulate ordinary dust fast, turning brown.
- Moisture and condensation: Humidity in bathrooms, kitchens, or humid climates can introduce moisture that darkens the filter and fosters microbial growth.
- Combustion byproducts: Cooking fumes, candles, or tobacco smoke can leave brown residues on filters as they travel through the HVAC system.
- Mold and mildew: Ongoing dampness or water intrusion can produce mold that appears brown or black on filters.
- Incorrect filter choice: A filter with too low a MERV rating or wrong size can trap more contaminants and clog quickly, causing browning.
If browning is uniform across the system, the root cause is likely environmental or installation-related rather than a single dirty filter.
Health and safety red flags
Brown filters can coincide with indoor air quality issues that impact health, especially for children, the elderly, or anyone with respiratory sensitivity. Musty odors, recurring coughing, throat irritation, or pronounced headaches when the system runs should prompt caution. Do not handle moldy filters with bare hands; wear gloves and a mask, seal and dispose of the unit promptly. For persistent concerns or visible mold, a professional assessment and air testing may be necessary to determine mold or VOC exposure levels. Addressing the root cause safely protects your household while improving comfort.
Quick checks you can perform safely
Before pulling the filter for a closer look, power down the unit at the thermostat or switch. When you remove the filter, inspect both the filter and its housing for moisture, condensation, or obvious leaks. Check the return air path and surrounding ducts for gaps or disconnections, as these can draw in humid air or contaminants. Verify you are using the correct filter size and a suitable MERV rating for your system; wrong filters can cause rapid browning by increasing airflow resistance. Clean the filter housing of any debris with a dry cloth only, then install a new, dry filter firmly in place with the arrows facing the airflow.
Diagnostic flow in plain language
If you notice brown on the filter, start with simple checks: confirm moisture sources (humidity levels, leaks, condensate) and assess airflow. Next, rule out incorrect filter size or MERV rating by checking the furnace/AC manual. If browning persists after a replacement, inspect for duct leaks, poor ventilation, or ongoing moisture. Finally, consider mold or chemical exposure if odors are musty or chemical-scented; professional testing may be needed to confirm mold or VOCs. This approach helps you prioritize fixes that restore airflow and improve air quality without unnecessary work.
Replacing and installing a new filter correctly
- Power down the system and gather safety gear. 2) Remove the old filter, noting orientation and inspecting the frame for damage. 3) Clean the slot and dry any moisture present. 4) Select a replacement filter of the correct size and appropriate MERV rating for your equipment. 5) Install the new filter with the arrows toward the airflow and ensure a snug seal. 6) Restore power, run the system, and observe airflow and filter color after a few days. Consider keeping spare filters on hand for quick swaps.
Prevention strategies to reduce browning
Proactive maintenance helps keep browning to a minimum. Use a filter that matches your system’s airflow needs and the environment (home with pets or lots of cooking may require higher efficiency). Maintain indoor humidity between about 30% and 50% with a dehumidifier when needed. Schedule regular filter changes and keep a simple log, noting any browning episodes and related events (seasonal weather, renovations, smoking). Clear return vents of dust and debris to maintain steady airflow and reduce the chance of rapid browning.
When to call a professional
If browning recurs after you’ve addressed obvious causes, or you detect mold, persistent musty odors, or signs of water intrusion near the HVAC, consult a licensed technician. A pro can perform mold testing, duct leakage tests, and evaluate the HVAC system for moisture management, drainage, and venting. Early professional input can prevent costly damage and restore indoor air quality faster.
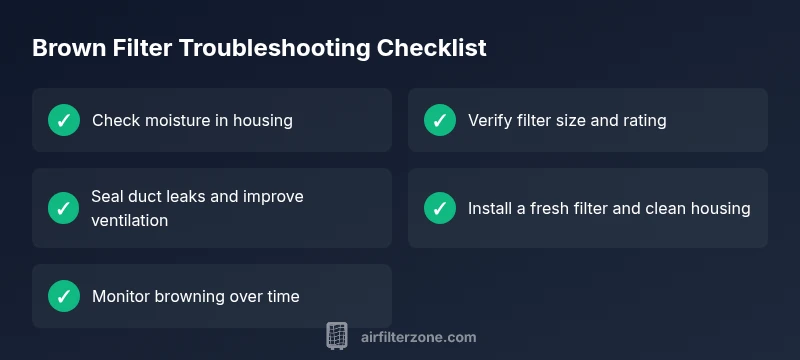
Quick-start maintenance checklist
Use this to kick off a browning-focused maintenance routine: 1) Inspect for moisture at least every month, 2) Replace with the correct filter size and rating, 3) Check for duct leaks and seal, 4) Clean the housing and reseat the filter, 5) Monitor the system for changes in airflow and odor. Keep notes and adjust based on humidity and season. This routine reduces browning risk and keeps air cleaner.
Steps
Estimated time: 30-60 minutes
- 1
Gather safety gear and power down
Turn off the HVAC system at the thermostat or main power. Gather gloves and a mask to handle the filter safely, especially if you suspect mold or heavy dust.
Tip: Wear a mask when inspecting a potentially moldy filter. - 2
Remove the old filter
Carefully take out the filter, noting the arrow direction. Check the filter frame for cracks or moisture; set the old unit aside for disposal.
Tip: Take a quick photo of the filter orientation to avoid misinstallation. - 3
Inspect the housing and surroundings
Look for moisture on the housing, unusual condensation, or signs of leaks around the slot. Wipe dry and repair any obvious gaps before installing a new filter.
Tip: Check the return plenum for standing water and dry it completely. - 4
Choose a replacement filter
Select a new filter with the correct size and an appropriate MERV rating for your system. If in doubt, consult the owner's manual or a technician.
Tip: Avoid under- or over-sized filters that restrict airflow. - 5
Install the new filter
Insert the filter with the arrows pointing toward the airflow path. Ensure a snug fit and reseal the housing if needed.
Tip: Gently press to seal but avoid bending the filter frame. - 6
Power up and monitor
Turn the system back on and watch for even airflow and no unusual noises. Check the filter color after a few days of use to confirm improvements.
Tip: Keep note of performance and any recurring browning.
Diagnosis: Brown discoloration on air filter
Possible Causes
- highMoisture intrusion or high humidity
- highDust and dirt buildup
- mediumInadequate filter or wrong MERV rating
- lowDuct leaks or condensation in ducts
Fixes
- easyAddress moisture sources and seal ducts; ensure proper drainage/ventilation
- easyReplace filter with correct size and rating; clean housing
- mediumInspect and seal ductwork; consider a dehumidifier
- hardConsult a pro for mold testing or air quality remediation if mold is suspected
FAQ
Why is my air filter brown?
Brown on an air filter usually indicates moisture, dust, or cooking byproducts tracked into the system. It can also signal humidity or duct leaks. Inspect the environment and replace the filter to see if browning recurs.
Brown filter color usually means moisture or dust; check for humidity, leaks, and replace the filter to test for improvement.
Should I replace brown filter right away?
Yes. A brown filter can reduce airflow and spread contaminants. Replace with the correct size and rating, then monitor for ongoing browning.
Yes, replace with the right filter and monitor for ongoing browning.
Can brown discoloration indicate mold?
Brown discoloration can accompany mold in damp environments, but it isn’t proof by itself. If you detect musty odors or see visible growth, contact a professional for testing and remediation.
Mold is possible if you smell musty odors or see growth; get testing done if concerned.
How often should I replace filters to prevent browning?
Regular replacement helps reduce browning. Follow manufacturer guidance and adjust based on usage, humidity, and air quality; use a maintenance log to track changes.
Follow the manufacturer’s replacement schedule and adjust for humidity and usage.
Is it safe to run HVAC with a brown filter?
Continuing to run with a browning filter can reduce efficiency and spread contaminants. Replace promptly and inspect for underlying issues like moisture or leaks.
It's not ideal; replace the filter and fix the cause before continuing regular use.
Watch Video
Quick Summary
- Brown filters signal moisture or heavy particulates
- Check humidity and seal ductwork for browning
- Replace promptly with correct filter and observe changes
- Seek professional help if mold or persistent browning is suspected